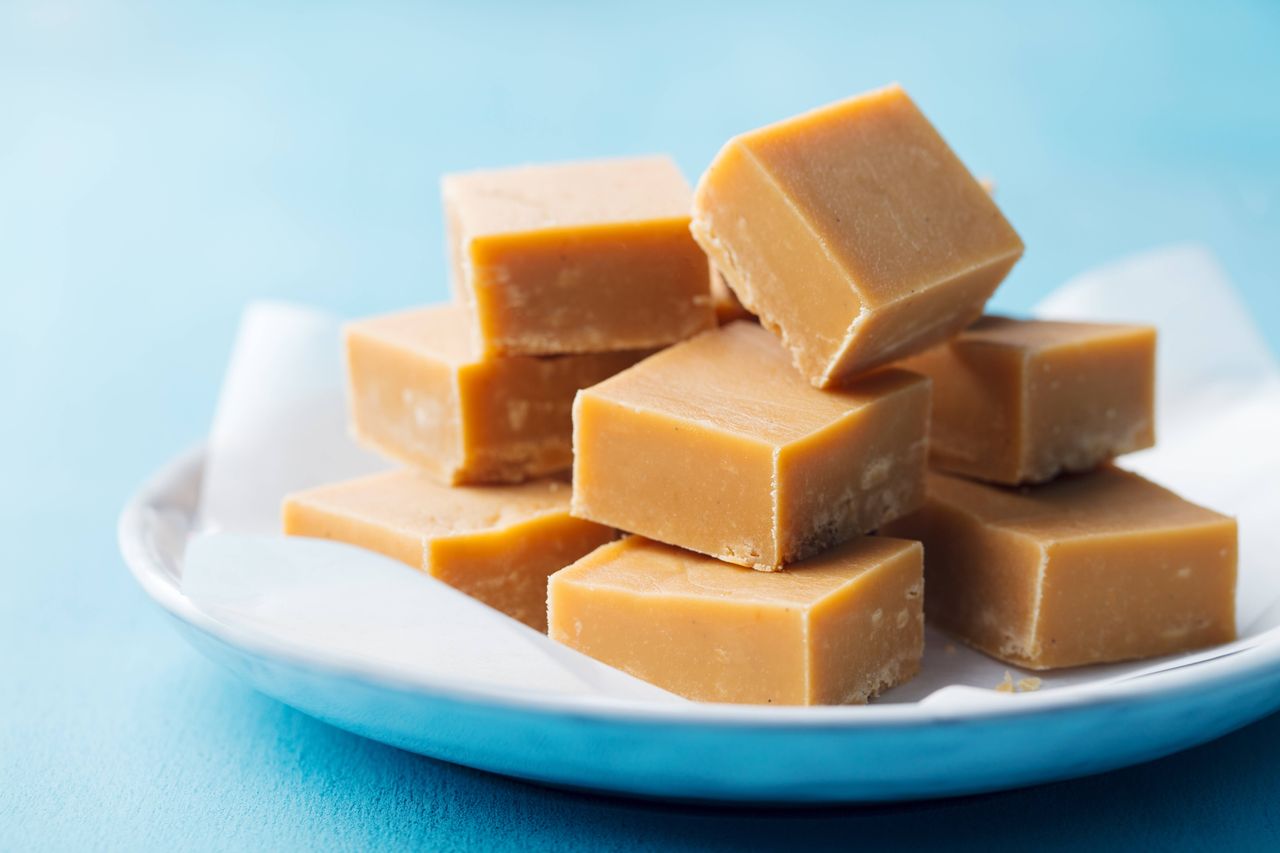
This vanilla fudge recipe takes 20 minutes to prepare and is only 71 calories per piece.
Making smooth, sweet vanilla fudge is easier than you might think. This recipe has been tried and tested to ensure you have perfect results every time. You can wrap the pieces individually and package them up as an edible gift or make a batch for your next dinner party and serve with coffee or tea to finish the meal.
Ingredients
- 450g (1lb) granulated sugar
- 85g (3oz) butter
- 150ml (¼ pt) milk
- 175g (6oz) evaporated milk
- Few drops of vanilla extract
- A little vegetable oil
WEIGHT CONVERTER
Method
- Tip the sugar, butter, milk, and evaporated milk into a heavy-based pan and heat gently, stirring frequently, until the sugar has dissolved.
- Bring to the boil and as the temperature rises, stir the fudge occasionally (be careful as the mixture is very hot) so that the sugar doesn't stick and burn.
- Continue boiling until a temperature of 116C is reached on a sugar thermometer. Remove the pan from the heat and stir in the vanilla extract.
- Pour into an 18cm shallow square tin brushed with a little vegetable oil, and leave for 10-15 minutes or until almost set.
- Mark the surface of the fudge with a sharp knife, this vanilla fudge recipe makes about 36 squares. Leave to cool completely then cut into squares and serve.
Watch how to make this vanilla fudge recipe
Top tips for making our vanilla fudge recipe
Fudge is easy to make but there are a few tips and tricks that can help make it even simpler. Brush the sides of the pan with a brush dipped in water before cooking, this will help stop the fudge from crystallising.
What is vanilla fudge made of?
Our recipe for vanilla fudge uses five simple ingredients. Sugar, butter, milk, evaporated milk, and vanilla extract. You can use vanilla bean paste if you prefer or scrape the seeds from half to a whole vanilla pod depending on how intense you want the flavour to be.
How do you know when fudge is done without a thermometer?
You can do the cold water test. Fill a glass with cold water and drop a small amount of the fudge into it from a teaspoon. As it falls through the water the syrup should form into a ball.
If it dissolves or forms into threads, it's undercooked. Try again with a clean spoon and new water in a couple of minutes. If it forms a ball, fish the ball out of the glass and press it between your fingers. It should be soft and easy to flatten. If it's hard, the fudge is overcooked.
How can I rescue overcooked fudge?
If your fudge is over-temperature or forms a hard ball in the cold water test, it can make the results hard and brittle. Pour the fudge syrup into a clean pan and add 3-4 tbsp cream. Stir gently but continuously until the sugar crystals are all melted, then boil until it reaches 115-116C again.
How long does fudge last for?
As it’ll last 2 weeks at room temperature and 3-4 weeks in the fridge, you can make it in bulk and store it ahead of gifting. Storing fudge in the fridge however may dry it out a little so make sure you wrap it in waxed paper. Store in an airtight container either tin or plastic.
Does fudge need to be refrigerated to set?
Although it can be tempting to quicken the setting of your fudge by chilling it, we don’t recommend putting fudge in the fridge or freezer. The moisture in the fridge will make the fudge sticky and tends to give a more crumbly, brittle texture compared to soft and chewy. Therefore it’s better to set the fudge at room temperature.
Why is my fudge grainy?
If your fudge is grainy it may be because you didn’t mix it for long enough. It could also be down to the fact that the sugar didn’t fully dissolve before boiling the mixture.
You also need to make sure you have the right amount of fat in the fudge mixture too. Following the method as closely as possible and timing everything to perfection will make delicious fudge every time.
How can I make this into a homemade gift?
This classic fudge is perfect as a homemade food gift for Christmas - or any time of year. The easiest way to present it is to pop a handful of fudge pieces into a cellophane bag and tie it with a ribbon.
If you want something a little more extravagant, use a shallow box, about 2cm deep. Line it with greaseproof paper and add the fudge neatly in a single-layer grid. If you want to personalise the gift, you can add someone's name to the fudge using a chocolate writing pen. Otherwise, you can add a personalised note inside for when they lift the lid. Line the back of the note with a piece of greaseproof paper before you place it in the box.
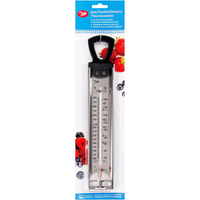
To achieve perfect results, every time, we recommend using a sugar thermometer such as this one from Tala so you can accurately read the temperature of the fudge.
Tala Jam Thermometer - View at Amazon
With this thermometer, you can read temperatures of 40C all the way up to 200C. It’s simple to use and clean and has a strong handle so it’s easy to take in and out of the pan.
Once you’ve mastered this fudge, you should try our easy chocolate fudge or for the grown ups, try our Irish liqueur fudge. We also have a microwave fudge recipe if you want another quick and easy option.

Jessica is a freelance food writer, stylist and recipe tester. She previously worked as Senior Food Writer at Future. While at Future Jessica wrote food and drink-related news stories and features, curated product pages, reviewed equipment, and developed recipes that she then styled on food shoots. She is an enthusiastic, self-taught cook who adores eating out and sharing great food and drink with friends and family. She has completed the Level 1 Associate course at the Academy of Cheese and is continually building on her knowledge of beers, wines, and spirits.
-
 Video recipe! Smoked trout pate
goodtoknow has lots of easy Christmas recipes like Smoked Trout Mousse. Check out our easy step-by-step guide to making these Christmas starters with our new baking video below.
By GoodtoKnow Published
-
 Video recipe: Phil Vickery's ginger biscuits
These ginger biscuits look lovely and festive hanging from the tree at Christmas and they taste great too! Follow along in our easy step-by-step video recipe visit goodtoknow.co.uk/recipes
By Phil Vickery Published
-
 Beetroot and butternut squash bruschetta
A flavour-packed bruschetta loaded with beetroot, butternut squash, pumpkin seeds, garlic and more...
By Rose Fooks Published
-
 Annabel Karmel's trio of vegetables with tomato and basil
Suitable for six months plus, this baby food by nutritional expert Annabel Karmel is made with a whole heap of veggies...
By Annabel Karmel Published
-
 Annabel Karmel's cheesy carrot stars
These flavour-packed cheesy carrot stars by Annabel Karmel are perfect for introducing finger foods to your little one...
By Annabel Karmel Published
-
 Steak and salsa wraps
Our steak and salsa wraps are one of those build-you-own suppers the teens in your house will love...
By Jessica Ransom Published
-
 Surprisingly cheap Mother's Day gift mums ACTUALLY want as chocolate and jewellery drop in popularity
New research has found that many mums in the UK have a very simple wish list this Mother's Day
By Emma Dooney Published
-
 These pumpkin-shaped pizza pockets are the perfect Halloween-themed snack - and you only need 4 ingredients to make them
4 ingredients and 20 minutes to make these pumpkin-shaped pizza pockets - just in time for Halloween!
By Ellie Hutchings Published
-
 Mary Berry's Ultimate Christmas: Recipes, guest stars and where to watch
BBC viewers can enjoy a slice of Mary Berry's Ultimate Christmas in December, with the British chef sharing recipes, tips and tricks to cooking the perfect Christmas dinner.
By Emily Stedman Published
