One Direction cake
This delicious coffee, chocolate and orange cake is the perfect bake for any One Direction fan. With all five of those cheeky boys nestled on top we know what lots of people are going to want this year for their birthdays...
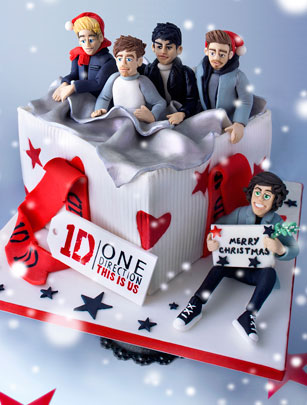

This delicious coffee, chocolate and orange cake is the perfect bake for any One Direction fan. With all five of those cheeky boys nestled on top we know what lots of people are going to want this year for their birthdays...
One Direction cake
We think you might know One Direction fan or two... Give them the best kind of birthday treat with this cake which features all five of those cheeky boys. We show you how to make the five boys with our detailed step-by-step guide.
Get the cake recipe by clicking here
Character ingredients: - 250g black ready to use gumpaste (mexican/modeling paste) - 250g white ready to use gumpaste - 200g flesh/peach ready to use gumpaste - Yellow, brown, blue, black and red food colour - White ball sprinkles (nonpareils) for eyes - Mistletoe (optional) - Edible glue Equipment: - 8 x 6 inch lolly sticks (Cut 2 sticks into 3 to get 6x mini sticks) - A few dry spaghetti strands - Dummy cake or styrofoam block (to use for drying items) - Small rolling pin - Brushes - Craft knife/scalpel - Ball tool, bone ball tool and a rounded flat end tool - Pointed tool or tooth pick - Star, heart and round cutters and a no 10 nozzle - A small piece of florist wire for the Mistletoe (optional) - Print outs of each character for reference - Cake board
One Direction: This is Us it out on Blu-ray 3D, Blu-ray & DVD on 19th December
For the heads
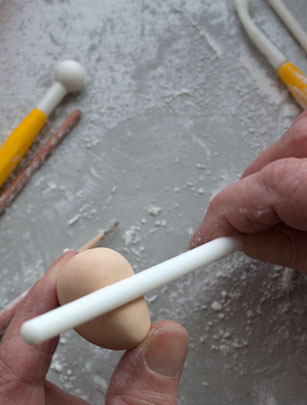
Shape 25g of flesh coloured gumpaste into an oval, pinch and flatten the narrow end to form a chin. Make an indent ¾ down with the side of your finger or use a rounded tool to help form the shape of a face.
GoodtoKnow Newsletter
Parenting advice, hot topics, best buys and family finance tips delivered straight to your inbox.
For the heads
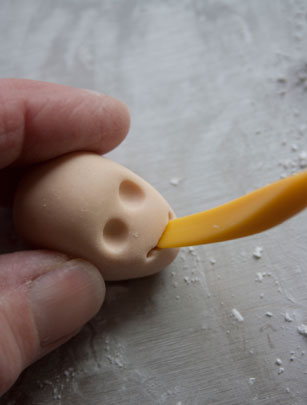
Mark out the eyes using the small end of ball tool and make a slit for the mouth using a rounded flat tool. Opening the slit to allow for teeth (if wanting teeth, Harry in this design is showing his teeth). Push into the corners of the mouth using a pointed tool.
For the heads
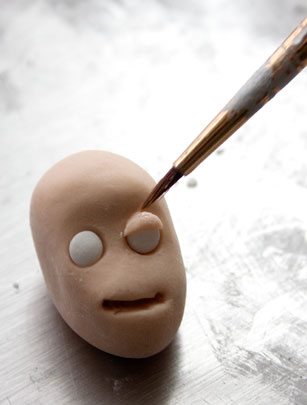
Roll out the eyes and place into the sockets.
Roll out a small, thin piece of flesh paste for the eyelids. Cut a circle shape using a small round cutter or the end of a no.10 nozzle.
Trim and discard the central panel leaving 2 x half moon shapes.
Place these over the eyes to form the eyelids.
For the nose
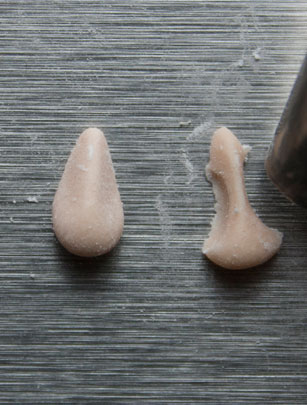
To make the nose, roll out a small piece of flesh paste into a cone then pinch while flattening the end.
Use the no.10 nozzle to trim off the sides.
Attach the nose with glue or water, blending onto the face.
For the mouth
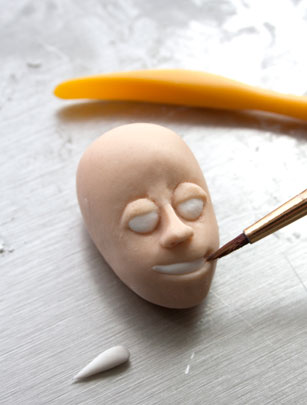
Teeth: Shape a small piece of white icing into a teardrop and a small piece of flesh coloured icing into a sausage, rolling both ends to a point, divide this into two length ways.
Attach the white icing into the mouth opening and blend with a brush.
For Harry - make his mouth wider to create a bigger grin.
Using smaller rolls of flesh coloured icing, add the lips and blend with a small brush until you have the required shape.
Set the head to correct position using a mini stick. Place into the foam and allow to dry.
Shape eyes and mouths according to your character reference picture.
For the ears
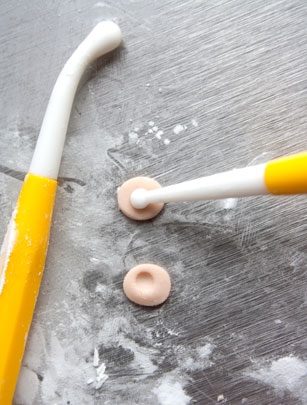
Flatten out a small ball of flesh coloured paste, using the small end of the ball tool, make an indentation towards the top.
For the ears
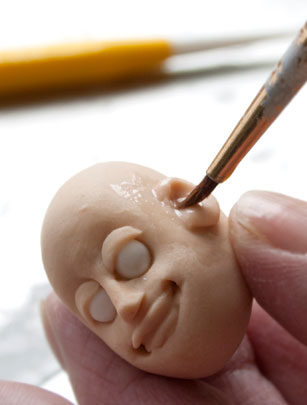
Position the ear onto the side of head with glue. Blend the front of the ear into the head using a small brush.
Repeat for all heads except Harry.
For the bodies
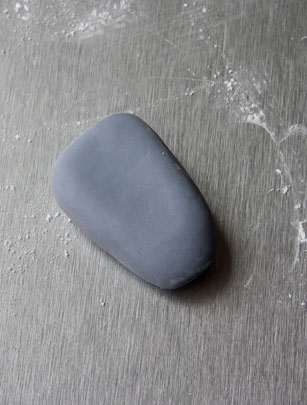
Colours:
- Liam = Dark Grey
- Louis = White
- Niall = Dark Grey
- Zayn = White
- Harry = Black
Colour and shape 25g of each paste into a teardrop, flattening both ends, the wider end will be the shoulders.
For the bodies
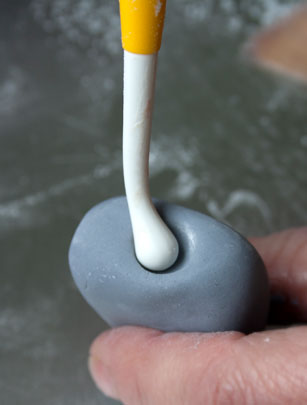
Press into the centre of the widest end with the large ball tool.
Press into the sides with the same tool to create sockets for the arms.
For the bodies
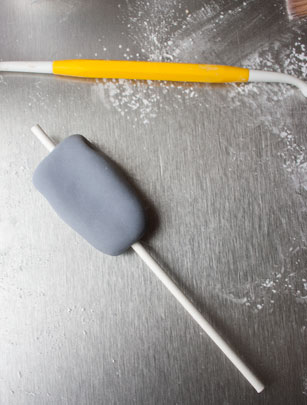
Dip a lolly stick into glue then insert through the centre of the fondant from the narrow end, until you have about 1-inch of the stick poking out at the top (this will be our support for the head).
Repeat for the five bodies, so that you have - 2 x white and 2 x grey plus 1 x black bodies.
For the necks
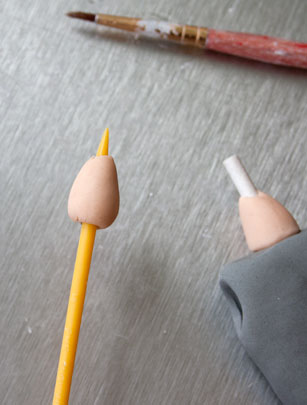
Next we need to create their necks! Take a piece of flesh coloured paste and roll into a ball. Using your sharp tool, poke through the centre and shape paste into a teardrop shape whilst on the tool.
Add glue to the body neck line and the lolly stick.
Slide your neck shape over the stick, gently pressing to make sure it sticks.
Leave to dry.
Harry's body
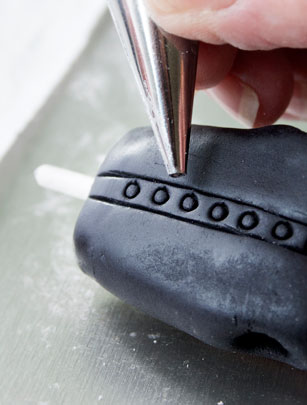
Taking Harry's torso, mark out the front of his shirt by scoring two lines down the center, for the buttons use a small nozzle or tool and press this in the center of the lines.
Allow to dry right side up.
Harry's body
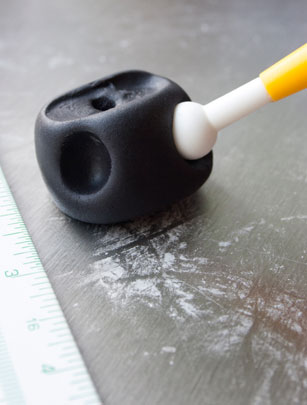
Roll a 1-inch ball of black paste to create a base for the torso. As a guide, push the top of the body into a ball to mark your placement. Then using the large ball tool mark the holes for legs.
Harry's legs
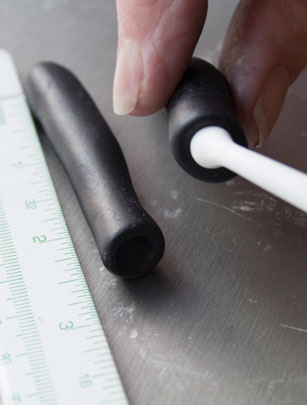
Roll a sausage shape, flattened at both ends, cut in half so you have 2 x 2.5-inch legs.
Use the bone ball tool and press in the bottom of each legs.
Bend these to your desired angle.
Harry's legs
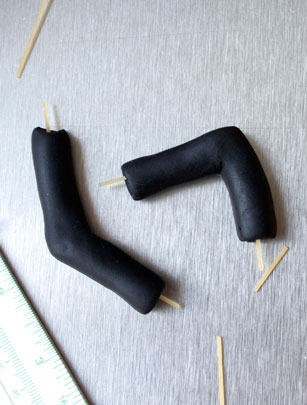
Take a 1.5-inch piece of spaghetti dipped into your glue and push through trouser leg (stop just before the knee area) leaving a 1/4-inch sticking out for his shoes.
Repeat for the top end of the legs.
Attaching Harry's legs
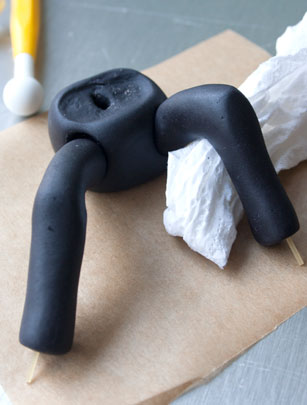
Dab glue onto the ends of the legs and position into place on the base of body, use a scrunched up piece of kitchen roll to support the underneath.
Using your rounded flat tool, blend the edges of the legs to the base using a brush and tiny bit of water. Add creases into knee joints.
Harry's jacket
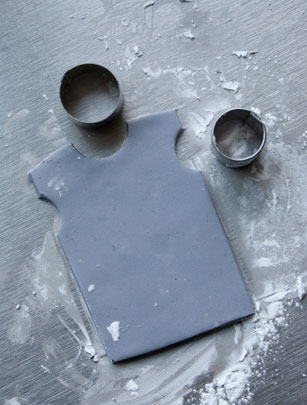
First make the back of the jacket by rolling out some light grey paste.
Lay your torso as a guide and trim straight edges around the shape. Make sure to leave a little extra at the shoulders and sides to allow for the seams.
Use a circle cutter to trim arm and neck holes (like a vest shape).
Harry's jacket
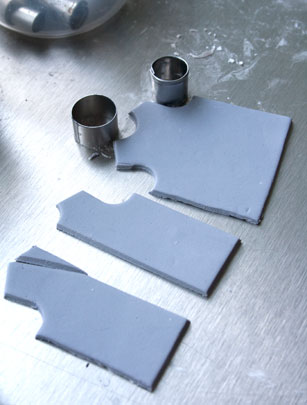
Using the first piece as a template, create the front of the jacket in exactly the same way. Cut in half and trim the front at an angle into a v shape.
Attaching Harry's torso
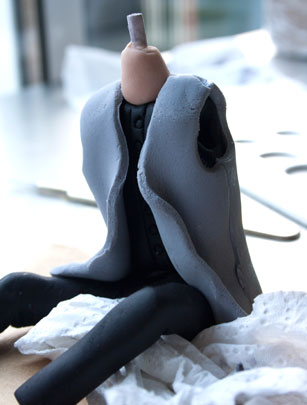
To do this, simply add a little glue to the top part of his lower body and sit the torso on
(pushing the stick through the base).
To add his jacket, take the back jacket section, add a little glue and place on the back of your figure.
Glue along the 'seams' of the jacket then lay on the front section, making sure to join the front and back.
Shape the jacket into place, adding ripples to create a fabric effect.
Harry's jacket collar
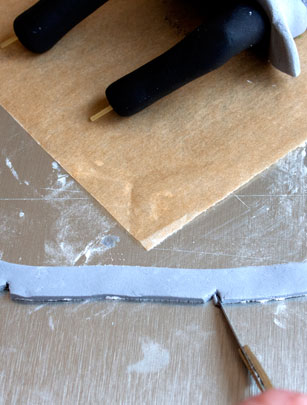
Roll out a long, thin rectangular piece of paste.
Cut two small triangles to create lapels.
Harry's jacket
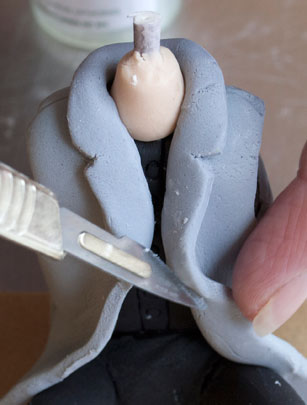
Glue around the edge of the jacket and attach.
Trim to match length of jacket front.
Harry's shoe bases
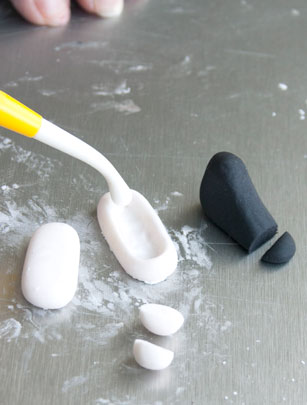
Roll 2 x white paste pieces, shape into ovals and flatten. Start pressing out the center of each, making sure to leave the edges higher.
Roll out 2 x black paste and shape into a boot making sure they will fit into each sole.
Trim off the toe part of the black shoe and roll a small ball of white. Divide this into 2 to create the new front of shoe.
Harry's shoes and laces
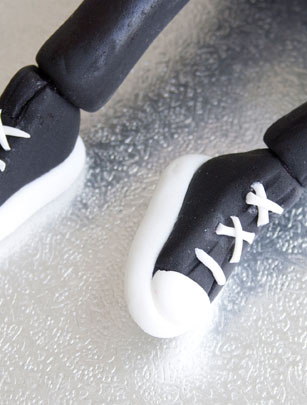
Mark out the front detail for the laces with a pointed tool.
Glue the shoe onto the base, adding in your half ball of white for the front.
For the laces:
Roll thin spaghetti shapes and divide into 10 pieces. Glue them onto the shoe, criss-crossing as you go.
Position the legs into your desired angle and attach the shoes with glue.
Allow to dry.
Harry's face and hair
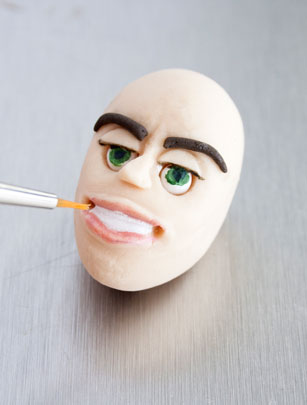
Paint Harry's eyes green.
Add eyebrows rolled from brown paste and paint the lips with a watered down red food colouring.
Harry's face and hair
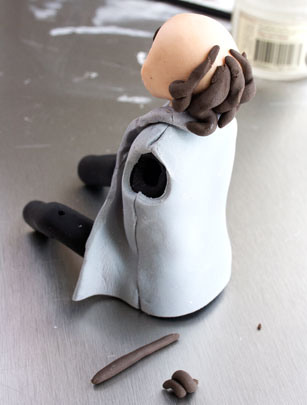
Roll out brown paste into little sausage shapes, then twist to create curls.
Carefully attach with glue to the back of the head.
Harry's face and hair
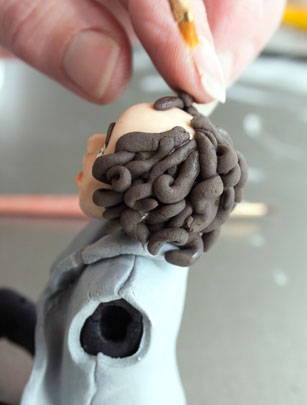
Continue to build this up creating layers.
Harry's face and hair
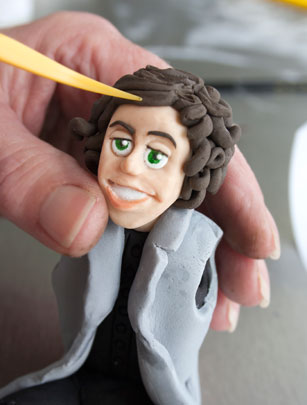
For Harry's fringe, glue a piece of paste across the front of his head and blend across in a sweeping motion using a pointed tool to create the texture.
Harry's Christmas sign
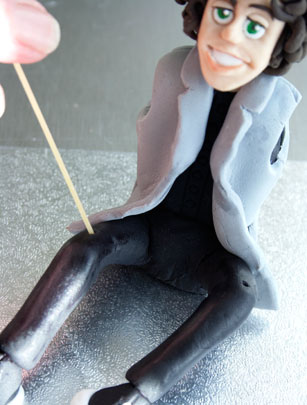
Roll out a thin piece of white paste and cut out a rectangle, big enough to sit on across the width of Harry's legs. Insert small pieces of dry spaghetti through the bottom on each side and allow to dry (these will be used to position into Harry's thighs).
Paint your greeting on with a black edible pen or edible paint, you can replace the Christmas message with a birthday greeting to suit your occasion. Allow this to dry then decorate with star sprinkles.
Once the sign is dry, mark the desired position of the sign on Harry's knees and using a sharp tool or spaghetti, make small holes for the sign to sit in.
Attach the sign to Harry's knees by dabbing a little glue in the holes. Place a piece of rolled up kitchen roll behind the sign for extra support and allow to dry.
Harry's Christmas sign
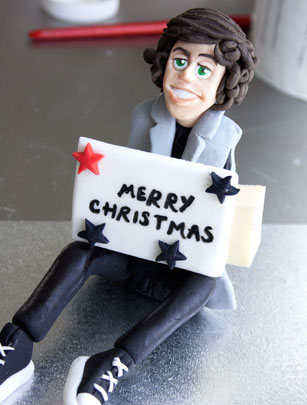
Once everything is dry, attach Harry's arms and hands (Steps 57-59), using glue to stick his hands to the sign.
Mistletoe
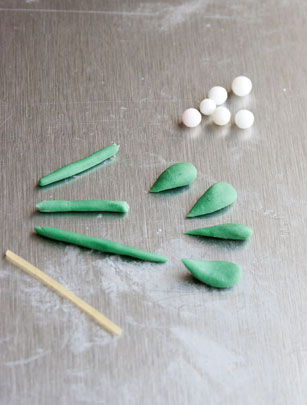
Using a thin piece of spaghetti, cover in green fondant and push through Harry's hand when you have attached his arms and hands to his body.
Attach small leaves and white sprinkles for the berries.
Zayn's jacket
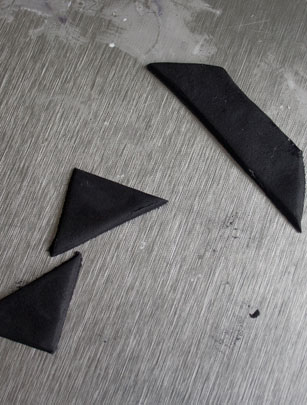
Repeat the same technique as Harry's jacket, using black fondant, to create the base. This time, as it is a leather jacket, add a wider collar and create triangles to become the lapels.
Zayn's jacket
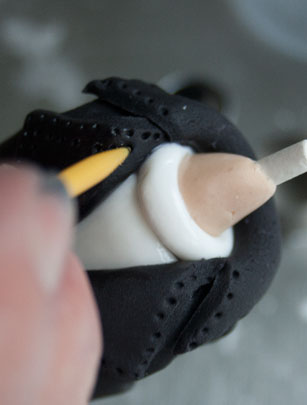
Mark out the stitching detail around the collar with a pointed tool.
Zayn's face
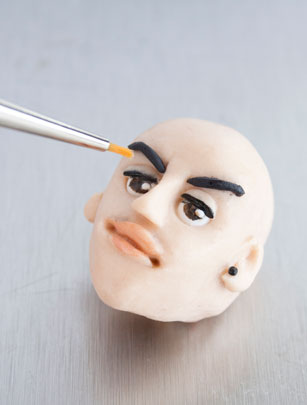
Using a small paintbrush, paint brown into the centre of the eyes.
Line eyelids with black and add white sprinkle as a highlight.
Add eyebrows rolled from black paste.
Paint lips.
Attaching Zayn's head
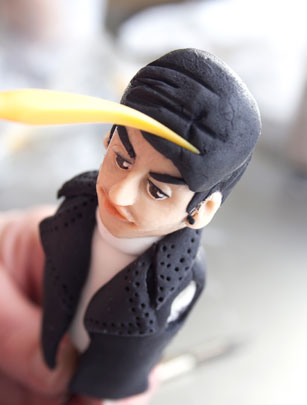
To attach the head to the body, poke the stick through the bottom of the head. Remove to add glue and return to stick. If the stick or neck is too long, trim as needed.
To create Zayn's hair:
Start with a ball of black paste and flatten out across his head, with your fingers shaping it around the head as you go.
Attaching Zayn's head
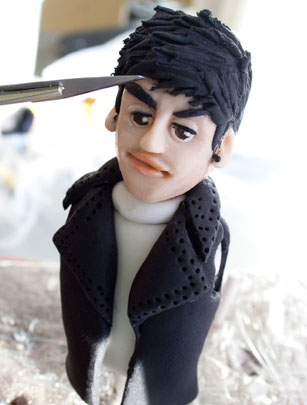
Build the paste up at the front and blend/score in different directions to give his hair texture. Carefully drag down some hair onto the face to create a fringe.
Liam's hooded jumper
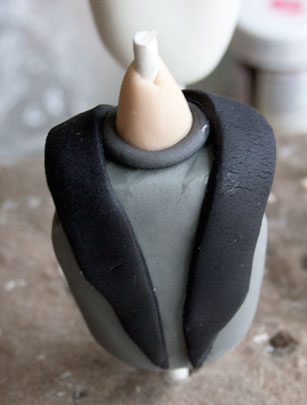
Roll flat a piece of black paste and cut into two panels.
Attach to either side of the front of his top.
Liam's hood
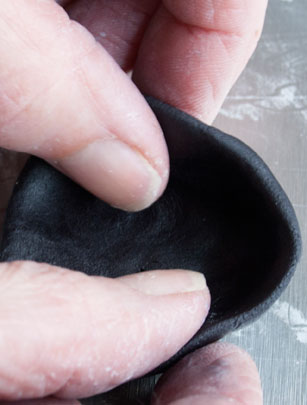
Using black paste, roll into a ball and work into a round cup shape using the large ball tool or your hands.
Liam's jacket
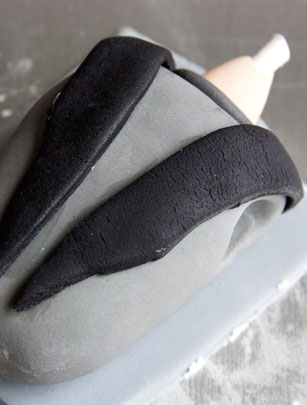
Using light grey paste, roll out flat to cut out his jacket - using the same technique as Harry's jacket and attach to the torso.
Attaching Liam's hood
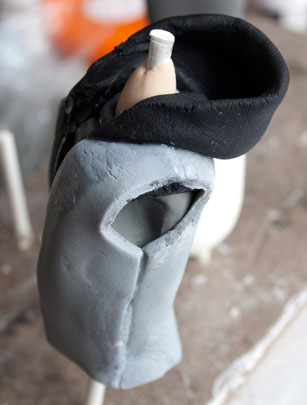
Cut a straight piece from the hood shape to allow you to wrap this around the top of the jacket.
Following the collar shape, bring the corners to the front of the jacket and glue to the black jumper panels.
Santa hat
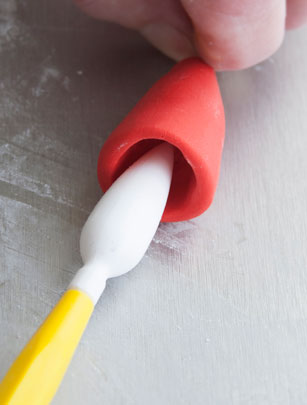
Take a piece of red paste and shape into a teardrop. Chop the bottom off and using a large ball tool smooth a hole into the base working the hollow out big enough to fit onto their heads.
Santa hat
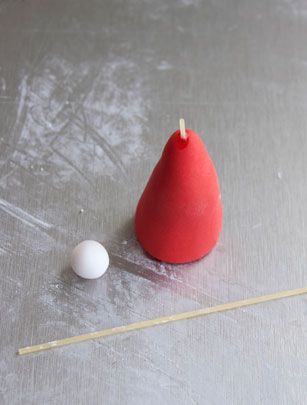
Add a small piece of spaghetti into the top of the hat and roll a white ball for your bobble.
Santa hat
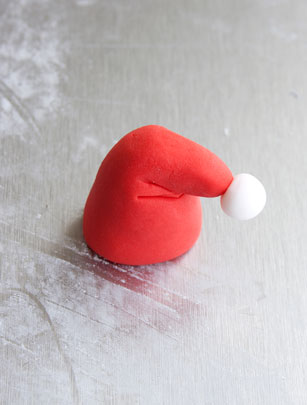
Bend into shape, adding creases at the bend. Glue on the white bobble.
Liam's head
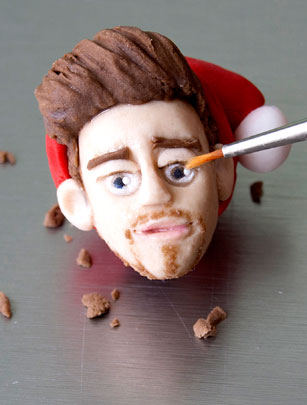
Paint the centre of the eyes brown and add a white sprinkle as a highlight.
Add eyebrows rolled from light brown paste. Next create some stubble to his chin and top lip using some crumbled dried brown paste, using glue to attach.
Paint lips.
Liam's hair
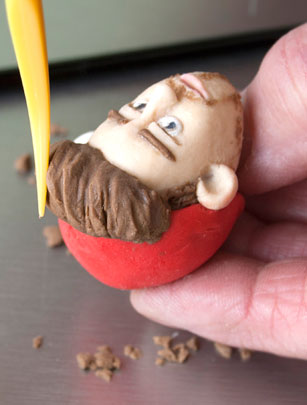
Smooth light brown paste onto the head giving him short side burns, glue on a thicker piece for his fringe.
Blend, sweeping it upwards for his quiff.
Santa hat
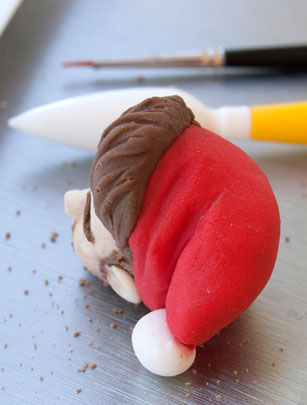
Glue the hat into place on Liam's head.
Making Niall
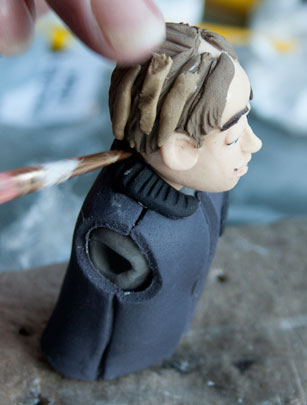
Using dark grey paste make his jacket following the previous steps.
For his collar:
Roll out a short collar from black paste. Using a flat edge tool, create a ribbed texture by pressing vertically across the paste. Glue to the neck area of the jacket.
For his pocket:
Add a small rectangle, indented horizontally to create a pocket.
Niall's face and hair
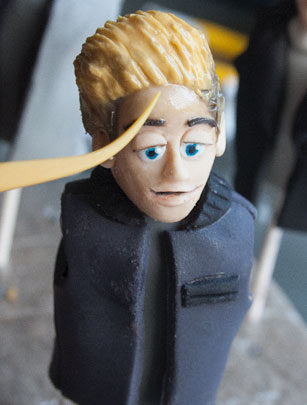
Using a small paintbrush, paint blue into the centre of the eyes. Line eyelids with black and add white sprinkle as a highlight.
Add eyebrows rolled from brown paste.
Paint lips.
For his hair:
Start with brown around the hairline, then add yellow paste, blend together.
Add a larger piece of yellow for the quiff, using upwards strokes to create the texture.
Niall's santa hat
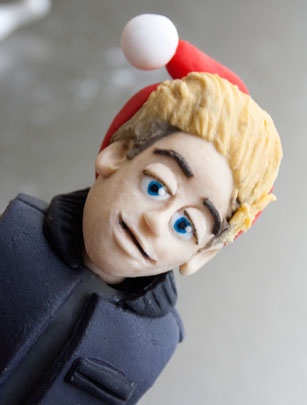
Attach a Santa hat to Niall's head, using glue around the edge and shape to fit.
Making Louis
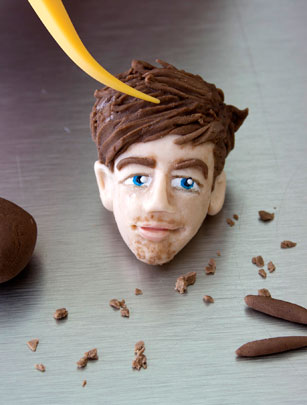
Paint blue into the centre of the eyes. Line eyelids with black and add white sprinkle as a highlight.
Add eyebrows rolled from light brown paste.
Add some stubble to his chin using some crumbled dried brown paste, using glue to attach.
Paint lips.
Louis' hair
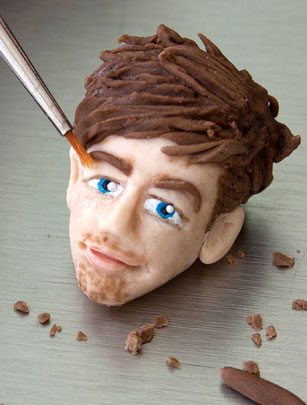
Mix some light brown with a little red paste to get a chestnut colour.
Start by adding small pieces around each ear and build up to one side to sculpt into a textured side sweep,
Blend and flick up around the top and the back of his hair.
Louis' body
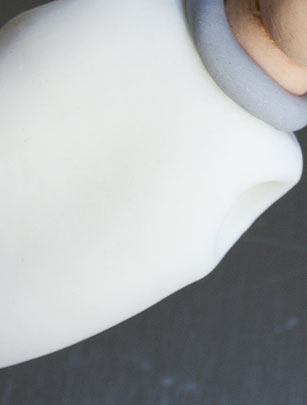
Copy the method for the other boy's bodies - adding a sausage of light grey around the neck to create a collar.
Icing the cake
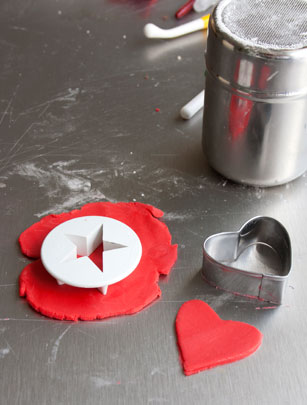
Using your heart and star cutters, press out the shapes on the sides of the cake, removing them as you go.
Roll out red fondant and cut some hearts and stars to glue into the cutouts on the cake.
Also cut some star shapes in black fondant, to decorate the board later.
Icing the cake
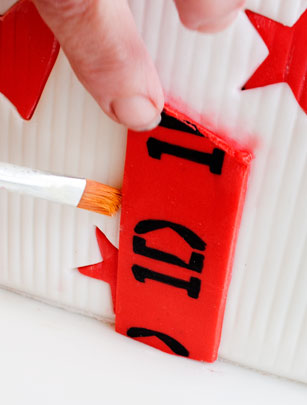
Cut out 4 x rolled red paste into strips and allow to dry. (If you are creating the cascading ribbon, cut an additonal four and wrap in cling film to stop them drying out).
Using a stencil created from a logo printed onto card, mark out the outlines using an edible black pen repeating the pattern along the ribbon, then paint with black food colouring to finish.
When dry, glue onto the centre of each side of the cake.
Icing the cake
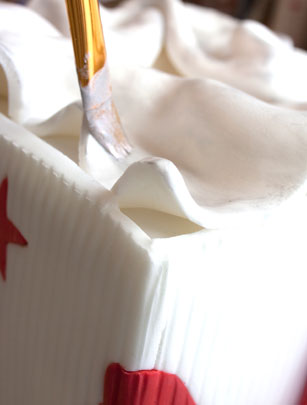
For the tissue paper in the box:
Roll out white fondant and cut into a square larger than the cake.
Place on the top of the cake, making folds and paint with edible silver paint.
Icing the cake
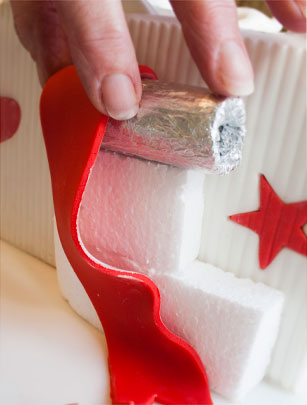
Roll out some red fondant and cut into strips the same size as the flat ribbon.
Match to the flat ribbon on side of cake and glue along seam.
Drape the rest of the ribbon onto the board and over some polystyrene/sponges. Prop into place and allow to dry.
Hands
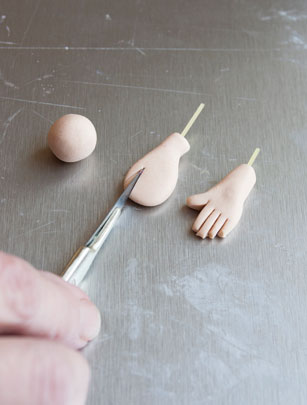
Roll out small ball of flesh paste, flatten one end and roll the other end to create a wrist.
Cut out the thumb and fingers.
Add a small piece of spaghetti to the wrist. Repeat 10 times - remembering to do left and right hands.
Arms
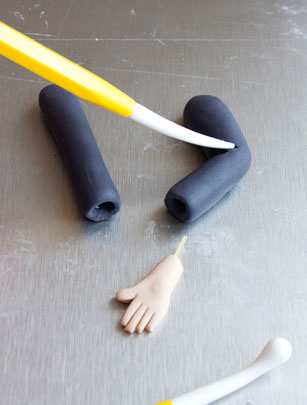
Use the matching colours for the jackets except for Louis who has contrasting grey sleeves:
- Liam = Light Grey sleeves
- Louis = Light Grey sleeves
- Niall = Dark Grey sleeves
- Zayn = Black sleeves
- Harry = Light Grey sleeves
Roll out two sausage shapes, flattening each end.
Attaching the arms
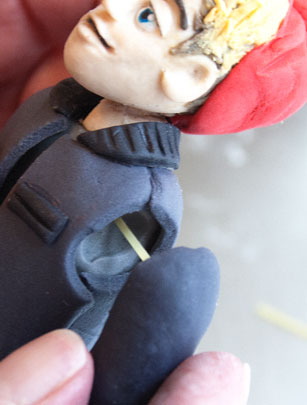
Take a matching arm to your character in the cake and bend into place.
Once happy with positioning of the arms, attach the hands to the arms with glue.
Lay the hands on the curves of the 'paper' this will allow the hands to rest.
Repeat for all characters.
Positioning Harry
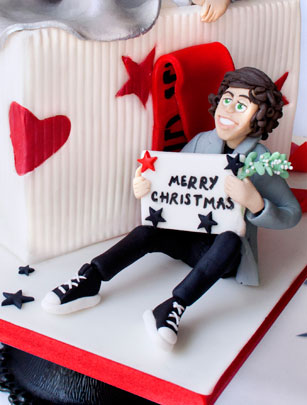
Sit Harry onto the board with a little glue once the cake is finished.
Attach the mistletoe under Harry's hand, glue into place.
The final cake

Clean the cake if needed with some clear alcohol.
Add stars around the covered board.
Wrap a red ribbon around the board edge and you're finished!
One Direction: This is Us it out on Blu-ray 3D, Blu-ray DVD on 19th December 2013.
Where to next?

Jessica Dady is Food Editor at GoodtoKnow and has over 12 years of experience as a digital editor, specialising in all things food, recipes, and SEO. From the must-buy seasonal food hampers and advent calendars for Christmas to the family-friendly air fryers that’ll make dinner time a breeze, Jessica loves trying and testing various food products to find the best of the best for the busy parents among us. Over the years of working with GoodtoKnow, Jessica has had the privilege of working alongside Future’s Test Kitchen to create exclusive videos - as well as writing, testing, and shooting her own recipes. When she’s not embracing the great outdoors with her family at the weekends, Jessica enjoys baking up a storm in the kitchen with her favourite bakes being chocolate chip cookies, cupcakes, and a tray of gooey chocolate brownies.