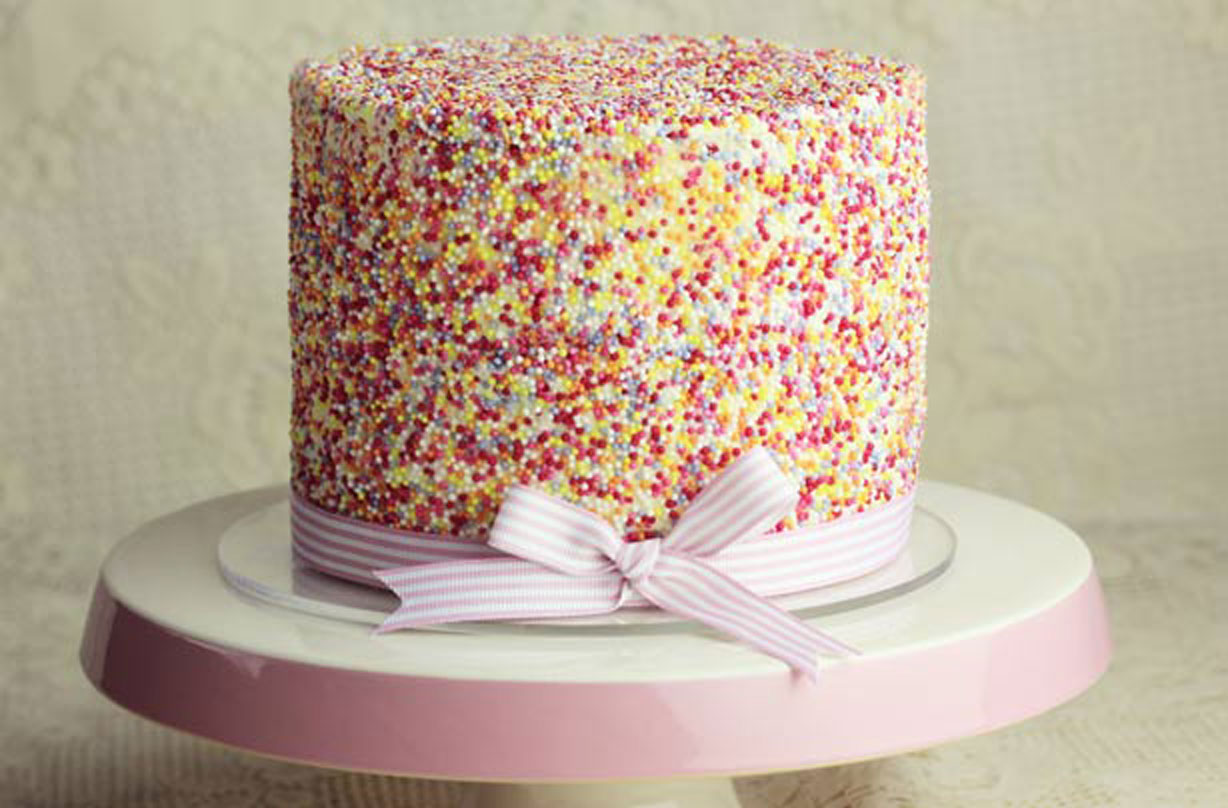
Sprinkles cake


This impressive sprinkle cake is the perfect treat for special occasions. It's much easier to make than you may think, but looks impressive enough to make a thoughtful birthday cake.
Our cake decorating queen Victoria Threader will show you how to create this masterpiece in just a few simple steps. The sprinkle cake is easy to make, but be warned, your kitchen counter may be scattered with sprinkles in the process!
This funfetti cake recipe uses hundreds and thousands, but if you want, you could use other sprinkles like chocolate strands.
You can browse more of our showstopping cake recipes here!
Ingredients
For the cake:
- 315g butter
- 315g golden caster sugar
- 315g self-raising flour
- 5 eggs
- 1tsp vanilla bean paste
- 1tsp baking powder
- 200g sprinkles
For the buttercream:
- 250g unsalted butter
- 450g icing sugar
- 2tbsp boiling water
- 1tsp vanilla bean paste
- ¾ jar good quality raspberry jam for filling
Funfetti cake - How to make a sprinkle cake:
Step 1:
Preheat the oven to 160C, gas 3 and grease and line the tins with greaseproof paper. Beat the butter and sugar with an electric whisk until light and fluffy (about 8 minutes). Sieve the flour into a separate bowl. Add the eggs one at a time with 1/5 of the flour, beating until just combined, no longer, or the batter will be greasy.
GoodtoKnow Newsletter
Parenting advice, hot topics, best buys and family finance tips delivered straight to your inbox.
Add the vanilla and fold through the batter with a large metal spoon or spatula. Divide the mixture between the two tins and bake in the oven for 55 minutes (this will depend of your own oven), removing it from the oven when it’s a golden colour and when the cake has shrunken away from the sides of the tin.
Step 2:
Leave the cakes to cool in the tins for 30 minutes before moving them to a wire rack to cool completely. When the cakes are completely cool, you can slice each cake in half. Using a large bread knife, trim the tops off the cakes and cut each cake in half. Add two cocktail sticks in the same place in the top and bottom slice of the cake. This helps you reposition the cakes to the original cut when you re-assemble the slices.
Step 3:
Make the buttercream by beating the butter with your electric whisk. Push the sieved icing sugar in by hand (as this saves some of the mess) and add 2 tbsp boiling water and your vanilla. Beat the buttercream for about 10 minutes, then it should have a lovely smooth consistency.
Add a blob of buttercream to one of your cake cards and stick the first layer to the card. Always keep the flattest sides (usually the bottom) of the cakes to the top and bottom. Add a couple of spoons of buttercream to a piping or sandwich bag, snip a small corner off (away from the cake so you don’t lose the corner in the food) and pipe around the outside edge of the sponge. This will just stop the jam coming out of the sides of the cake when you’re icing it.
Step 4:
Add jam to the middle of your cakes, adding the layers, using your cocktail sticks as a guide so you get a nice even cake.
Step 5:
Add a layer of buttercream to the whole of the cake and pop the other 6 inch cake card to the top before refrigerating for 1 hour to harden the first layer. When the first layer is set, add another layer.
Step 6:
Add the sprinkles to a roasting dish as this will stop some (not all!) of the mess.
Step 7:
Now for the tricky bit! Pick the cake up using the cake cards and roll the buttercream into the sprinkles. At this point, it’s really handy to have a helper shake the dish for you so you get an even amount all the way around. If you don’t, just pop the cake down each time or spread them on by hand, patting handfuls where you need it. Fill the gaps by hand.
Step 8:
Finally, using a large palette knife, remove the card from the top of the cake. This might pull some of the icing away as you do it but just fill it in with a fresh bit and pour the sprinkles over the top. You can use the tips of your finger to move them around and create a sharp edge.
Step 9:
There will be sprinkles everywhere but you are certain to wow your guests with this one, so it won’t matter. Now, simply slice your funfetti cake and serve!

Jessica Dady is Food Editor at GoodtoKnow and has over 12 years of experience as a digital editor, specialising in all things food, recipes, and SEO. From the must-buy seasonal food hampers and advent calendars for Christmas to the family-friendly air fryers that’ll make dinner time a breeze, Jessica loves trying and testing various food products to find the best of the best for the busy parents among us. Over the years of working with GoodtoKnow, Jessica has had the privilege of working alongside Future’s Test Kitchen to create exclusive videos - as well as writing, testing, and shooting her own recipes. When she’s not embracing the great outdoors with her family at the weekends, Jessica enjoys baking up a storm in the kitchen with her favourite bakes being chocolate chip cookies, cupcakes, and a tray of gooey chocolate brownies.