How to make Danish pastries


If you're in the mood for some serious baking and fancy making something sweet and delicious that the whole family can enjoy, these classic Danish pastries would be the perfect choice.
With 30 mins prepartion time and 25 mins in the oven, this triple-tested recipe is an easy recipe to master. It takes 4-5 hrs for these pastries to rest and prove - this gives them plenty of time to rise and fill with air so you have the perfect soft and crisp pastry once cooked.
If you fancy experimenting with flavour try swapping the apricots for softened pears, apples or peaches instead.
When you remove the pastries from the oven, make sure you take them out with care as some of the butter may have run out during the cooking process. You could use a spatula or flat palette knife to remove them from the baking sheets.
Ingredients
- 250g strong white flour
- 250g white flour
- 7g sachet easy-bake/fast-action yeast
- 2tbsps caster sugar
- 1tsp salt
- 250ml milk, warmed
- 1 large egg
- 250g butter, softened
- 125g marzipan
- 9 canned apricot halves,drained
- 6-8tbsps apricot jam, sieved and warmed
Step 1
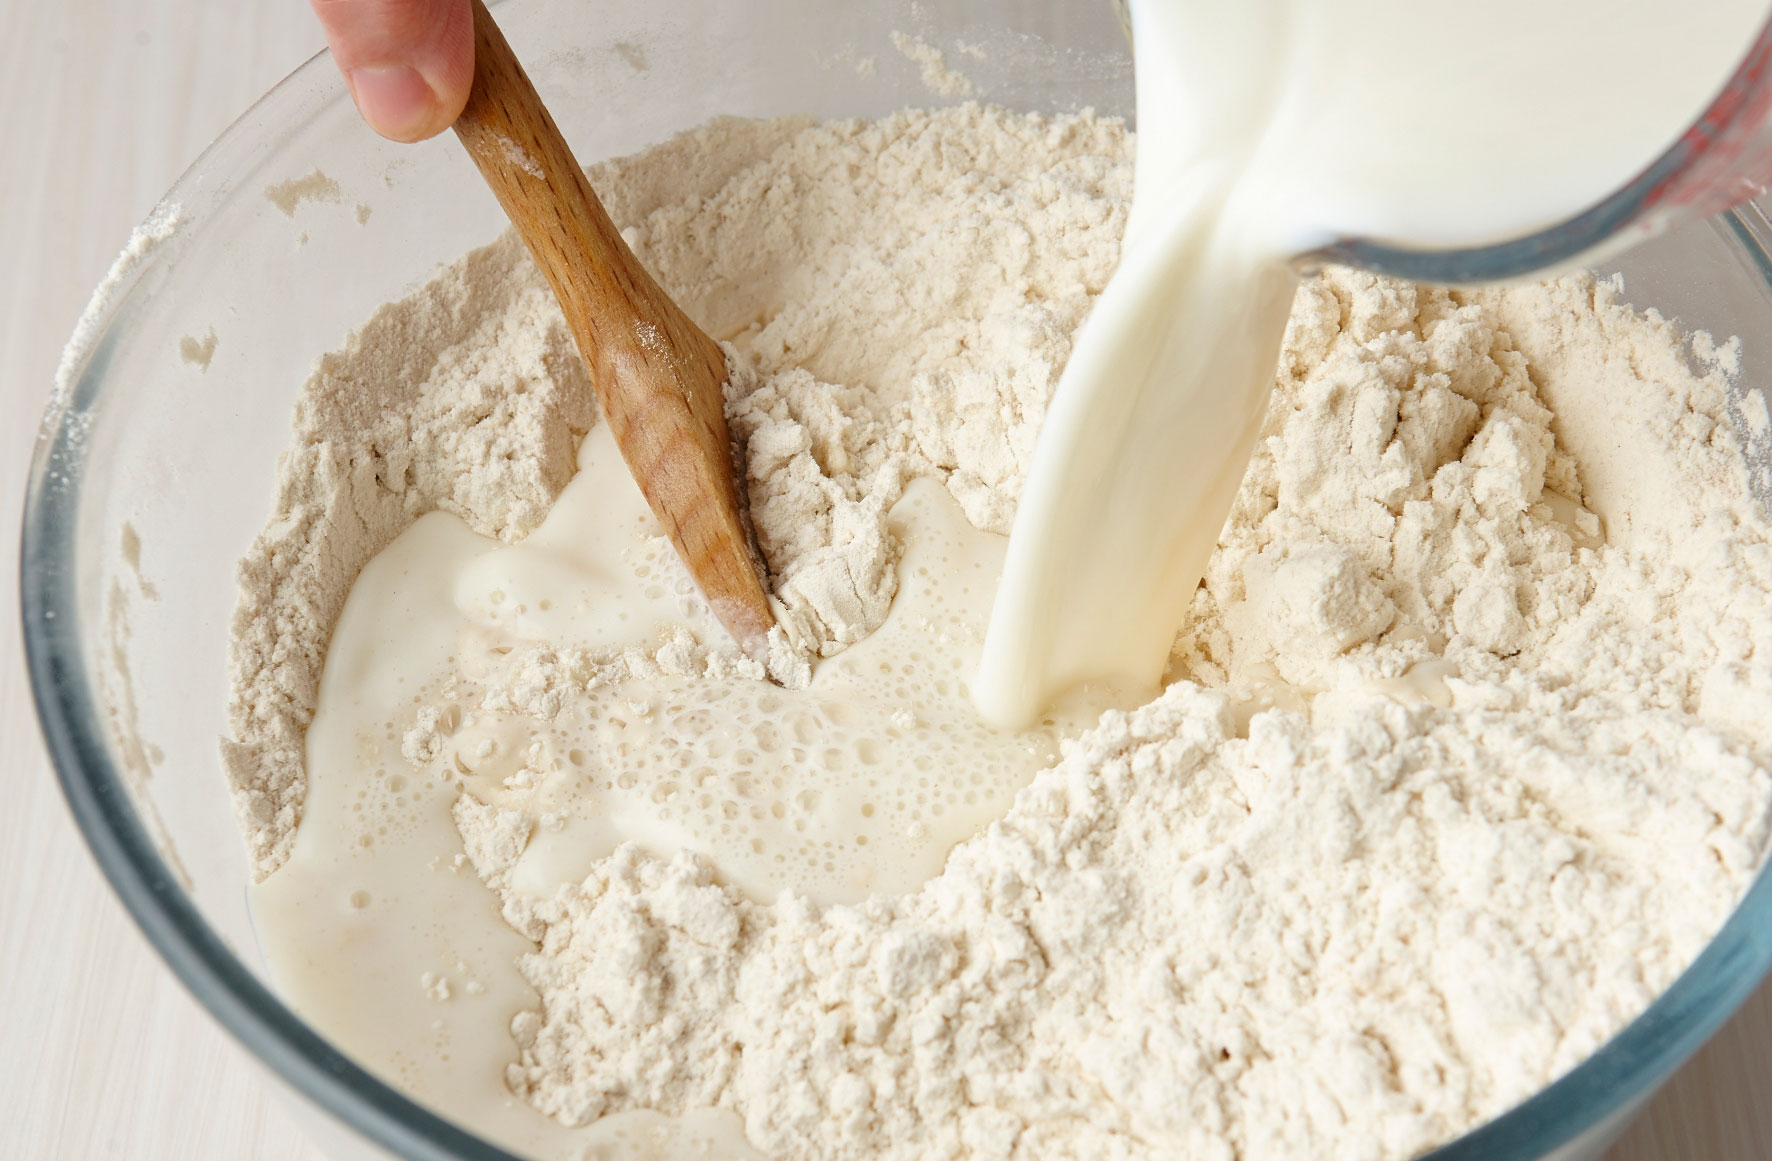
Tip the flours into a bowl and stir in the yeast, sugar and salt. Mix the milk and egg together and tip into the flour then mix well, to give a soft dough. Knead the dough very lightly to form a ball and then roll it out to a rectangle about 1cm thick.
Step 2
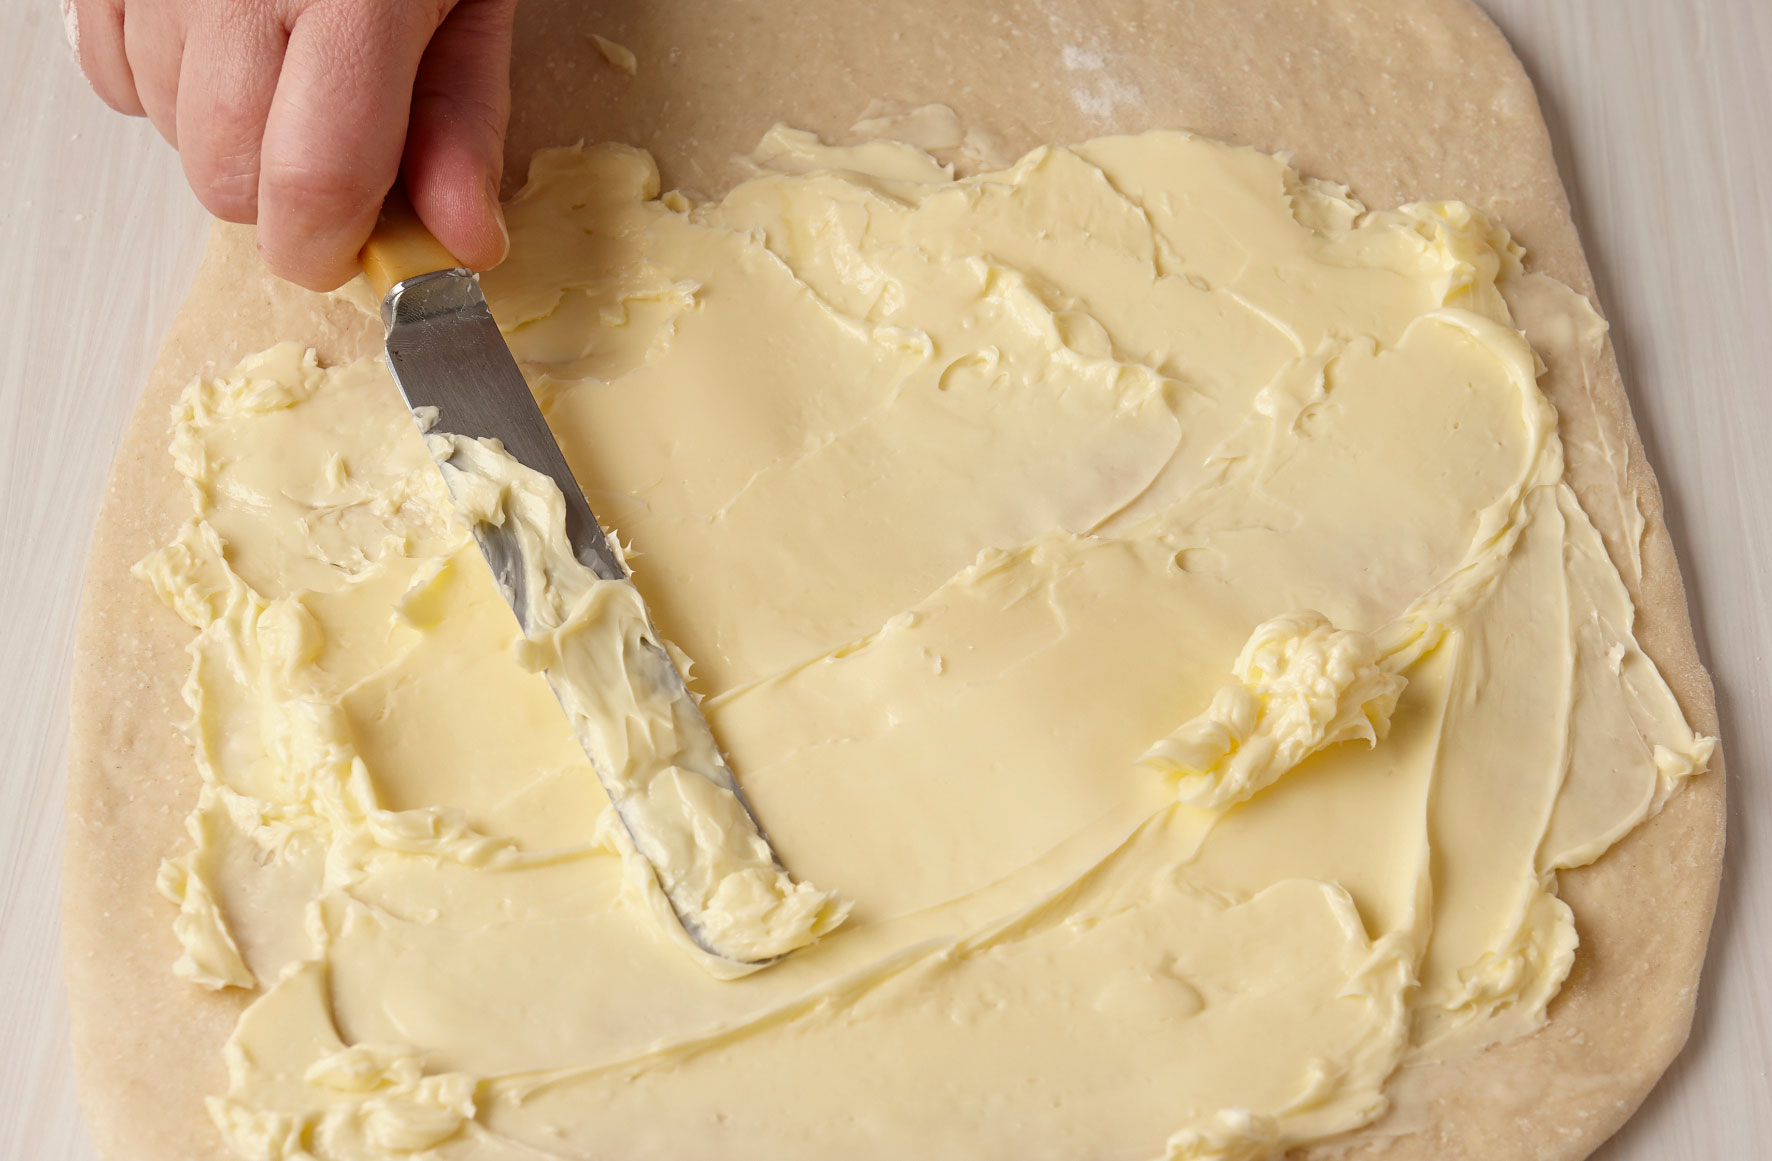
Spread the butter over two-thirds of the rectangle, leaving the bottom clear.
Step 3
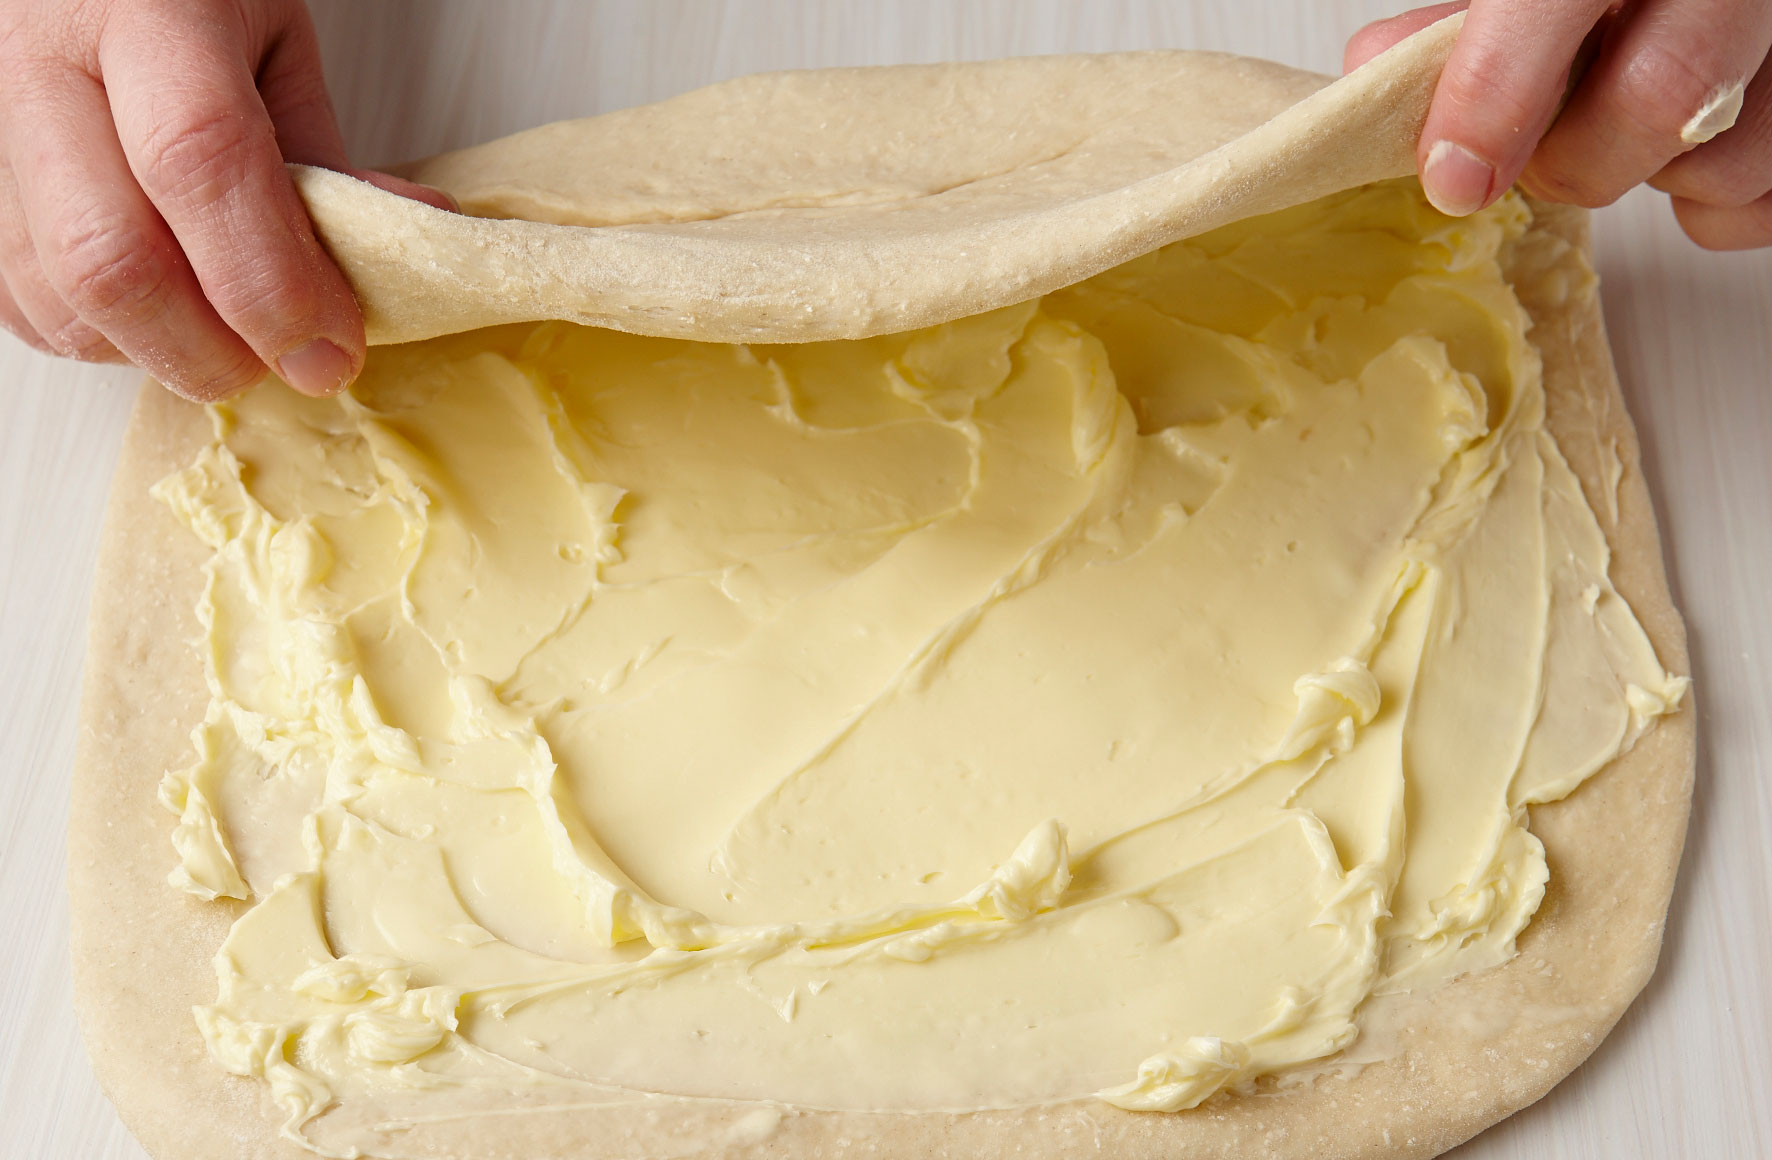
Fold up bottom third over the butter, and then fold the top third over it.
GoodtoKnow Newsletter
Parenting advice, hot topics, best buys and family finance tips delivered straight to your inbox.
Step 4
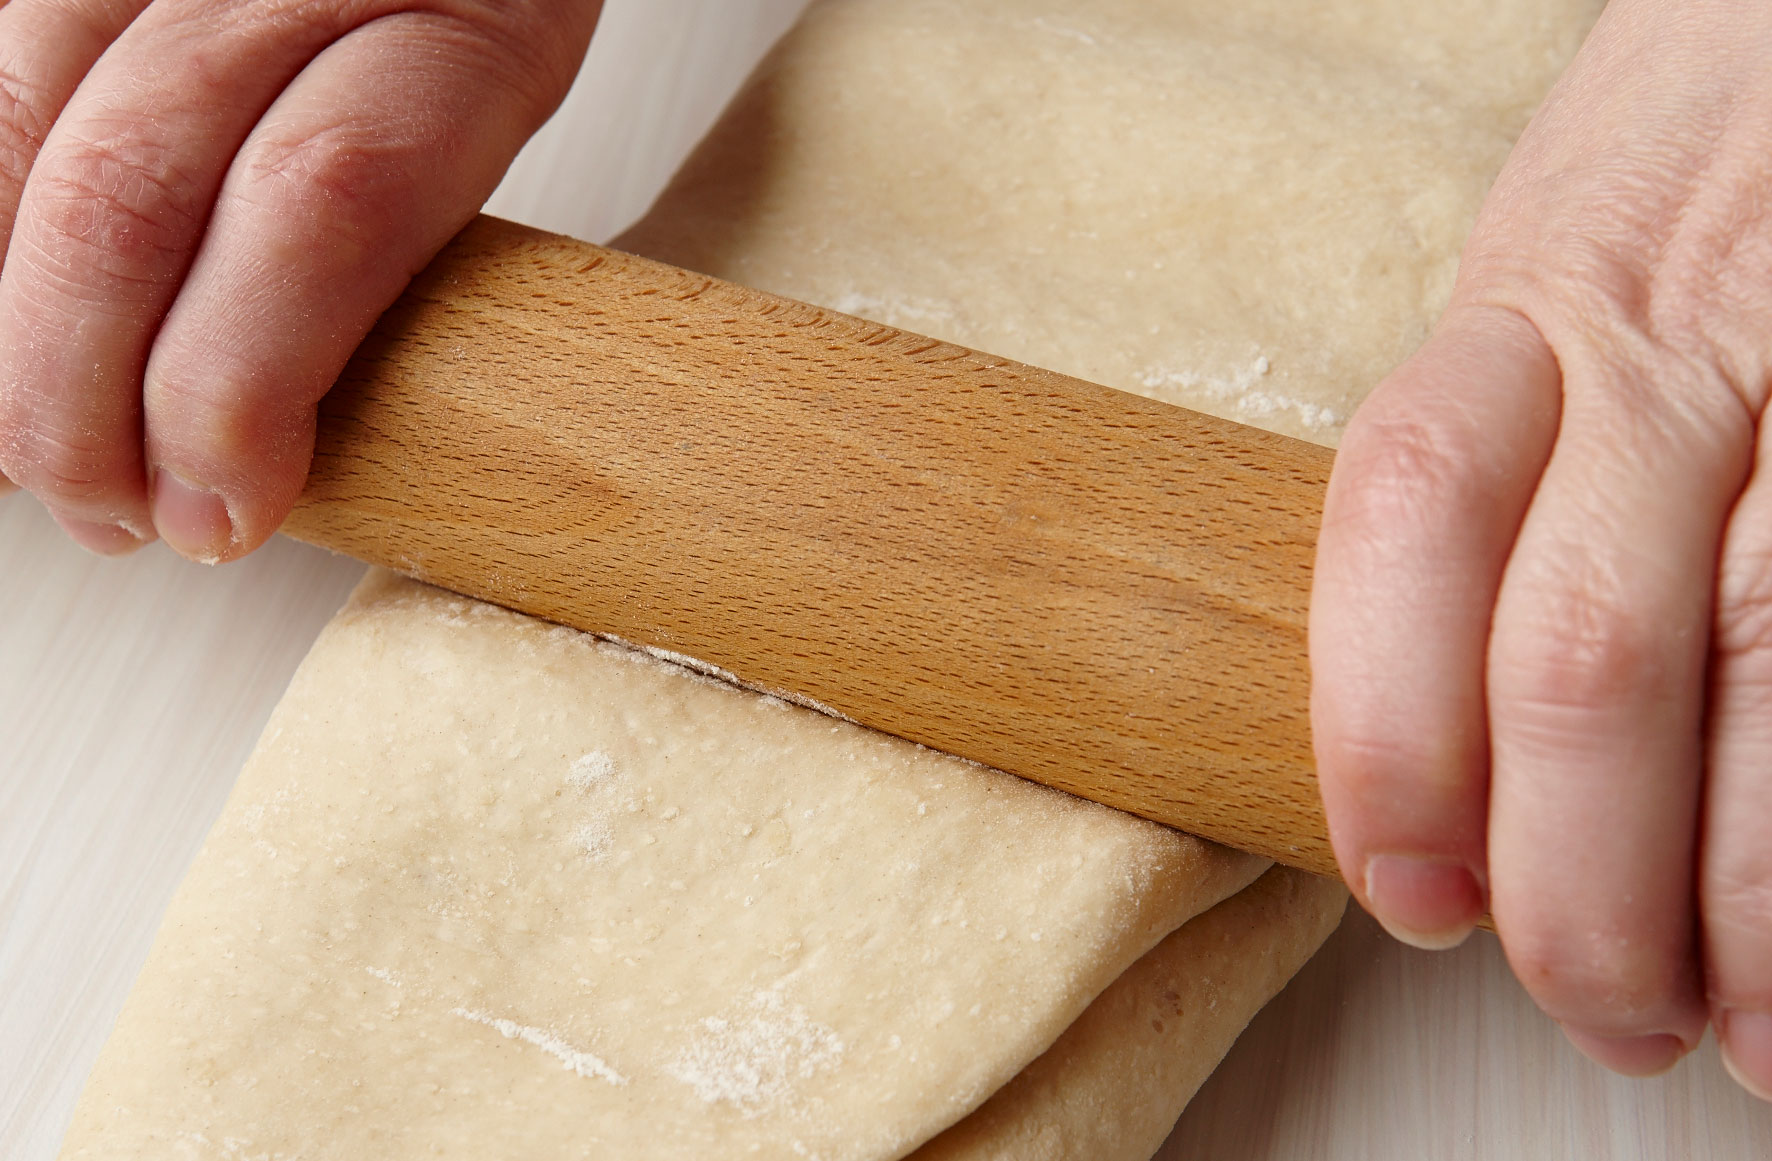
Use the rolling pin, press down ridges in the dough. Wrap it in cling film and chill for 1 hour.
Step 5
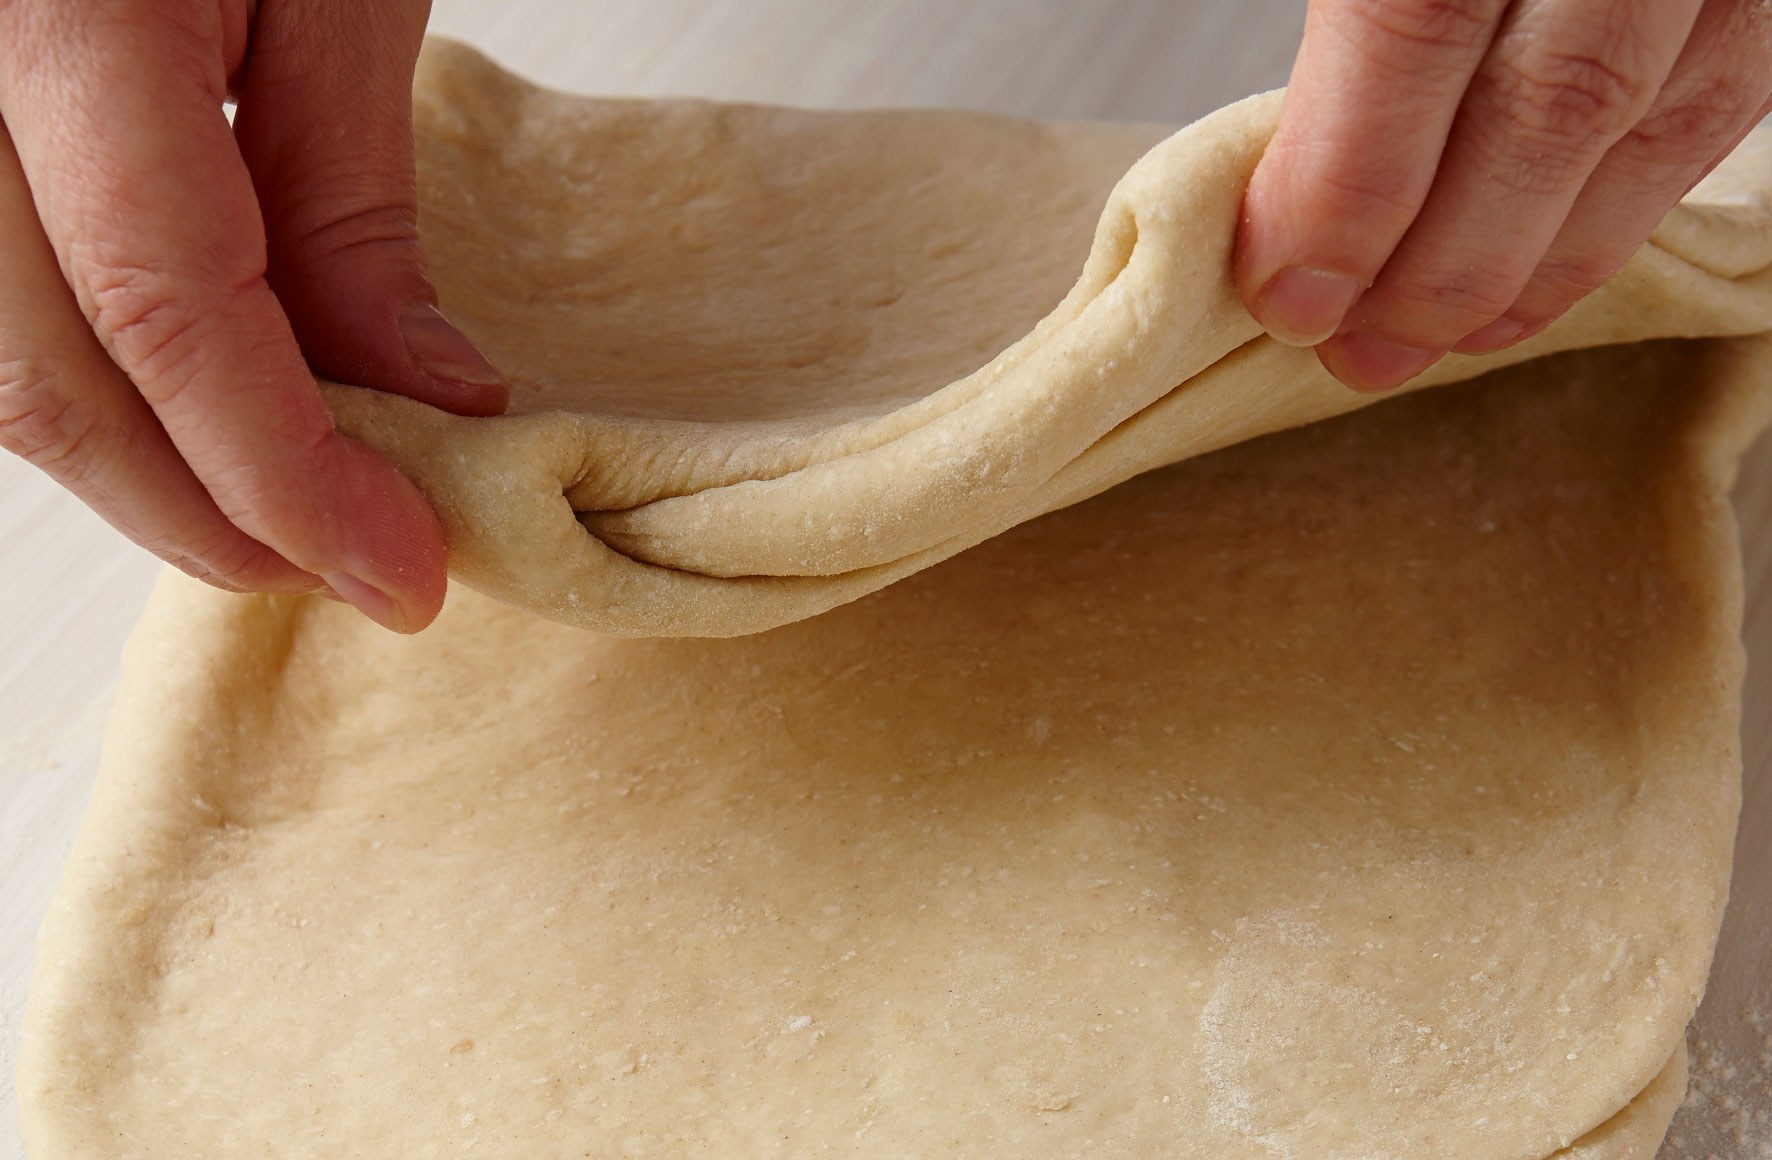
Re-roll the dough to a large rectangle, then repeat the folding by folding up the bottom third and then the top third and pressing the ridges down with the rolling pin. Chill the dough for an hour. Repeat the rolling and folding process once more, and chill it for a further hour.
Step 6
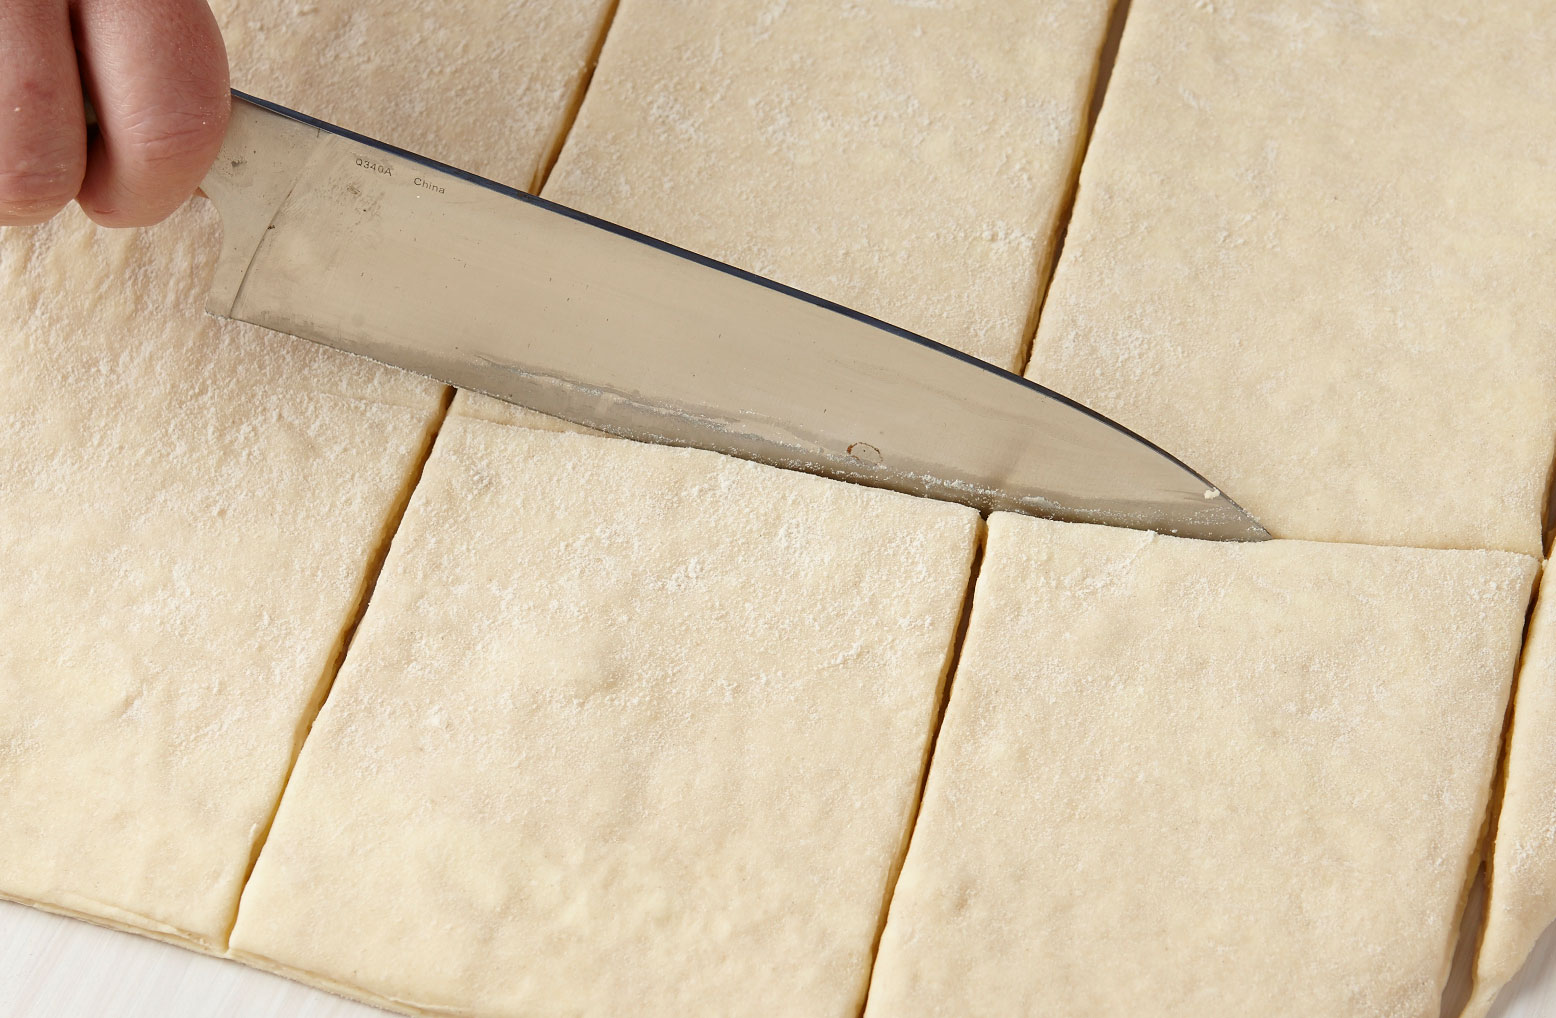
Roll the dough out to a large square, about 36cm (just over 14in) square. Trim off the edges of the dough, and cut into nine squares.
Step 7
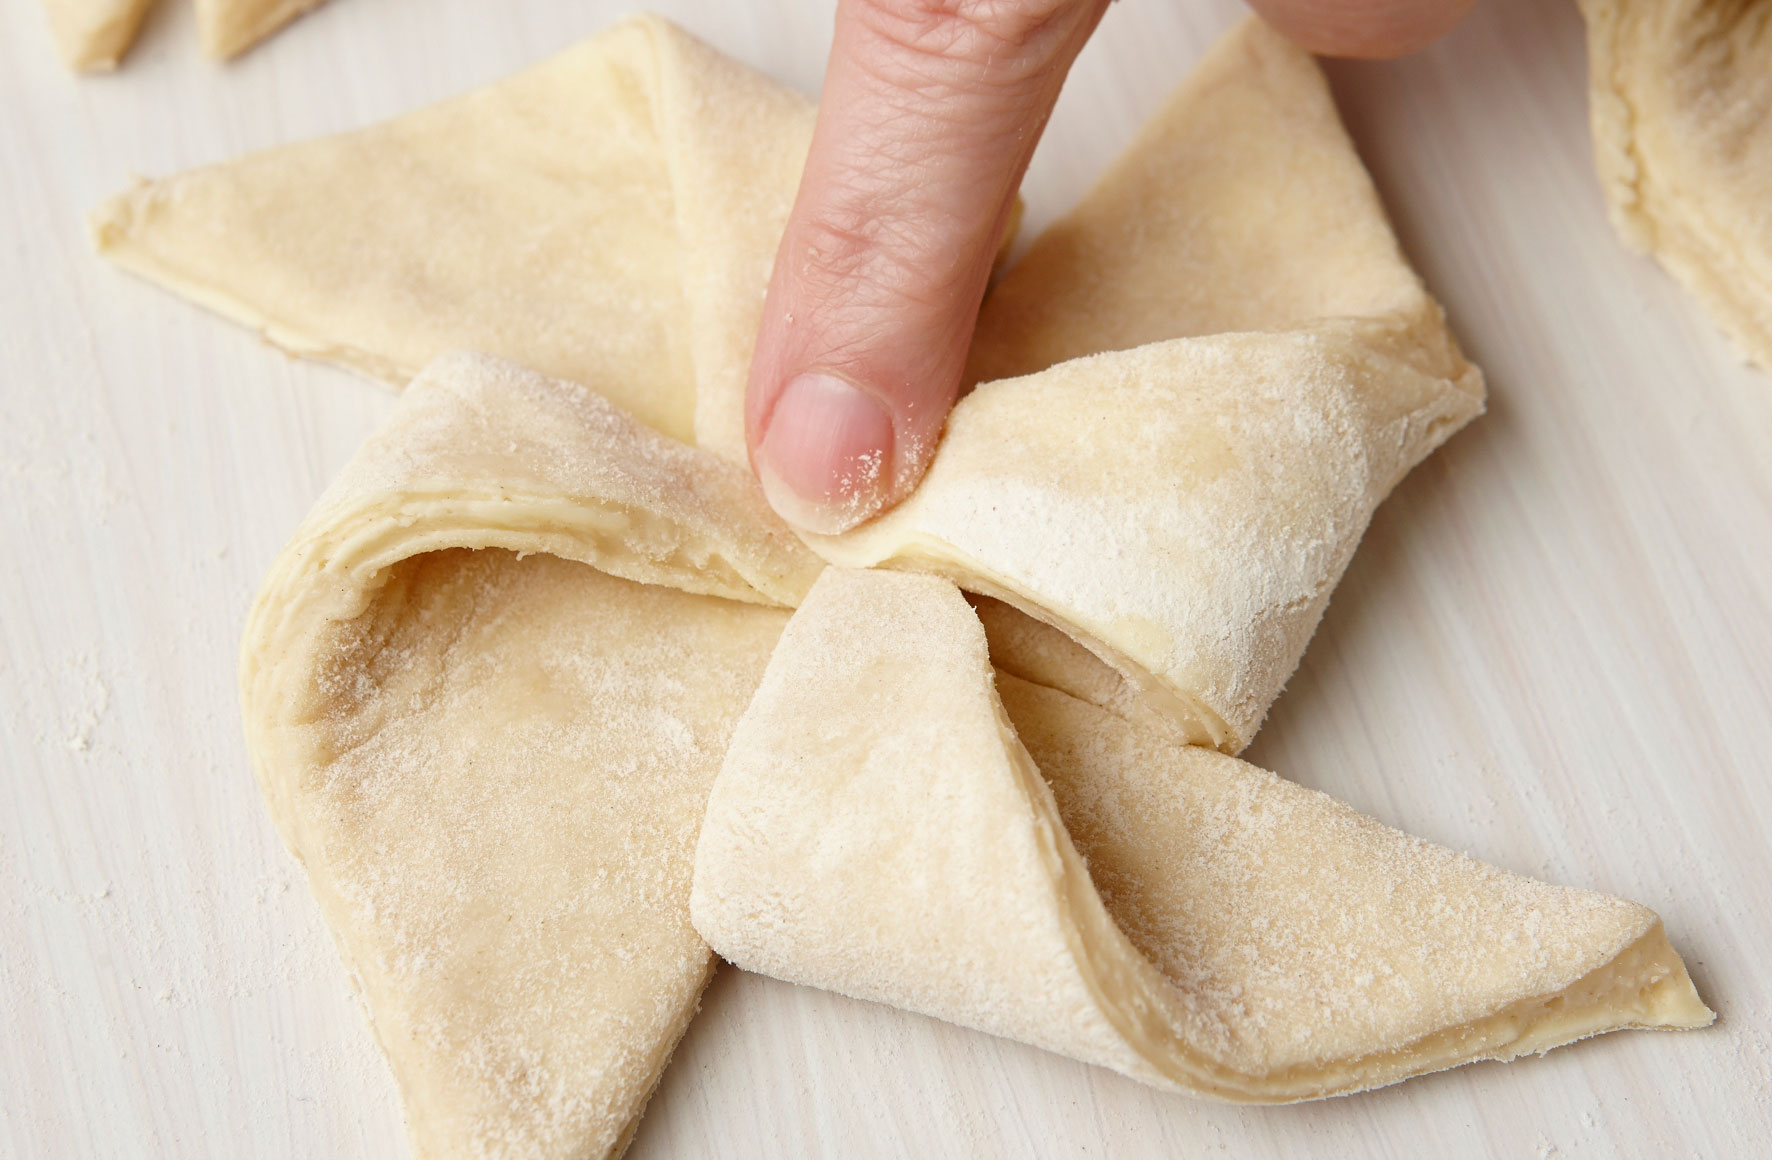
Cut into the squares diagonally from each corner. Brush some water in the centre, then fold in one side of each edge to give the pinwheel shape and press down well in the centre.
Step 8

Divide the marzipan into nine pieces and roll each piece into a ball. Flatten them and place in the centre of the pinwheel. Put an apricot half on top of the marzipan. Place on baking sheets, cover with oiled cling film and leave in a warm place until the dough has doubled in size.
Step 9
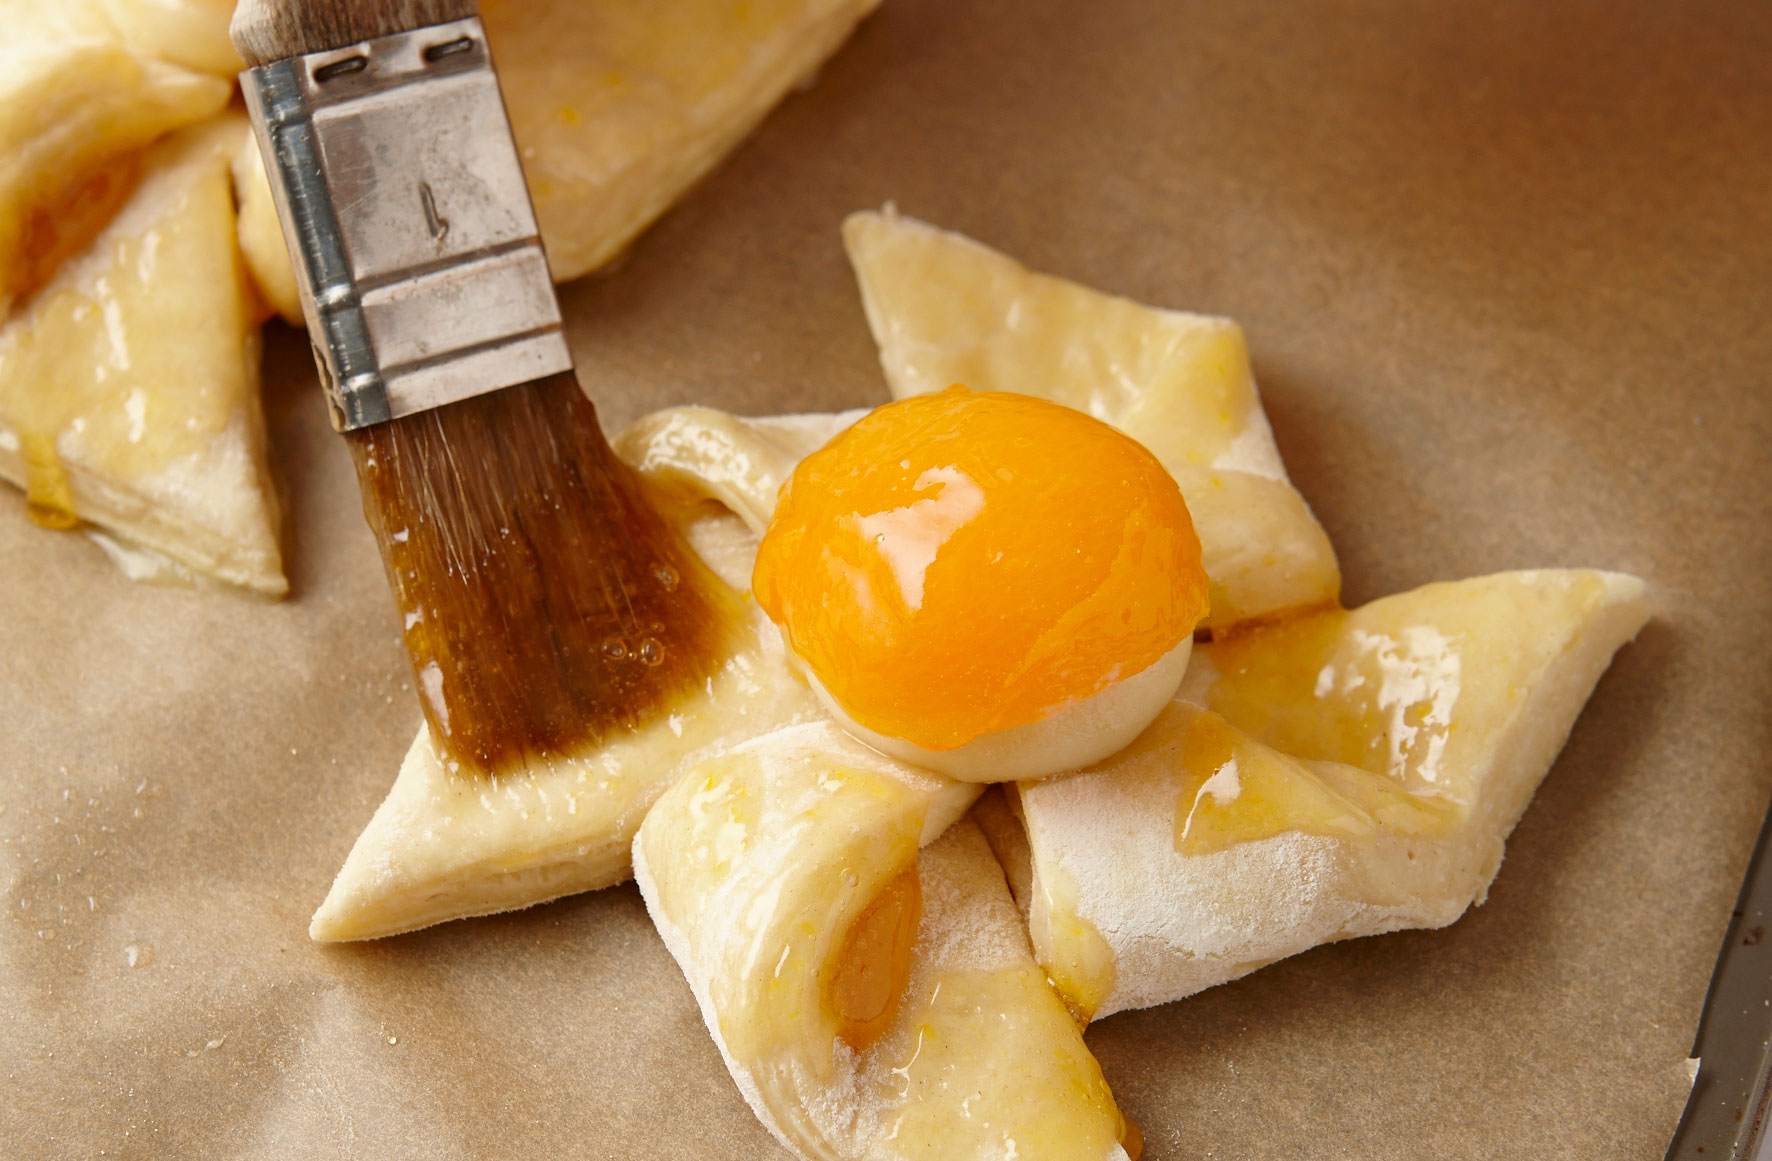
Set the oven to 220°C/425°F/Gas Mark 7. Brush some apricot glaze over the pastries and bake for 20-25 minutes, until light golden, and then remove from the oven.
Step 10
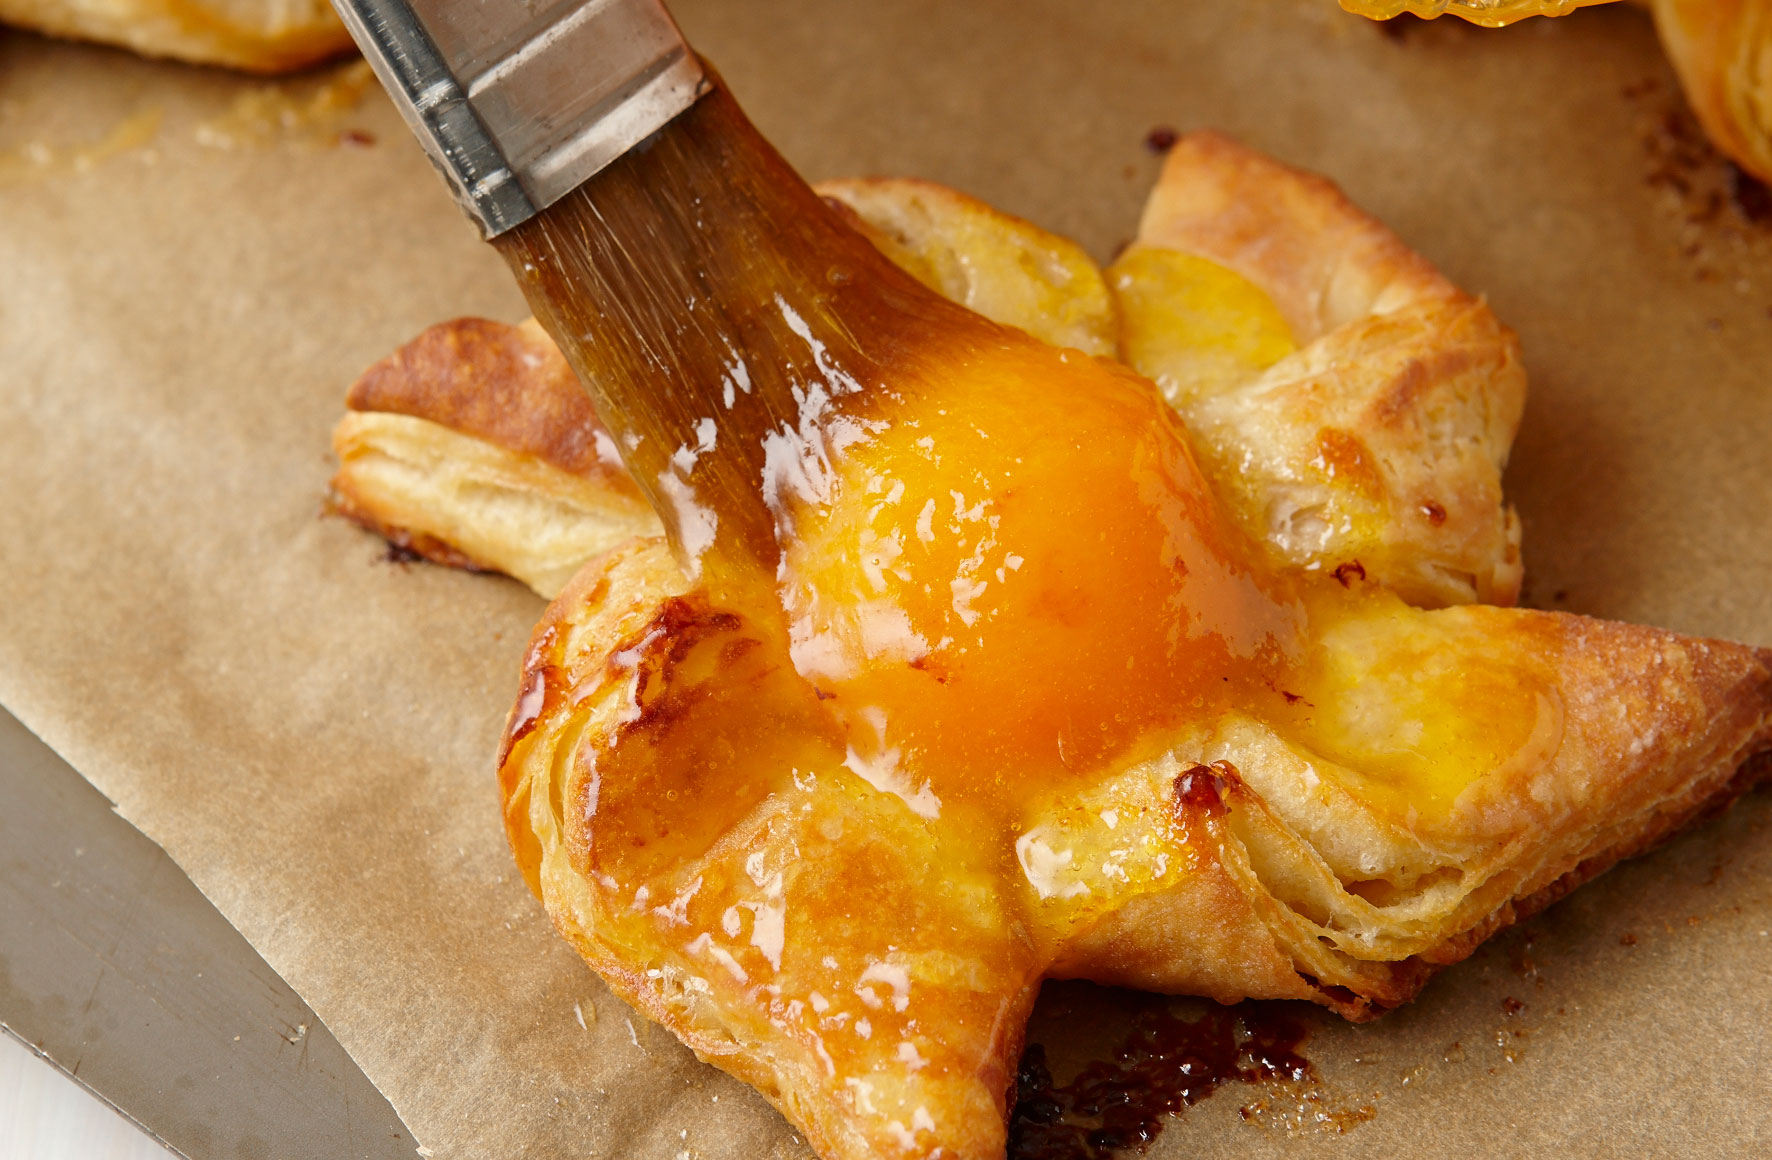
Brush over the remaining glaze. Transfer the pastries to a wire rack to cool.
Step 11

These are best served warm on the day of making, but may be reheated if they’ve cooled completely.

Jessica Dady is Food Editor at GoodtoKnow and has over 12 years of experience as a digital editor, specialising in all things food, recipes, and SEO. From the must-buy seasonal food hampers and advent calendars for Christmas to the family-friendly air fryers that’ll make dinner time a breeze, Jessica loves trying and testing various food products to find the best of the best for the busy parents among us. Over the years of working with GoodtoKnow, Jessica has had the privilege of working alongside Future’s Test Kitchen to create exclusive videos - as well as writing, testing, and shooting her own recipes. When she’s not embracing the great outdoors with her family at the weekends, Jessica enjoys baking up a storm in the kitchen with her favourite bakes being chocolate chip cookies, cupcakes, and a tray of gooey chocolate brownies.