Olaf cake
Score extra points with the kids by making this Olaf cake for Christmas – it looks complicated to prepare, but our step-by-step picture guide makes it easy.
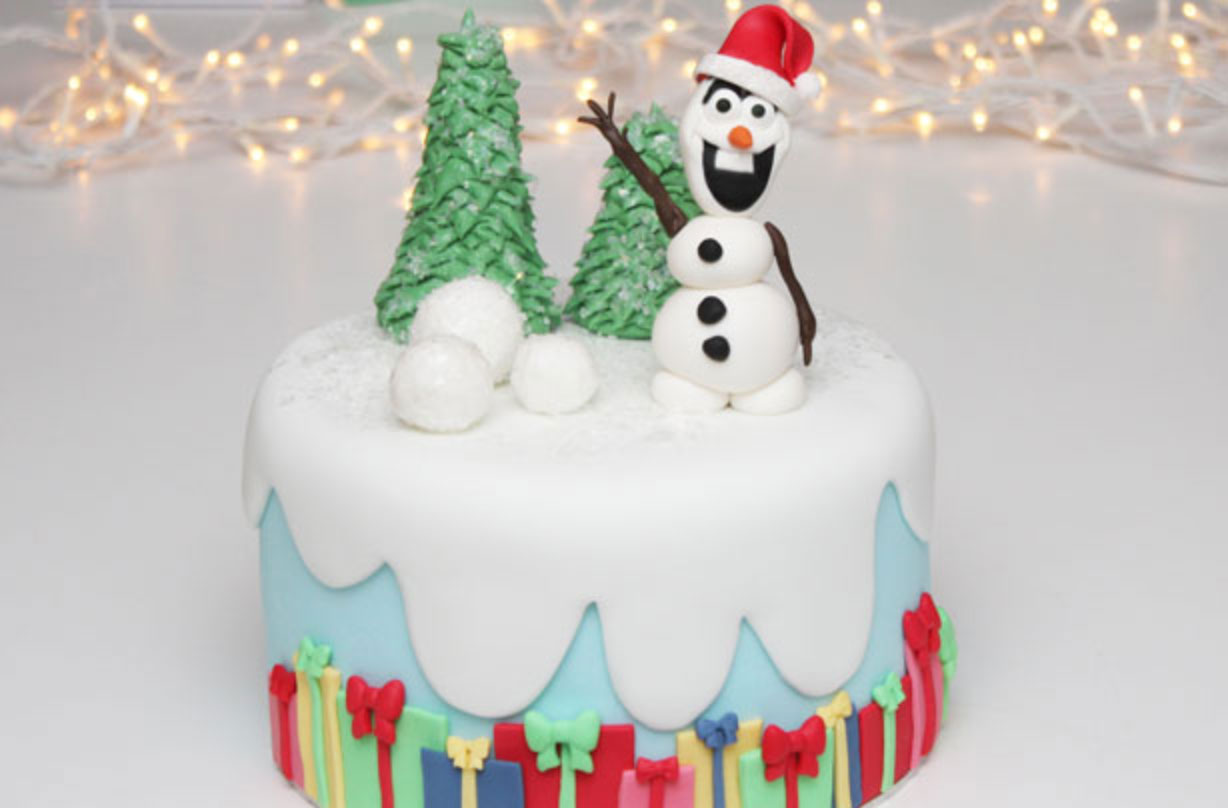

Score extra points with the kids by making this Disney's Frozen-inspired Olaf cake for Christmas. It might look complicated to prepare, but our step-by-step picture guide makes it easy.
Magic sparkles add a twinkly touch to the snow, while Olaf’s Santa hat and the gift border give the final festive flourish. We highly recommend Mary Berry’s traditional Christmas cake recipe for a delicious base. You can also stick to a shop-bought Madeira or Victoria sponge to save on time and washing up.
Ingredients
- 3 tiered Victoria sponge or Madeira cake, covered in buttercream or ganache
- 1.5 kg white ready to roll fondant
- 100g white modelling paste
- 120g green modelling paste
- 20g each colour modelling paste
- 20g black fondant
- 10g brown paste
- 1g orange
- 15g of red modelling paste
- Wilton candy eyes
- sparkly sugar
- magic sparkles
- a length of dried spaghetti
- piping gel, to use as glue
- sky blue food colouring (such as Sugarflair)
Step 1
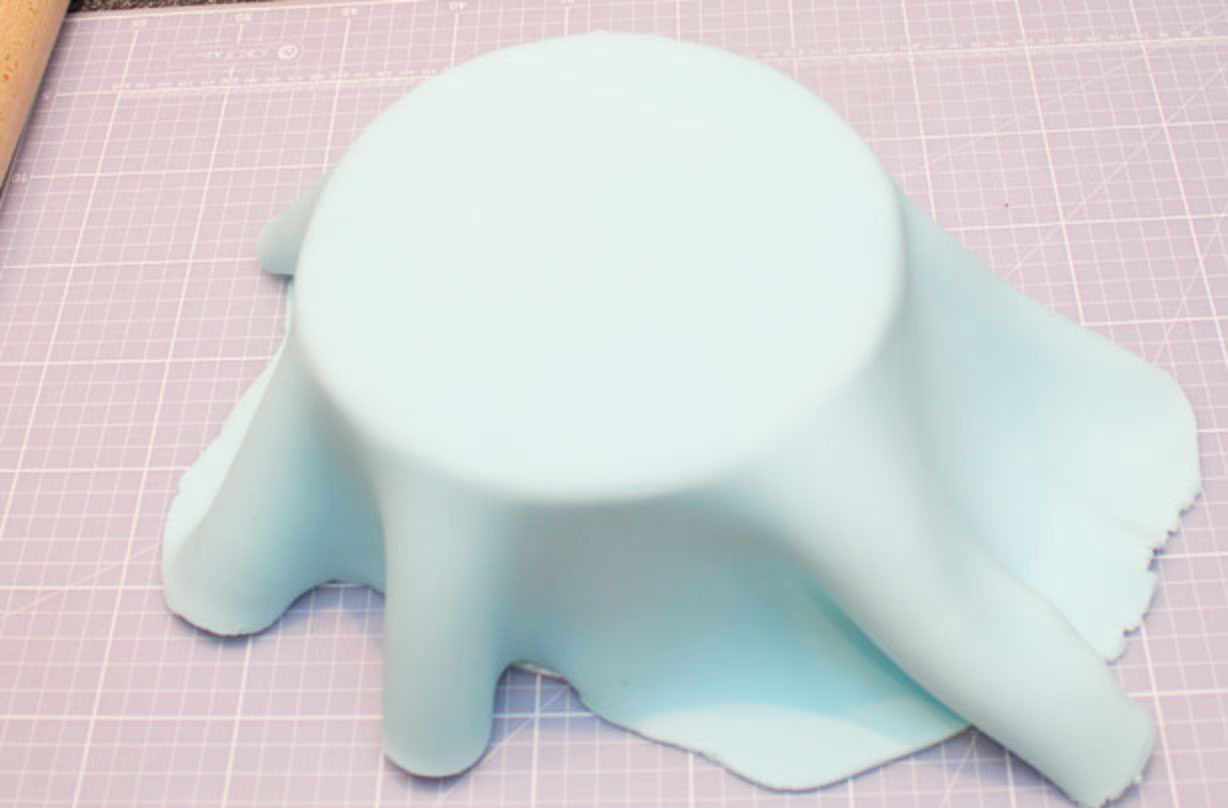
Using the sky blue food colour, colour 1kg white ready to roll fondant. Roll the fondant out until it will fit over the cake, to about 2-3mm thick. Smooth the fondant onto the cake using an upwards sweeping motion with your hands. If you sweep up rather than down, it stops the fondant tearing at the edge.
Step 2
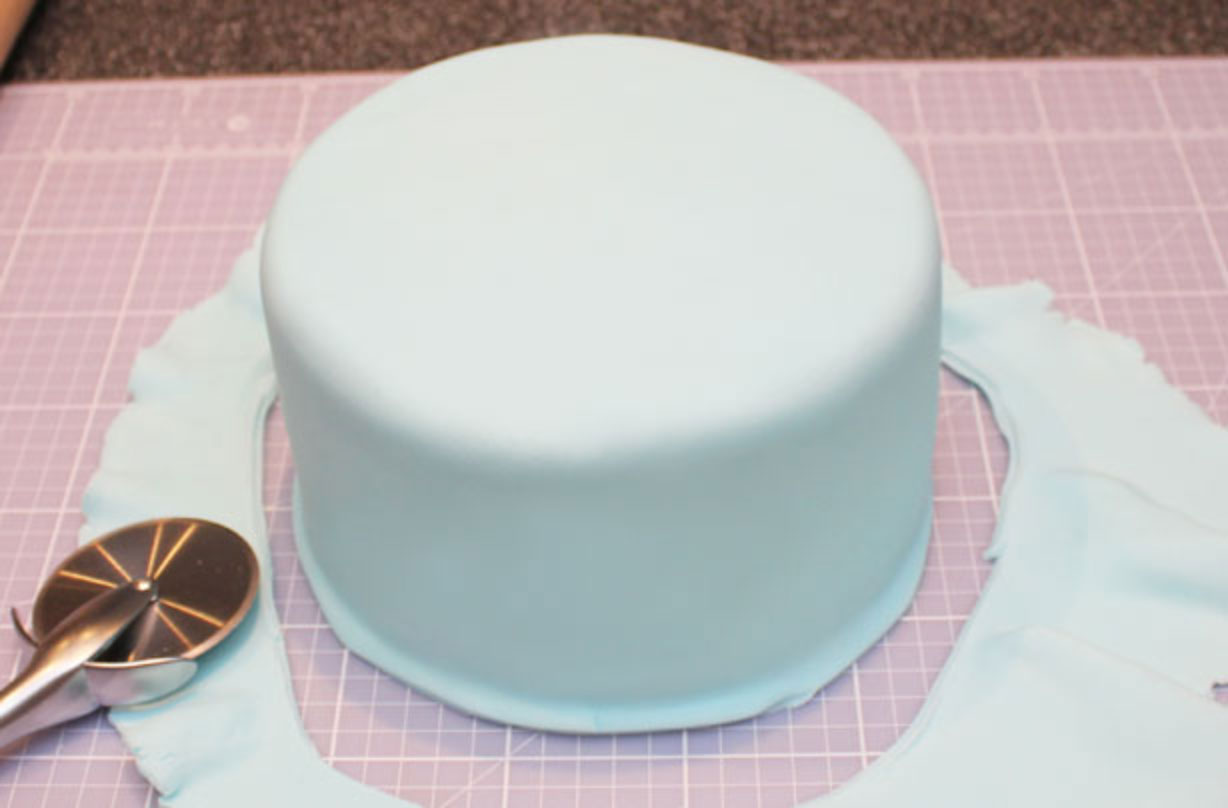
Cut the excess off with a pizza wheel, leaving a little extra around the edge, just until you’ve smoothed the bottom. Smooth the cake using the fondant smoothers, then you can trim the extra icing off with a sharp knife.
Step 3
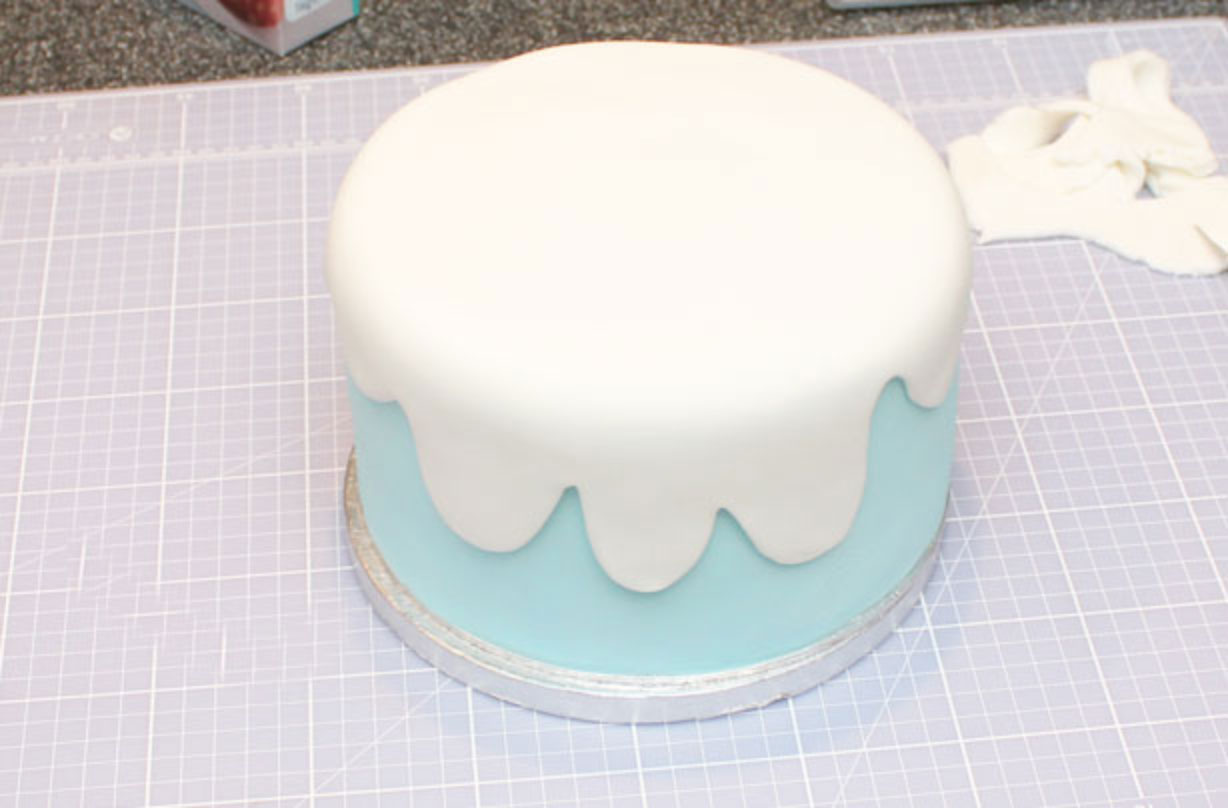
Roll out 500g white ready-to-roll fondant and using a craft or sharp knife, cut a wiggly pattern into the fondant. This will act as the snow for the top of the cake. Place the white fondant onto the cake, smoothing the edges with the tips of your fingers.
Step 4
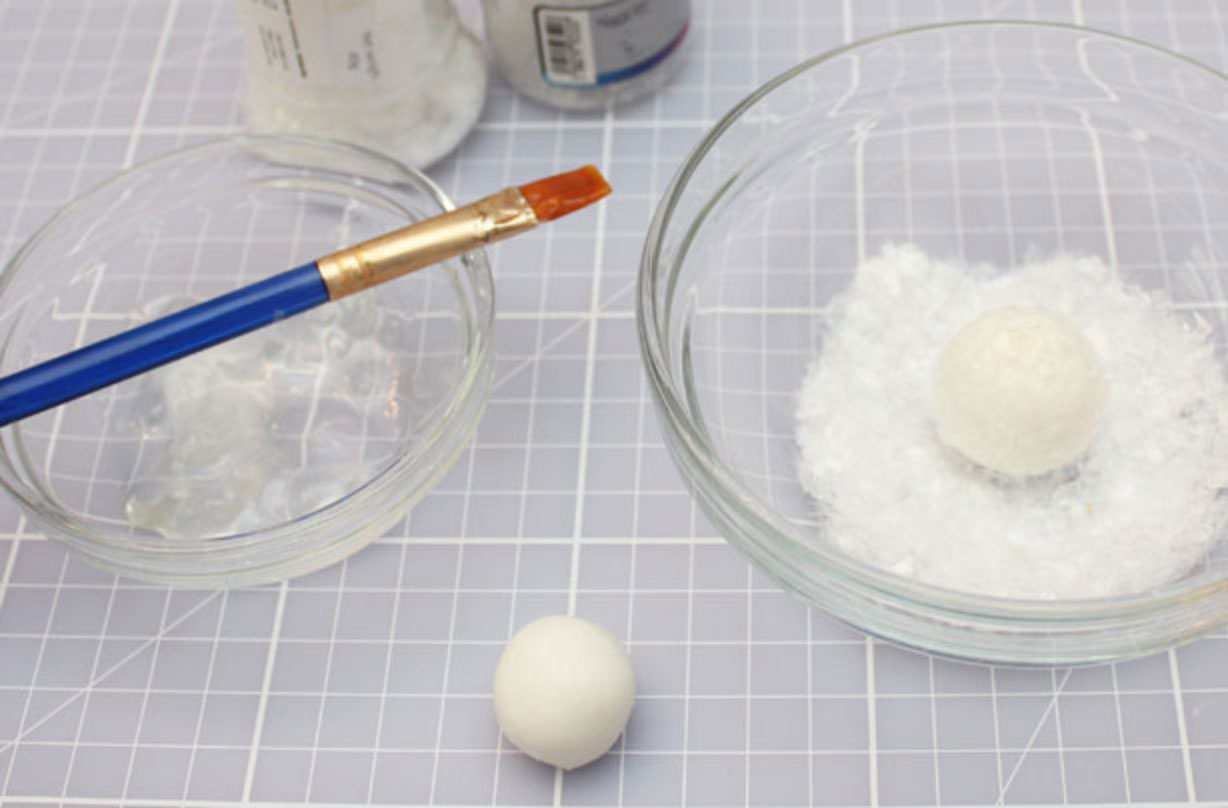
Use the excess white fondant to make the snow balls. Add the sugar and magic sparkles to a small bowl. Roll various sized balls of fondant and paint them with the piping gel. Drop the painted snowballs into the sugar/sparkles mix and roll around until it’s completely covered. Leave the snowballs to dry on greaseproof paper until you are ready to stick it to your cake.
Step 5
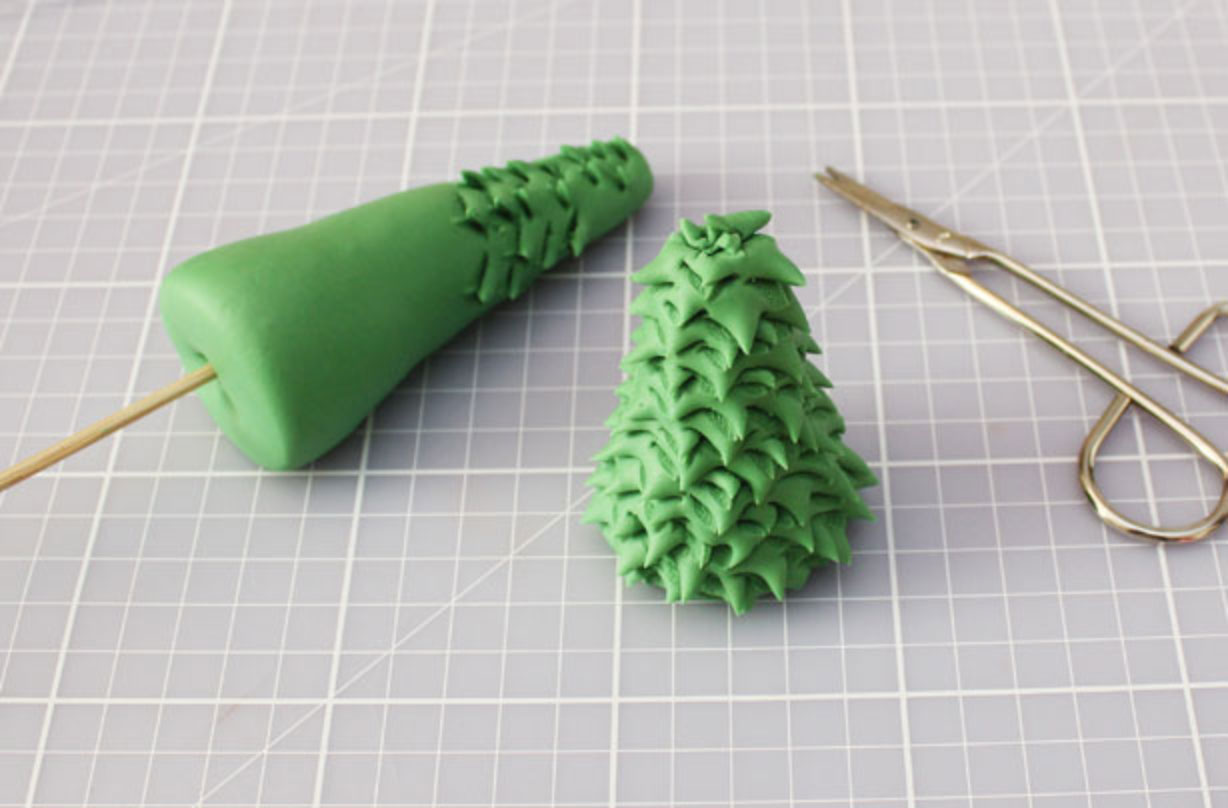
To make the trees, divide the green modelling paste and roll cones. Pop the cones onto a skewer as it's easier to cut the branches this way. Using the small scissors, snip upwards into the paste, lifting up as you snip.
Paint the tips of the branches with the piping gel and then put the tree into the sprinkles bowl. Pour the sprinkles over the top of the tree - they will stick to where you’ve painted the piping gel on. Leave them on greaseproof paper until you’re ready to use them.
GoodtoKnow Newsletter
Parenting advice, hot topics, best buys and family finance tips delivered straight to your inbox.
Step 6
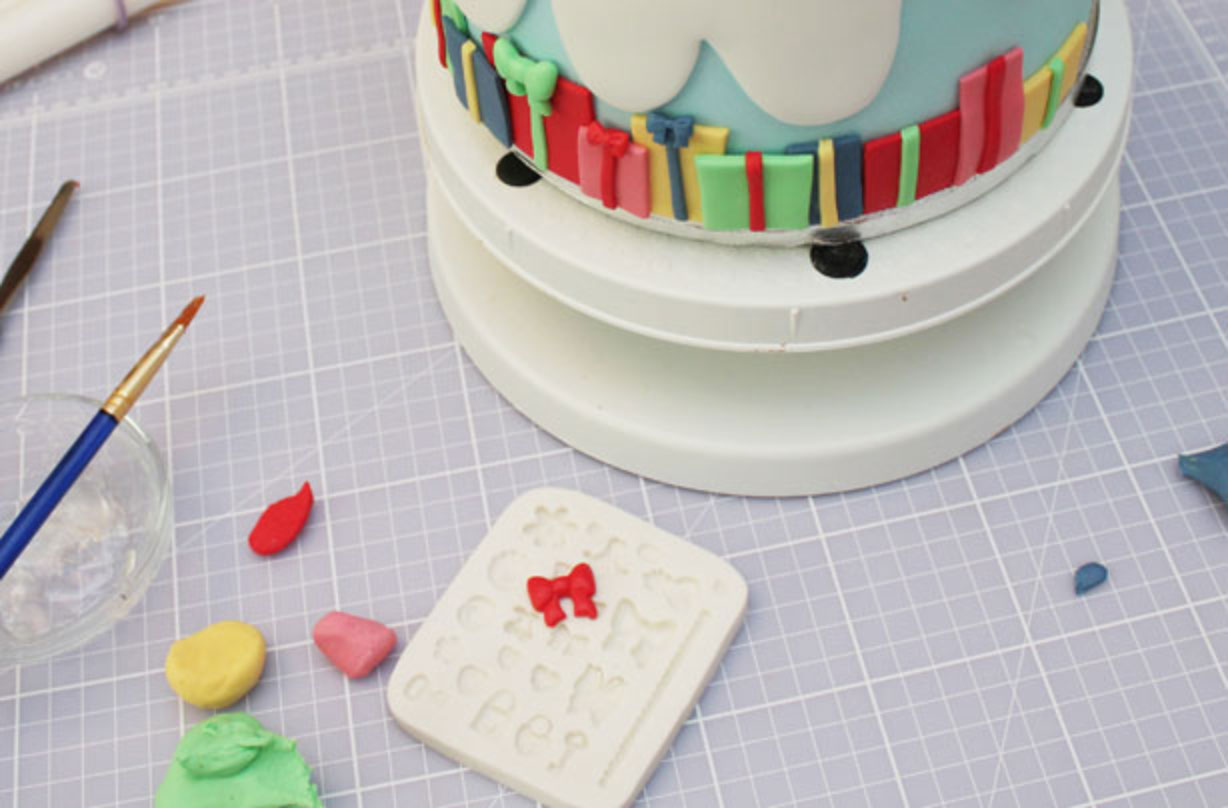
For the presents, roll and cut the coloured paste into different sized squares, overlapping them slightly as you stick them. Use the piping gel as glue to stick them. Once all the presents are glued onto the cake, cut a contrasting strip for the ribbon and mould some bows for the tops.
Step 7
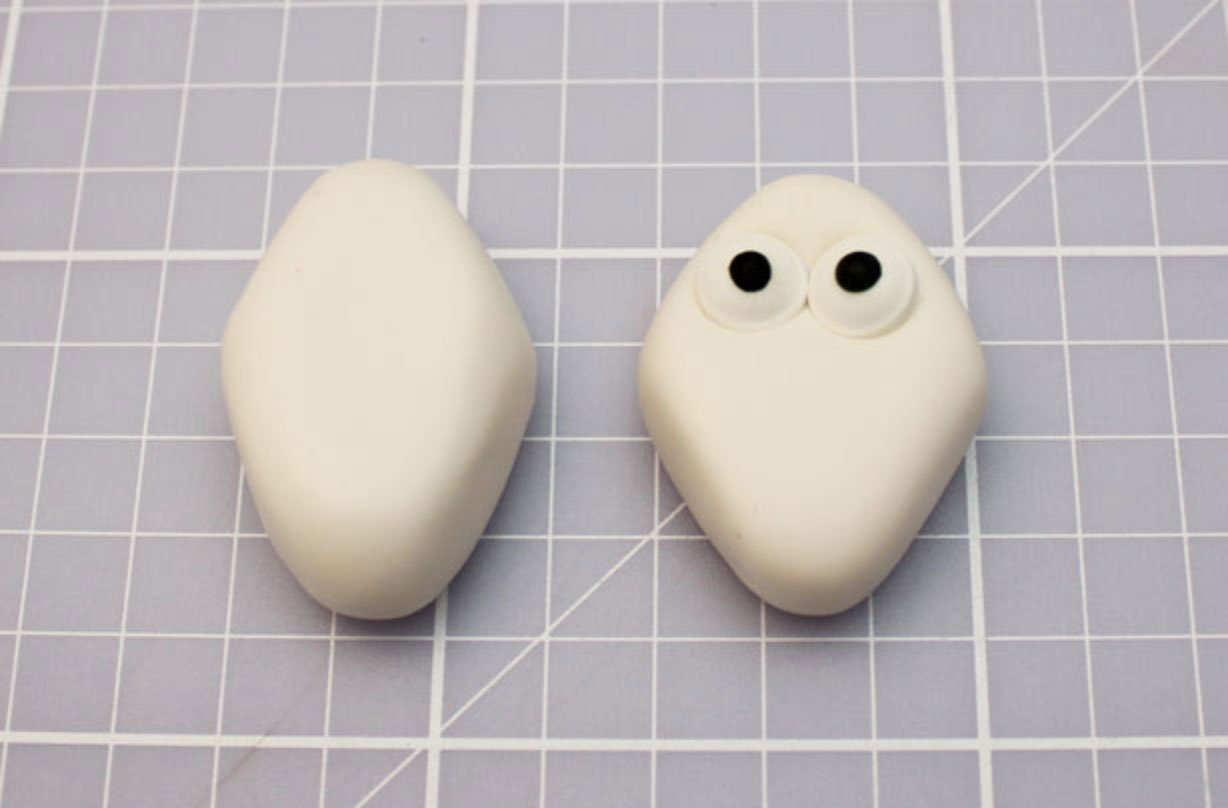
To make Olaf, mould a piece of white modelling paste into a diamond shape and add the Wilton candy eyes by sticking them with a dot of piping gel.
Step 8
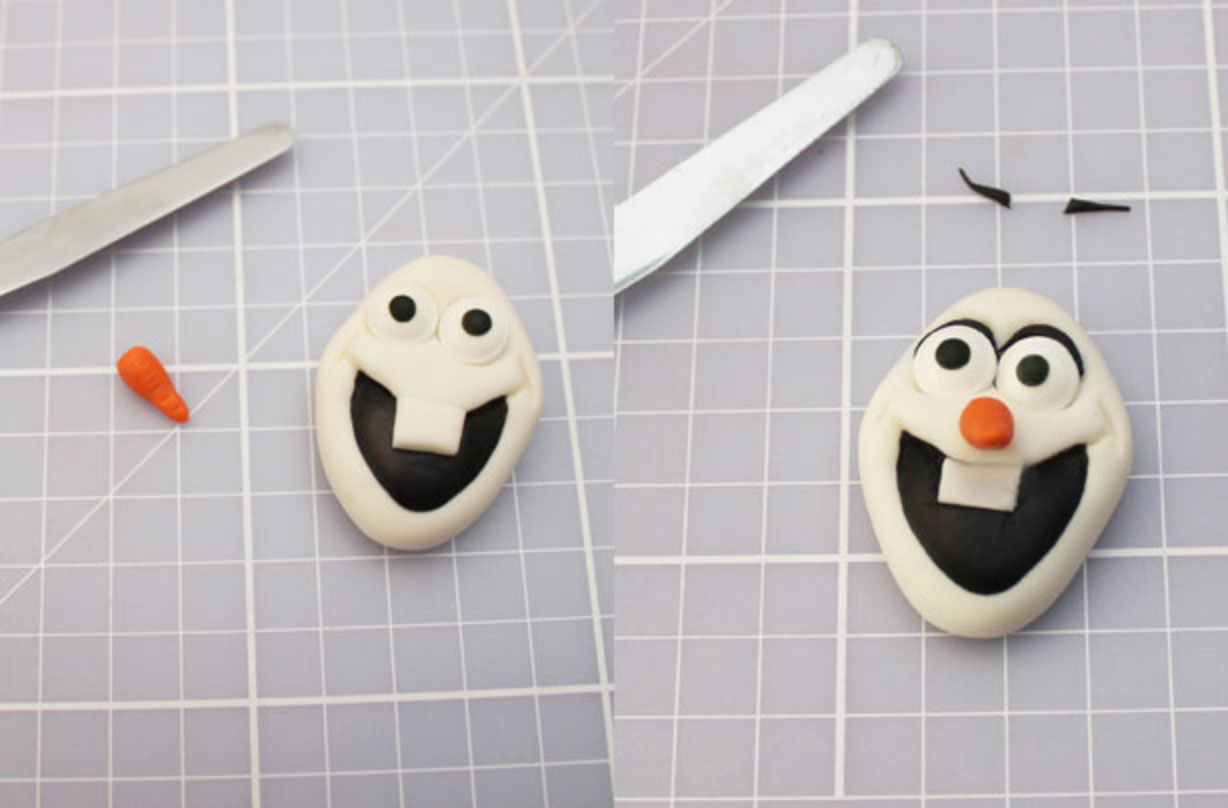
To make Olaf, mould a piece of white modelling paste into a diamond shape and add the Wilton candy eyes by sticking them with a dot of piping gel.
Step 9
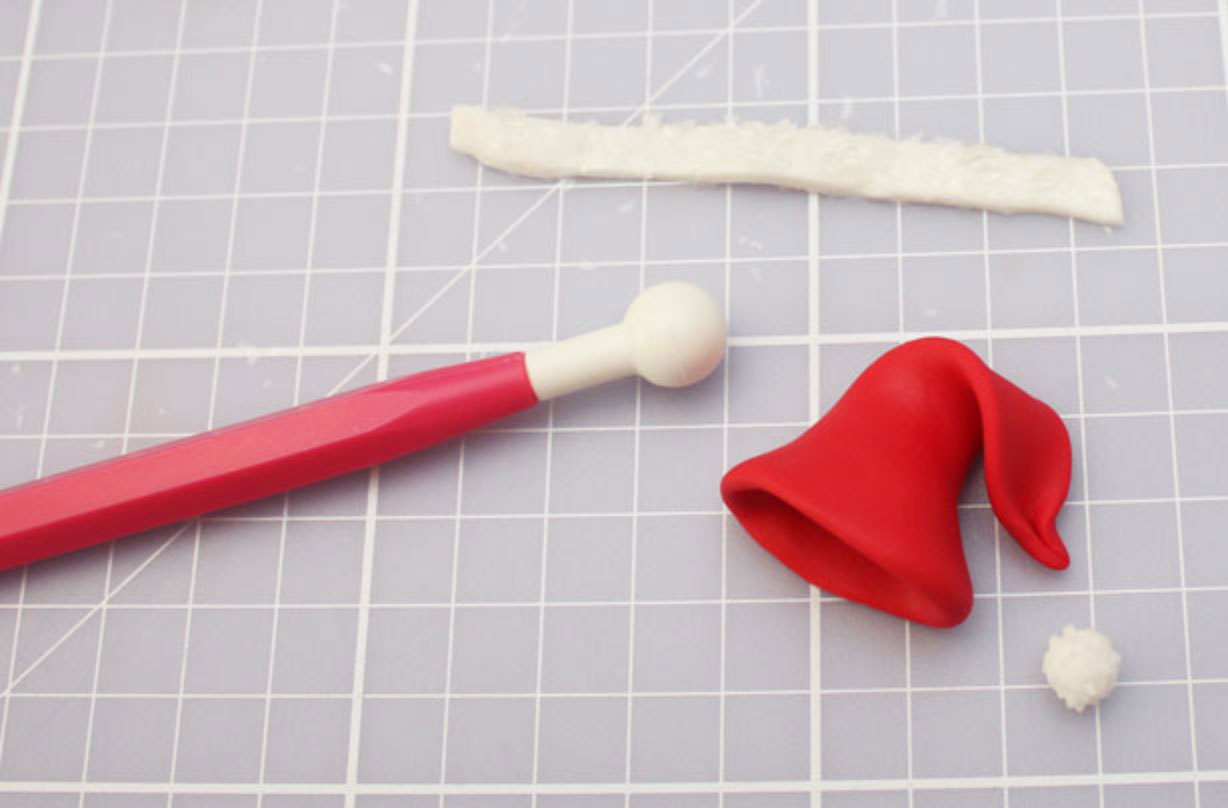
For the Christmas hat, roll 10g red paste into a cone shape. Roll the tapered end flat with the rolling pin and stick the sugar mimosa ball to the end for the bobble. Hollow out the centre of the hat with the ball tool. Cut a small strip of white paste and stick sprinkles to it before sticking around the bottom edge of the hat.
Step 10
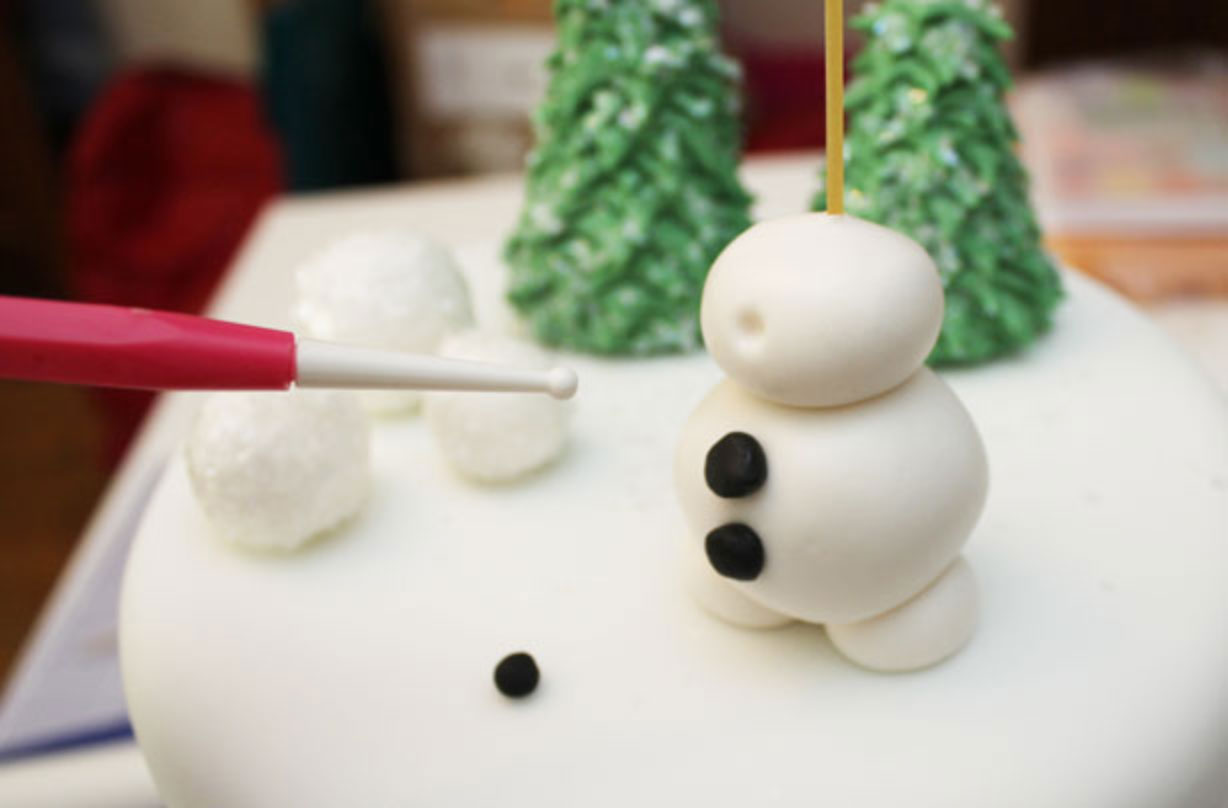
With a drop of piping gel, stick the trees and the snowballs onto the cake.
To make Olaf’s body, roll 2 small balls for the feet and then push the length of spaghetti into the cake between the feet - this will hold the body together.
Roll a large and a small ball of paste for the body and use the small ball tool to indent where the coal buttons will go. Stick the black fondant on with a dot of piping gel and brush around the top of the neck where the head is going to go.
Step 11
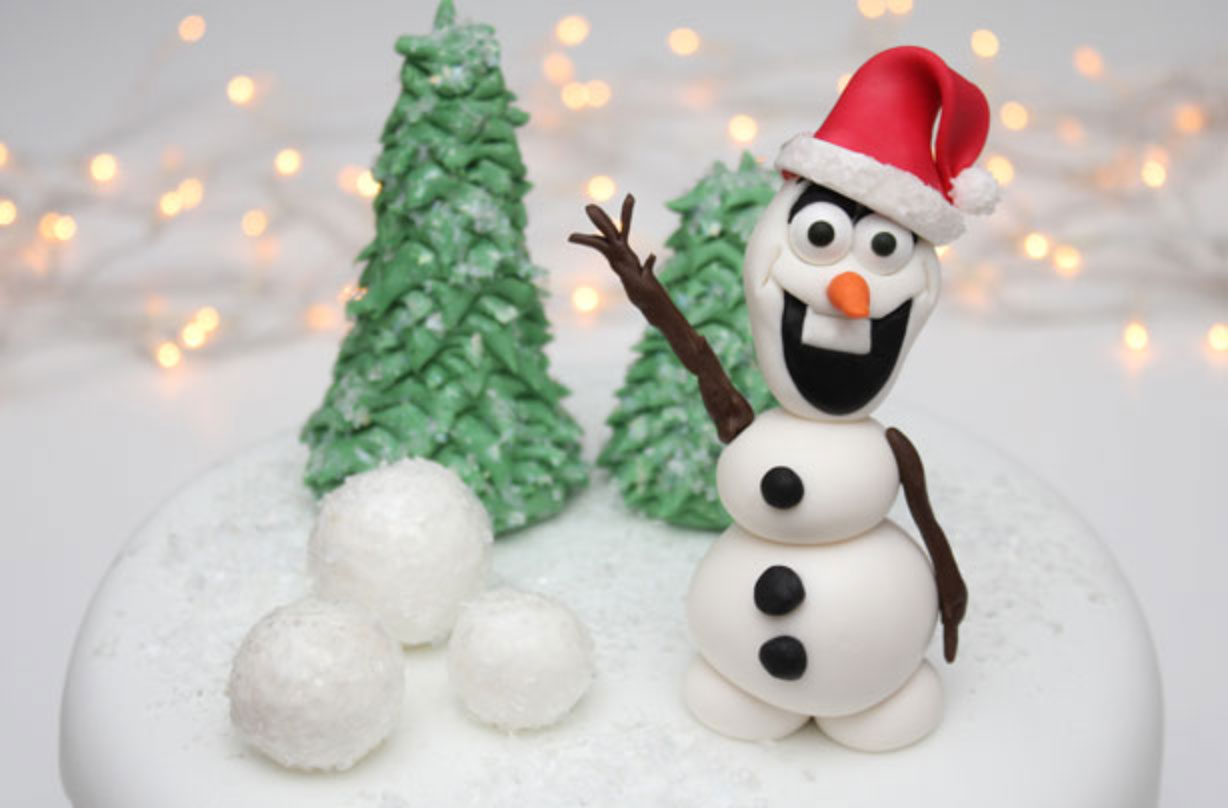
Push the head onto the spaghetti and trim the excess spaghetti off with a pair of scissors. Then with a brush of gel stick the hat to Olaf’s head.
To make the arms, divide the brown paste into two and roll one into a bobbly shaped stick. To cut the hands, add 2 snips in the ends of the paste for the fingers. For the waving arm, add some piping gel to a small length of spaghetti and roll the brown paste around the spaghetti, cutting in the same way for the fingers. Push the waving arm into the body and stick the other down the side of the body.
Step 12

Your cake is now ready to serve. It will stay fresh for up to 4 days and doesn’t need to be kept in the fridge.

Jessica Dady is Food Editor at GoodtoKnow and has over 12 years of experience as a digital editor, specialising in all things food, recipes, and SEO. From the must-buy seasonal food hampers and advent calendars for Christmas to the family-friendly air fryers that’ll make dinner time a breeze, Jessica loves trying and testing various food products to find the best of the best for the busy parents among us. Over the years of working with GoodtoKnow, Jessica has had the privilege of working alongside Future’s Test Kitchen to create exclusive videos - as well as writing, testing, and shooting her own recipes. When she’s not embracing the great outdoors with her family at the weekends, Jessica enjoys baking up a storm in the kitchen with her favourite bakes being chocolate chip cookies, cupcakes, and a tray of gooey chocolate brownies.