Birthday present cake
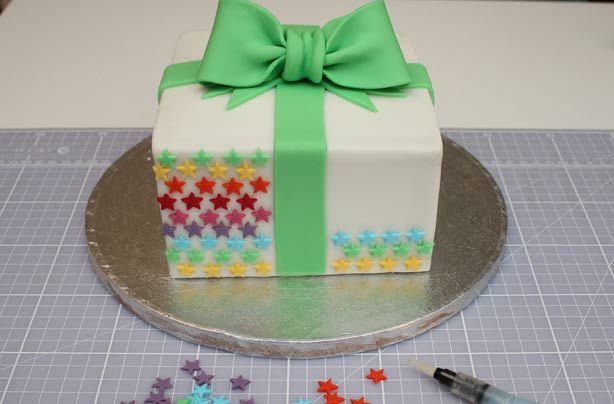

Learn how to make your own birthday present cake with our simple step-by-step recipe. This edible gift would make the perfect treat for the birthday boy or girl.
Change the colours of the fondant stars to suit the birthday theme.
Ingredients
For the cake:
- 240g butter
- 240g golden caster sugar
- 4 medium eggs
- 330g self-raising flour
- 1tsp vanilla bean paste
- ¼ jar raspberry jam
- Trex for fixing the cracked fondant
Fror the ganache:
- 200ml double cream
- 350g dark chocolate
For the decorations:
- 700g ready to roll white fondant
- 50g green modelling paste
- 50g various coloured modelling paste
- 2tbsp royal icing sugar
- A few drop of water
Step 1
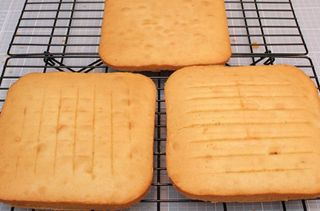
Preheat the oven to 160°C/320°F/Gas mark 3. Cream the butter and sugar together until light in colour and fluffy. Add one egg at a time with ¼ of the flour and mix until smooth. Repeat until all the eggs and flour have been incorporated. Add the vanilla and beat until evenly mixed. Divide the mixture into three.
Leave the cakes to cool completely on a wire rack. Once cooled. Wrap each cake individually in cling film and pop in the freezer for 1 hour.
Remove the cakes from the freezer and trim to 1 mm or 2 mm smaller than the cake card.
Step 2
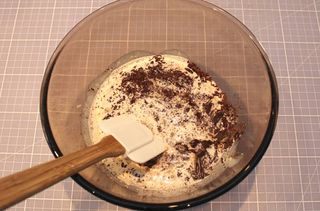
Finely chop the chocolate for the ganache. Cut the chocolate on baking paper, so you can pick it all and tip it into the bowl easily.
Heat the cream on a low heat and when it reaches a boil, pour over the chocolate, stirring gently until you have a shiny ganache.
GoodtoKnow Newsletter
Parenting advice, hot topics, best buys and family finance tips delivered straight to your inbox.
Step 3
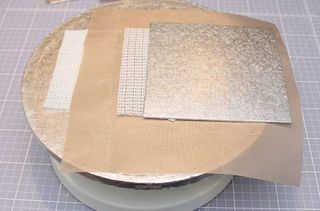
Using the re-useable baking paper, cut a square slightly larger than the cake card.
Set up your turntable like this with the larger cake board (just so you can pick the cake up easily) and the non slip in place.
Step 4
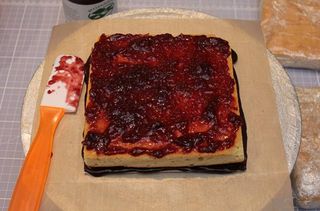
Spread the ganache onto the cake card and place the first layer on top of the ganache. Then spread the jam on the next layer.
Step 5
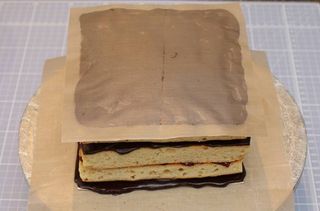
Once you have layered the cake add a reasonable amount of ganache to the top and then smooth the re-useable baking paper onto the top, smoothing it down with the palm of your hand.
Step 6
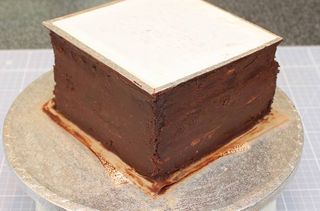
Then flip the cake over so the cake card is on the top. Add one thin layer of ganache between the cake cards. Don’t worry if it looks really messy at this stage, you’ll be able to smooth things out later.
Step 7
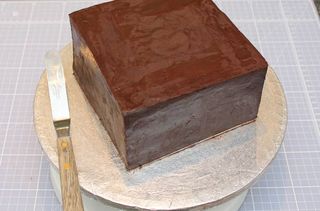
Add another layer of ganache and chill in the fridge for 30 minutes Remove and with a hot palette knife, dipped in boiling water, run the hot knife over the ganache to make it look smooth.
Step 8
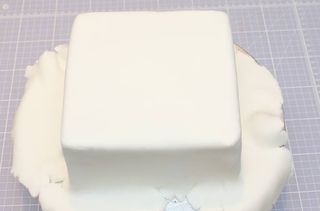
Cover your square with icing. Try if you can to gently stroke upwards as it stops the fondant tearing at the corners. Don’t worry if you have cracking around the top edge, you can fix this with a touch of trex and the fondant smoother.
Rub a touch of Trex in with a clean finger into where the fondant looks cracked and then smooth over in an upward motion with the smoothers.
Trim the excess with a pizza wheel and smooth the fondant with the flexi smoother.
Step 9
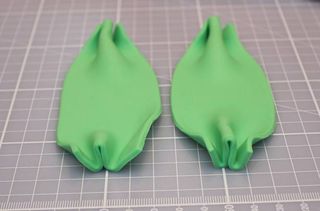
For the bow, cut two rectangles roughly 13 cm long. Fold the ends in a concertina shape like this.
Step 10
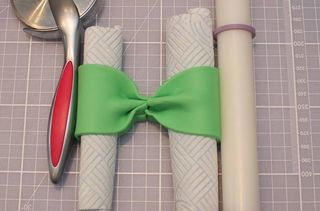
Fold the two ends to meet each other and stick with a brush of water. Once you’ve made your bow, leave it to dry with some kitchen towel ln the loops. Use the rolling pin and pizza cutter the hold the bow in a round shape.
Step 11
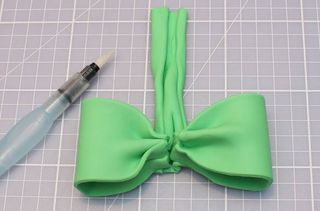
Cut a rectangle for the middle, now fold the edges in and put a couple of folds into the ribbon with the tips of your fingers, to make it look more realistic.
Wet the inside of the centre part and the wrap it around the centre.
Step 12
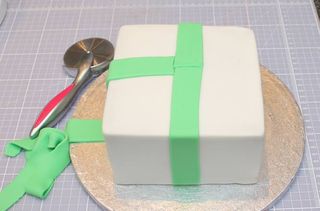
Cut 3cm strips for the strips of ribbon making sure you make the trimmed strips for the ribbon. Just cut a triangle out of one end with the sharp knife.
Add the bow to the top with a blob of royal icing sugar mixed with a few drops of water to make a thick paste, colour it green too so it’s not so noticeable.
Step 13
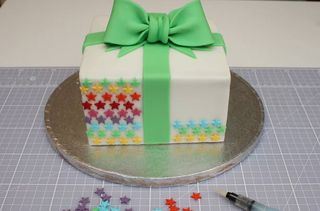
Cut the different colour stars from the coloured modelling paste and leave them to dry slightly as this will make them easier to pick up.
Glue them to the cake with a brush of water.

Jessica Dady is Food Editor at GoodtoKnow and has over 12 years of experience as a digital editor, specialising in all things food, recipes, and SEO. From the must-buy seasonal food hampers and advent calendars for Christmas to the family-friendly air fryers that’ll make dinner time a breeze, Jessica loves trying and testing various food products to find the best of the best for the busy parents among us. Over the years of working with GoodtoKnow, Jessica has had the privilege of working alongside Future’s Test Kitchen to create exclusive videos - as well as writing, testing, and shooting her own recipes. When she’s not embracing the great outdoors with her family at the weekends, Jessica enjoys baking up a storm in the kitchen with her favourite bakes being chocolate chip cookies, cupcakes, and a tray of gooey chocolate brownies.