How to make a Jubilee crown cake
What have you got planned to celebrate the Queen's Jubilee? Whether it's a big party or just a small celebration with friends, Woman's Weekly's impressive Jubilee crown cakewill be the perfect addition to the occasion.

This Jubilee crown cake is probably our most epically impressive creation for celebrating the Queen's Platinum Jubilee.
This cake was originally created for the Queen's Diamond Jubilee, back in 2012. However, it was so popular back then that we've revived it for this, her Platinum Jubilee year. The regal purple cushion forms the main part of the cake - and it's a whopper. It serves around 32 people. This project does take some dedication - you're looking at around 6 hours to make it. However, it's fun to do, and the reactions you get make it all worthwhile. This recipe takes you through the step-by-step of the decoration, but first you'll need to make the cake, with our Jubilee crown cake recipe.
Step 1
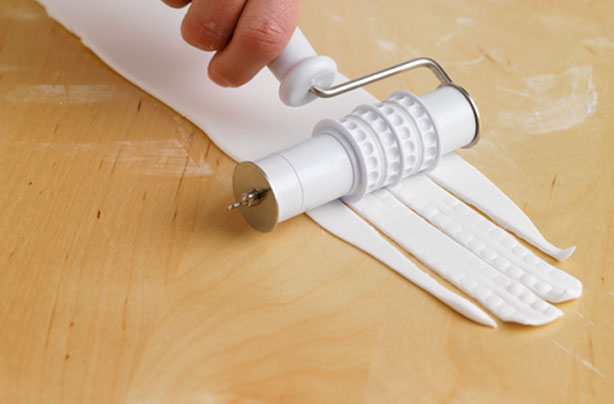
Partially inflate a balloon to the right size and knot the end. Place a small piece of sticky tape close to the knot. Cut a strip of shiny card and use tape to shape it into a ring for the balloon to sit in. Rub white vegetable fat over the balloon's surface and the white card. Knead the flower paste to soften it and then roll it out on a surface lightly dusted with cornflour. Use the ribbon cutter and embosser to cut 2 long strips.
Step 2
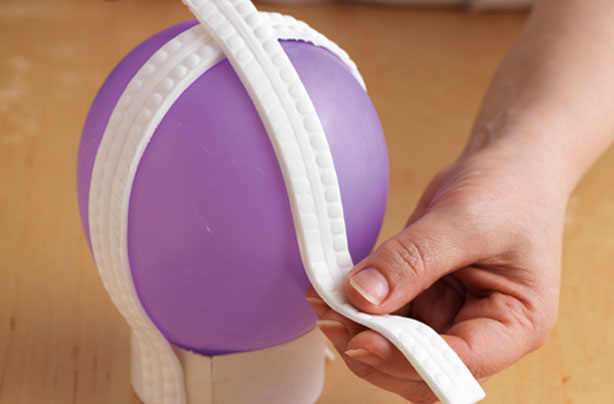
Lay one strip over the balloon and brush a little water at the top, then lay the other strip over it, pressing lightly where the water is, so that the strips stick together. Trim away the excess flower paste at the base.
Step 3
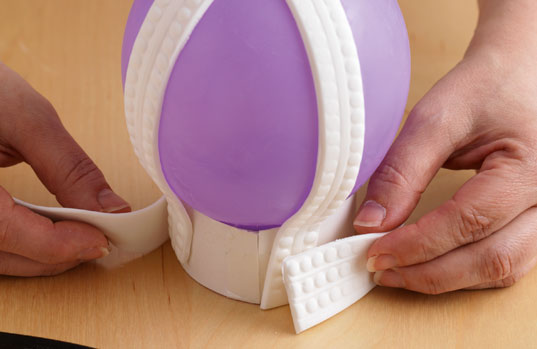
Use the cutter to make a wider strip for the base. Brush water on each of the 4 ends of the ribbons on the balloon and wrap the wider strip around the base, pressing it to the ribbon ends.Trim the base strip, so that its edges overlap slightly, and brush them with water to stick together.
step 4
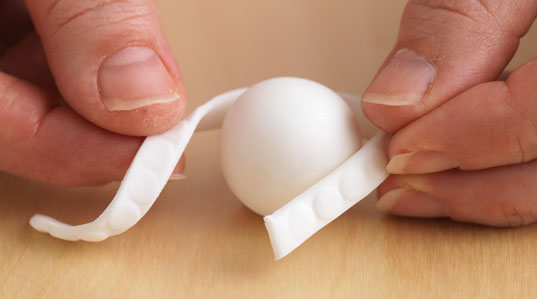
Roll a ball of flower paste and stick a narrow, embossed strip around it. Leave this and the crown to dry (at least overnight). When they are dry, carefully stick a pin into the sticky tape near the balloon?s knot and it should deflate slowly, but take care in case it goes off with a bang! Once deflated, the balloon should come out easily. Slide out the base's ring of card.
Step-5
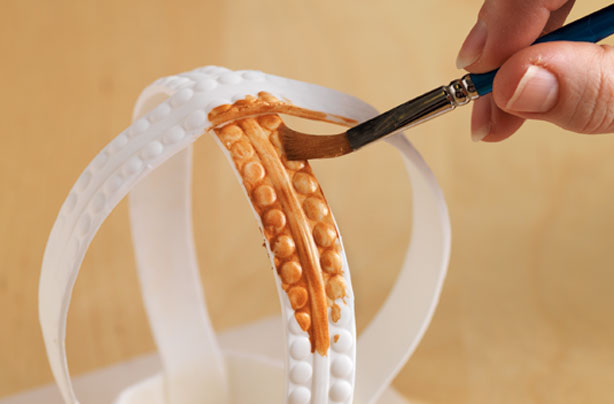
Mix some gold lustre colour with rose water and paint the crown both inside and out.
GoodtoKnow Newsletter
Parenting advice, hot topics, best buys and family finance tips delivered straight to your inbox.
Step 6
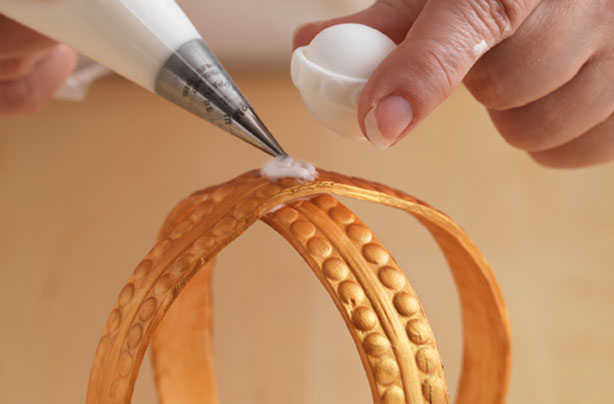
Use a little royal icing, in a piping bag fitted with the No. 2 piping tube, to stick the ball to the top of the crown and paint it gold, too. Leave to dry.
Step 7
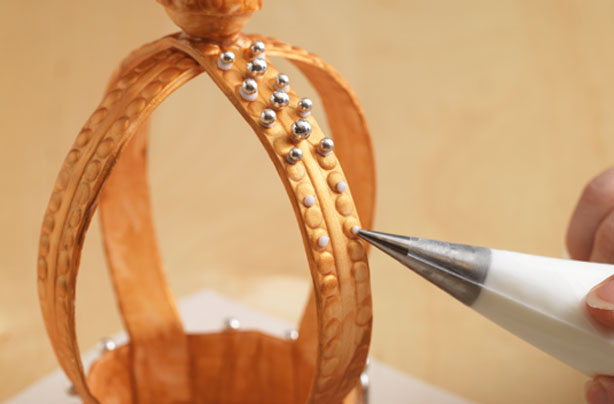
Pipe dots of royal icing on to the crown and decorate with the silver dragées and silver sugar-coated chocolate hearts. Leave to dry.
Step 8
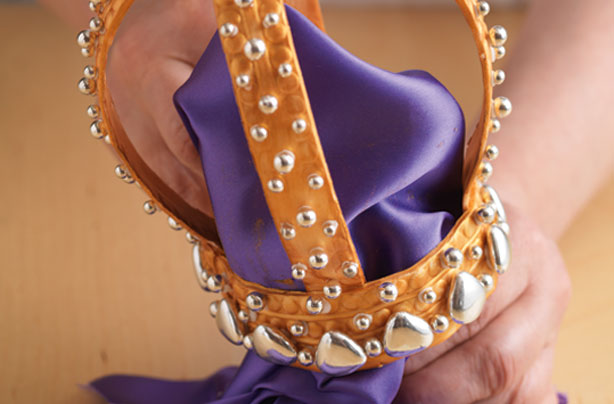
Scrunch up a piece of purple satin fabric and place it inside the crown, trimming the ends if it looks too bulky.
Step-9
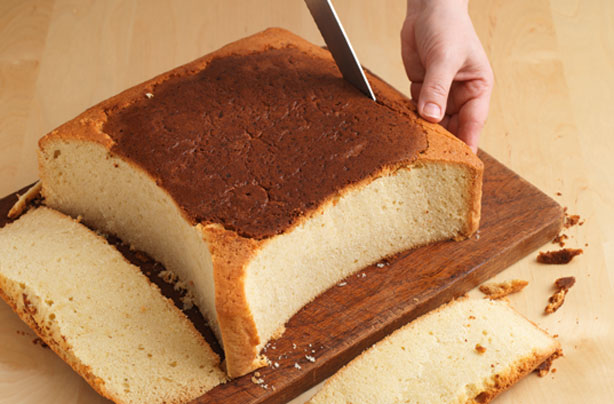
Use a bread knife to start carving the cake into shape by cutting curves in from each of the corners, keeping the knife vertical.
Step 10
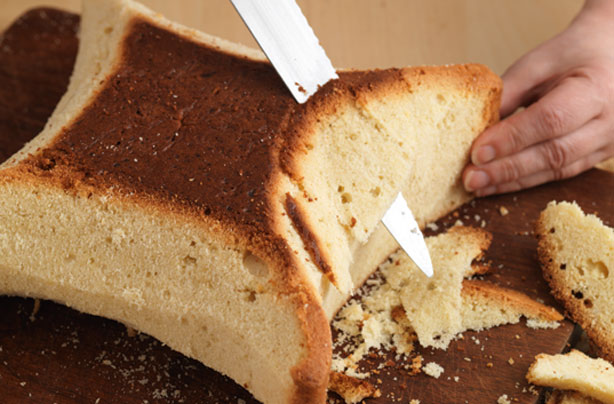
Angle the knife and cut away some of the top of the cake to chamfer it to half its depth, and then chamfer the lower half of the cake inwards under the cake. Discard the trimmings or use in a trifle.
Step 11
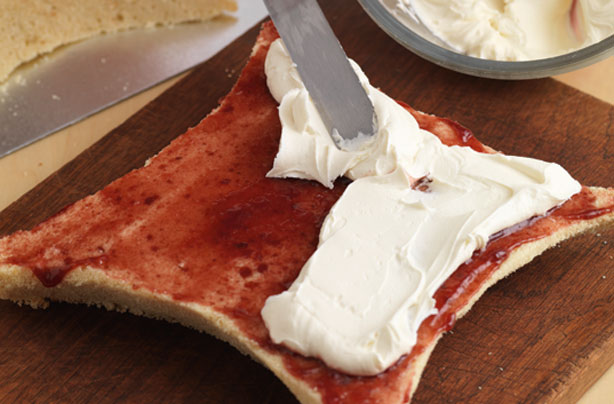
Cut the cake in half horizontally and spread jam over the bottom half. Spread most of the buttercream over the jam, taking care not to mix the jam into it.
Step 12
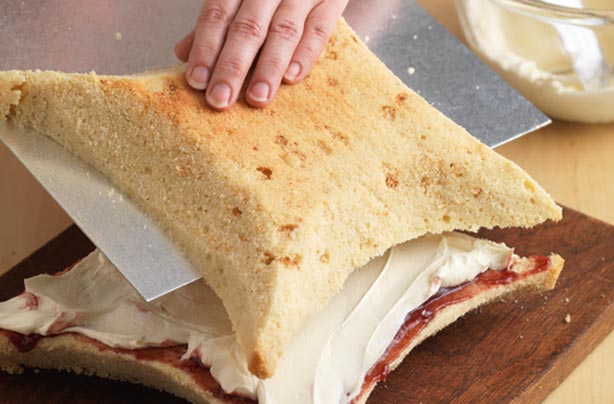
Slide the top half of the cake back in place. Place it on the cake drum or serving plate. Spread the remaining buttercream over the top and sides of the cake.
Step 13
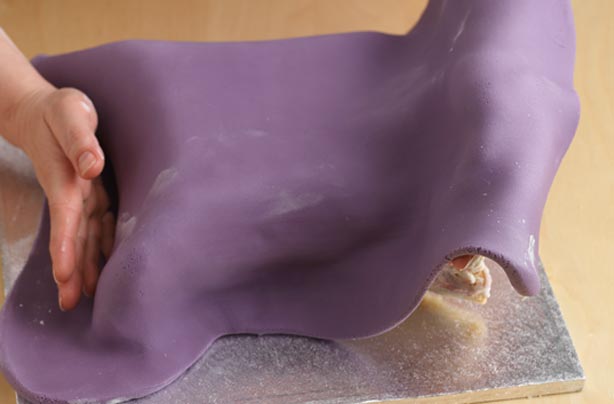
Knead the purple sugarpaste to soften it, and then roll it out on a surface lightly dusted with icing sugar,until it's large enough to cover the cake. Lift the sugarpaste over the cake and smooth it down over the top and then the sides, easing in the fullness at the corners. Tuck the sugarpaste under the cake against the angled sides and then cut it away where it touches the board. Rub the surface of the sugarpaste smooth with a flat hand.
Step 14
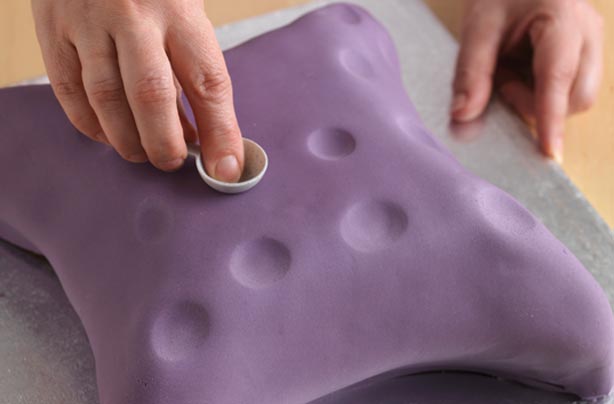
Use a small, round measuring spoon to make indentations for the buttons,or use your thumb, taking care not to stick your nail into the sugarpaste.
Step 15
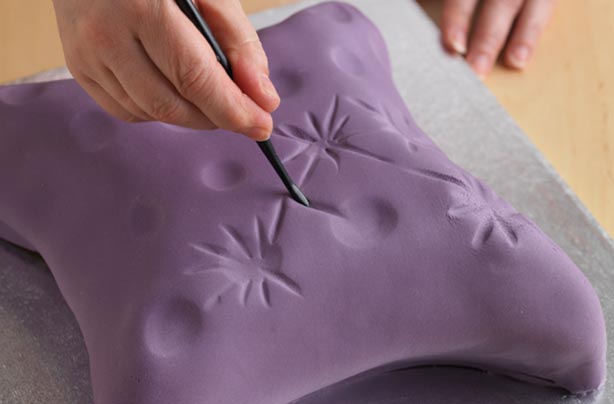
Use a veining tool to texture the sugarpaste around the button impressions. If you don?t have a veining tool,a cocktail stick will do.
Step 16
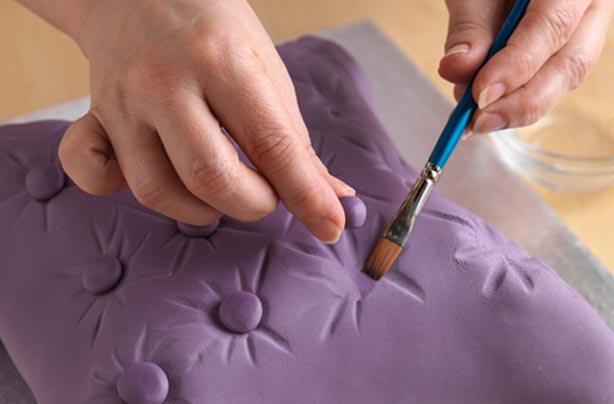
Roll balls of purple sugarpaste and flatten them slightly to create the buttons. Brush water into the impressions for the buttons and stick a button in each.
Step 17
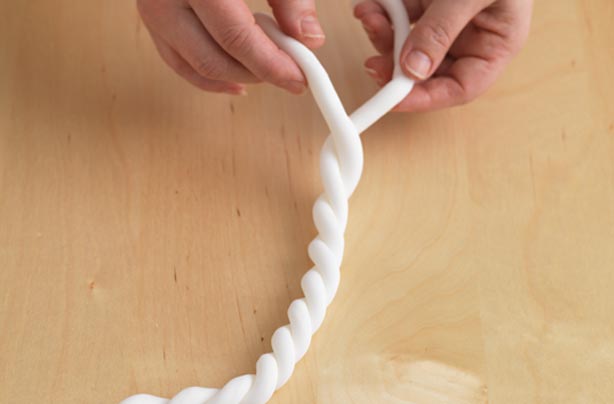
To make the ropes on the side, roll 2 long sausage shapes of white sugarpaste and twist them together.
Step 18
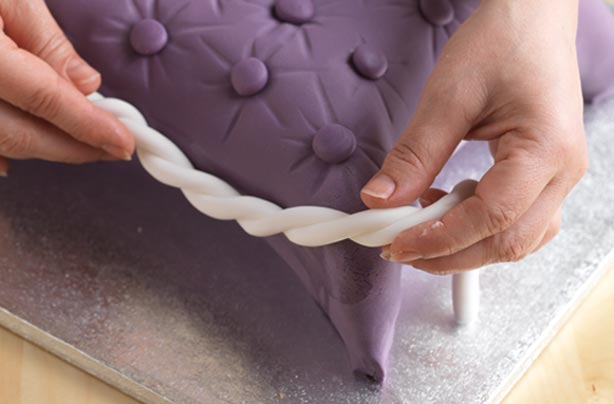
Brush water along the halfway ridge of one side of the cake, and then press the rope to it. Cut off the ends. Repeat for the other 3 sides.
Step 19
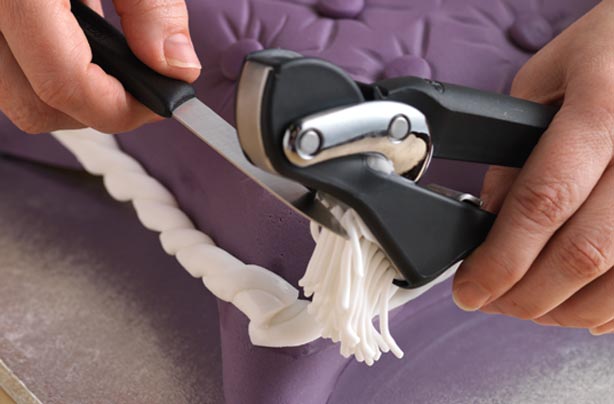
To make the tassels, soften some white sugarpaste by kneading it and press it through a clean garlic press. Brush water on to where the ropes join at the corners and stick on the tassels.
Step 20
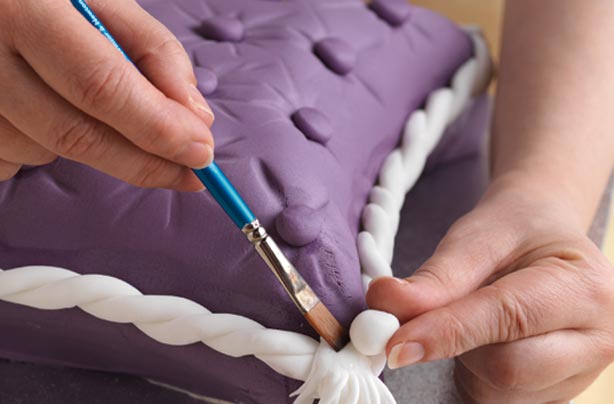
Roll a ball of sugarpaste and use water to stick it on to the top of the tassel.
Step 21
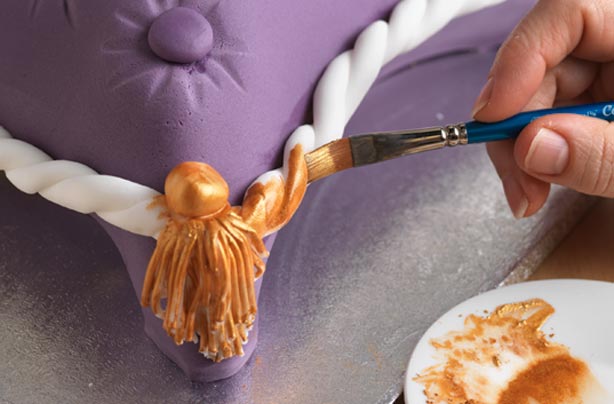
Paint the rope and tassel as for the crown with the gold lustre dust mixed with rose water.
Jubilee crown cake
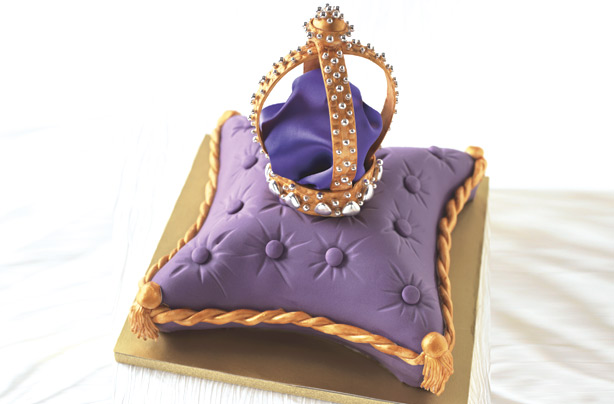
Use a little royal icing under the edges of the crown to stick it to the top of the cushion and there you have your Jubilee crown cake!
Top tip for making the Jubilee Crown cake
This crown, called St Edmund's crown, often sits on a red velvet cushion with golden trim, so you could switch up the colours for the cake. Use red icing for the main body of the cushion, and gold for the trim.
You might also like...
Jubilee cupcakes

Jessica Dady is Food Editor at GoodtoKnow and has over 12 years of experience as a digital editor, specialising in all things food, recipes, and SEO. From the must-buy seasonal food hampers and advent calendars for Christmas to the family-friendly air fryers that’ll make dinner time a breeze, Jessica loves trying and testing various food products to find the best of the best for the busy parents among us. Over the years of working with GoodtoKnow, Jessica has had the privilege of working alongside Future’s Test Kitchen to create exclusive videos - as well as writing, testing, and shooting her own recipes. When she’s not embracing the great outdoors with her family at the weekends, Jessica enjoys baking up a storm in the kitchen with her favourite bakes being chocolate chip cookies, cupcakes, and a tray of gooey chocolate brownies.