How to turn a paper plate into a rainbow


This kid-friendly rainbow craft is one of the easiest to make, all you need is a paper plate, some paint and glue.
With this fun paper plate rainbow craft, you and the kids can create fun rainbow hangers, with paper plates transformed into a shining sun or a happy cloud, to hang up in your child’s room or in your living room.
Add a touch of brightness to any space with our other fun rainbow crafts, like this one for making your own rainbow decorations.
How to turn a paper plate into a rainbow:
You will need:
- Paper plates
- Yellow paint
- Paintbrush
- Yellow and orange paper or card
- Scissors
- Ruler
- Pencil
- Rainbow tissue paper
- Pritt stick or PVA glue
- Pink colouring pencil
- Black felt tip pen
- Ribbon
- Washi tape
How to turn a paper plate into a rainbow:
1. Paint the reverse side of a paper plate with yellow paint and allow to dry completely. Once dry, cut the plate in half.
2. On the reverse of the yellow and orange card or paper, draw some triangles with the pencil and ruler. Cut out the triangles.
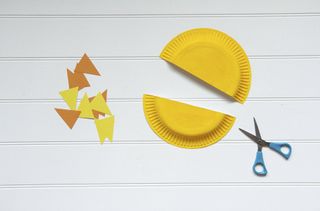
3. Apply some glue to the edge of the unpainted side of the paper plate and stick the cut out triangles on, alternating between orange and yellow. Allow to dry.
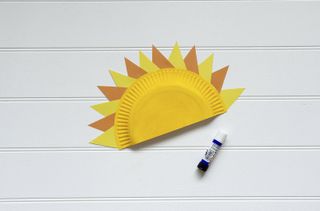
4. Cut the rainbow tissue paper pieces into 2cm wide strips. We’ve used red, pink, yellow, blue, dark blue and lilac for our rainbow but you can use whatever colours you have already.
GoodtoKnow Newsletter
Parenting advice, hot topics, best buys and family finance tips delivered straight to your inbox.
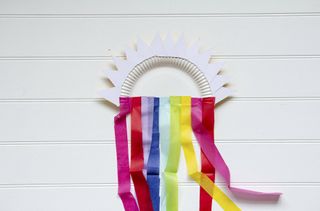
Glue the tissue paper strips to the bottom of the paper plate to form a rainbow cascade and allow to dry.
5. Using the black felt tip pen, draw on eyes and a mouth in the middle of the paper plate sun. With the pink colouring pencil, colour in rosy cheeks to make it look like the sun is blushing.

6. Cut a 30cm length of ribbon and fold in half. Secure at the back of the paper sun with a small piece of washi tape or some glue. Allow to dry if you’ve used glue before hanging.
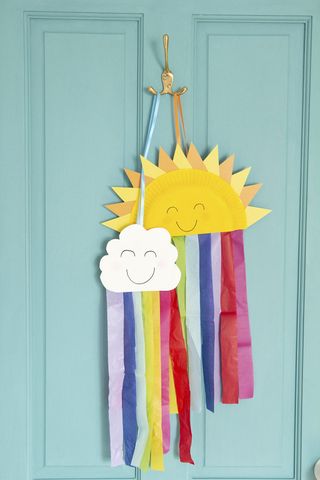
7. To create the cloud version, cut out a cloud shape from the paper plate instead. Omit the sun ray steps and continue from step 4 instead.

Esme is Future's resident craft expert, working across titles such as GoodTo, Woman&Home, Woman’s Weekly, Woman, Woman’s Own, Chat, Now, Pick Me Up and The Craft Network. Successfully turning her sewing hobby into a career, she's adept in a number of crafts, including sewing, papercraft, calligraphy, embroidery and printing.