How to sew a llama toy
Stitch this lovable fluffy llama friend with the brightest of accessories
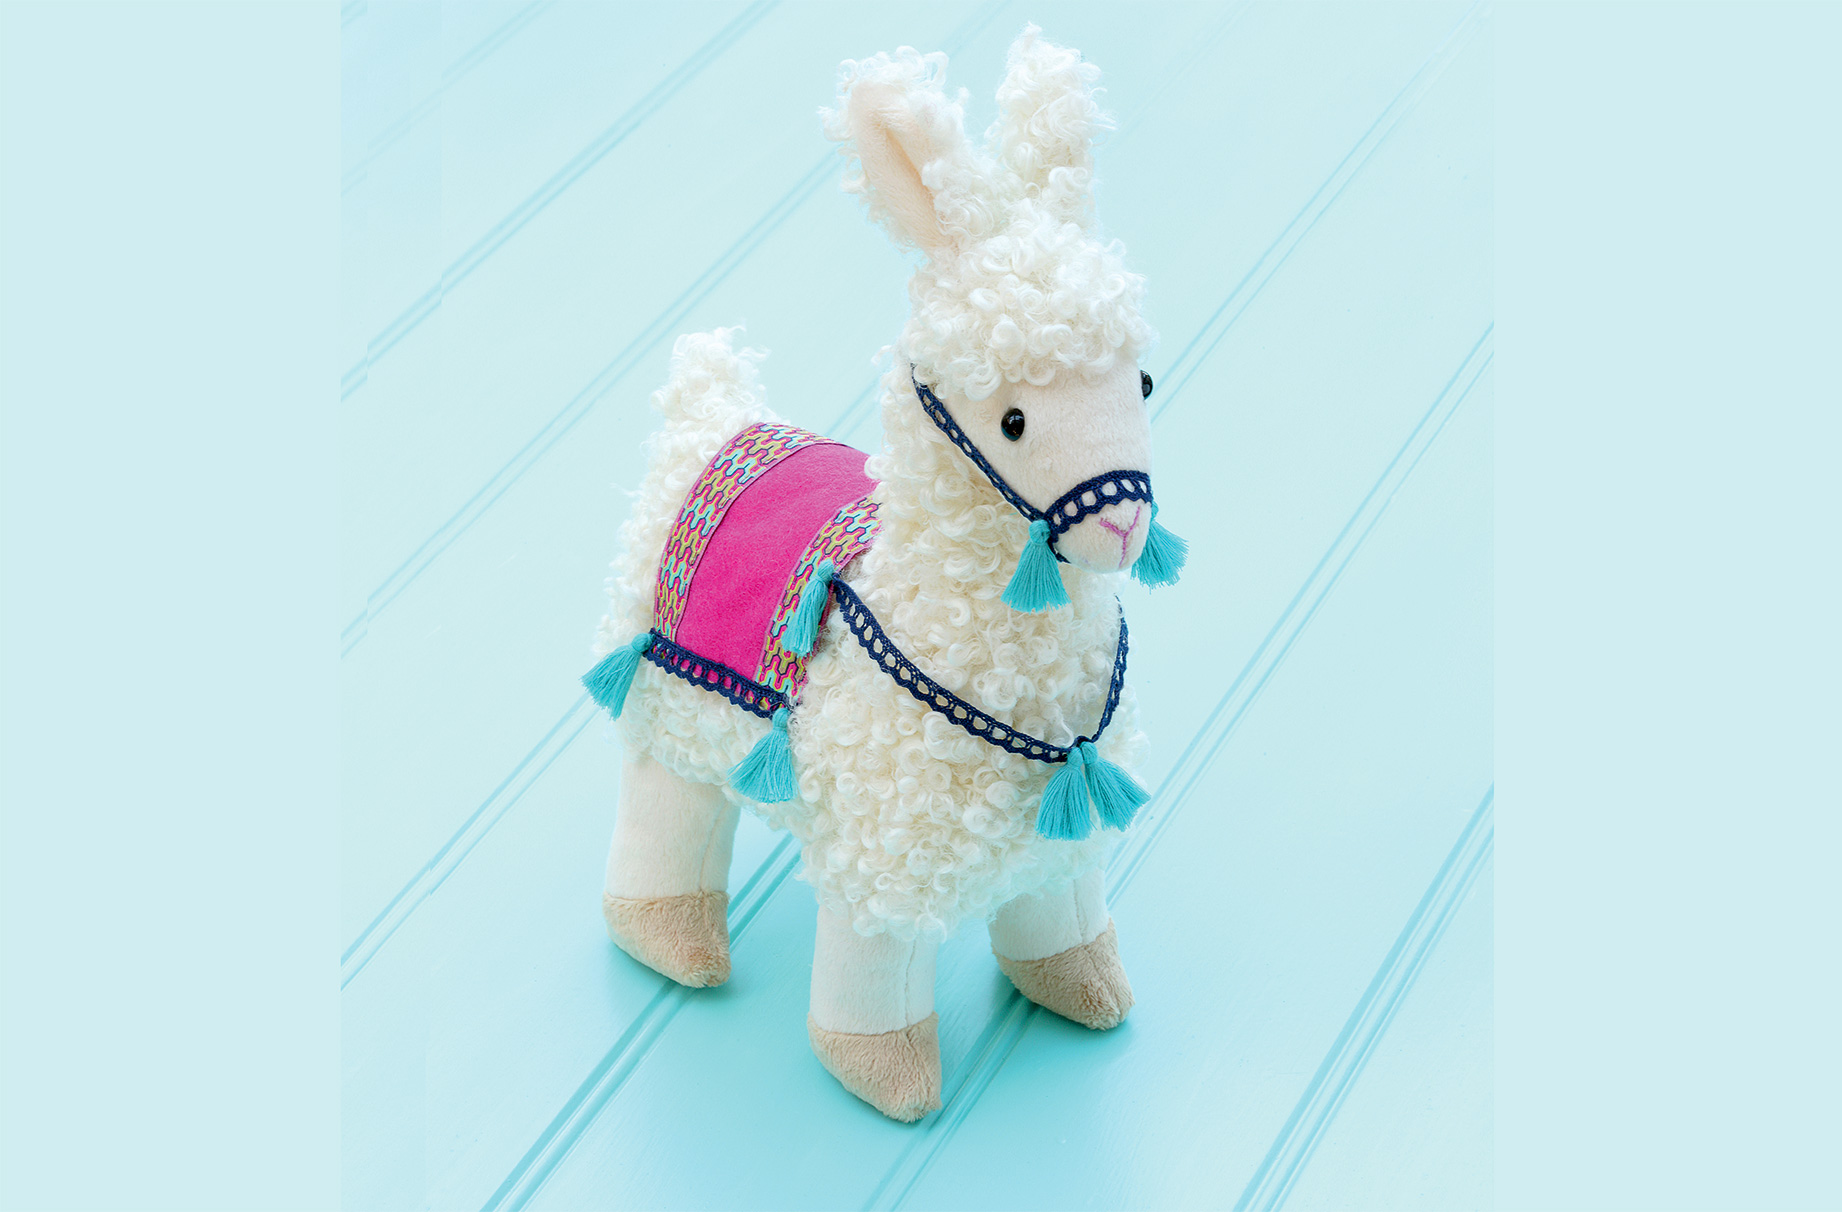

Stitch this lovable fluffy llama friend with the brightest of accessories
Have a go at learning how to sew our llama toy called Luca. He makes the perfect special gift for children, just remember to omit the tassels and chest strap if making the llama for a small child. His bright and bold saddle is sure to impress little ones.
If you love making this llama toy, then why not have a go at some of our other toy sewing tutorials? Like this traditional teddy bear, elephant toy, or floppy bunny to sew.
You will need:
Finished size: 31x26cm
- Llama toy template printed at 100% - Download PDF
- Tracing paper and pencil
- 50x35cm rectangle (⅛m) of cream curly 15mm pile fur fabric
- 50x35cm rectangle (⅛m) of ivory 3mm mini long pile minky style fabric
- 35x25cm rectangle (1/16m) of beige 3mm mini long pile minky style fabric
- Two 9mm black toy safety eyes
- Pink stranded cotton embroidery thread
- 16x7.5cm rectangle of pink felt
- 40cm of 1.8cm-wide patterned ribbon
- 90cm of navy 8mm-wide lace trim
- Five pairs of 3cm tassels
- Matching sewing threads
- Toy filling
For craft supplies, check out John Lewis & Partners
How to sew the llama toy:
Note: Take a 6mm seam allowance. Pin seams before stitching with lots of pins because the layers of fur fabric are prone to move otherwise. Using a ballpoint needle on the sewing machine, join pieces with right sides together and edges level, matching notches and dots. After stitching use a pin to release any curly fur caught in the seam. Press the fabric face down on a towel with a cool iron to avoid flattening fur pile.
Step 1
GoodtoKnow Newsletter
Parenting advice, hot topics, best buys and family finance tips delivered straight to your inbox.
Pin each curly fur ear to a minky style ear. Stitch the outer edge A-A, leaving the lower short edge open. Clip the corner, snip the curves then turn right side out. Fold the ears in half with the minky style ears inside, pin the lower folded edges together. Pin and tack each ear to a head, matching A and B.
Step 2
Tack, then stitch the heads and bodies together C-A-B-D. Snip the curves, and press seams toward the heads.
Step 3
Stitch the tails together E-F, leaving the notched edge open. Snip the curves and turn right side out. Tack the tail to the right side of one body E-F.
Step 4
Stitch the hooves to the legs G-H. Press the seams open. Stitch the front legs to the bodies and tummies from I to the dot at J. Stitch the back legs to the bodies and tummies from the dot at K to L. Press the seams toward the legs.
Step 5
Pin, tack, and stitch the bodies together M-C-E-F-N. Snip the curves.
Step 6
Make a tiny hole at the eye crosses on the face. Insert the shank of the toy eyes through the hole from the right side. Fix in place on the wrong side with its locking washer, pushing it down as far as it will go. Pin the face to the body. Stitch this seam by hand with a backstitch starting and finishing at the dots at O, stitch O-D-M-D-O. Snip the curves. Press seam toward the body.
Step 7
Fold the face in half along the fold line. Pin and stitch P-O-Q. Snip the curves. Finger press the seam open. To finger press, open the seam and run a moistened finger along it. Leave to dry before handling.
Step 8
Stitch the tummies together Q-N, leaving a gap between the crosses. Snip the curves, press the seam open.
Step 9
Pin the tummy to one body, legs, and hooves. Pin and stitch Q-I-G-R then stitch S-H-J-K-G-R then stitch N-L-H-S. Repeat to stitch the other half of the tummy to the other body, legs, and hooves. Snip bodies and tummies to J and K. Snip the curves. Press seams open.
Step 10
Stitch the hooves together along the bases. Finger press the seams open. Fold the hooves diagonally to match the end of the base seams to R and S. Stitch R-R and S-S.
Step 11
Turn the llama right side out. Stuff the llama evenly with toy filling. Slip stitch the gap closed.
Step 12
Refer to the pattern to mark the nose and mouth with a row of pins. Embroider the nose and mouth with a stem stitch using three strands of pink embroidery thread.
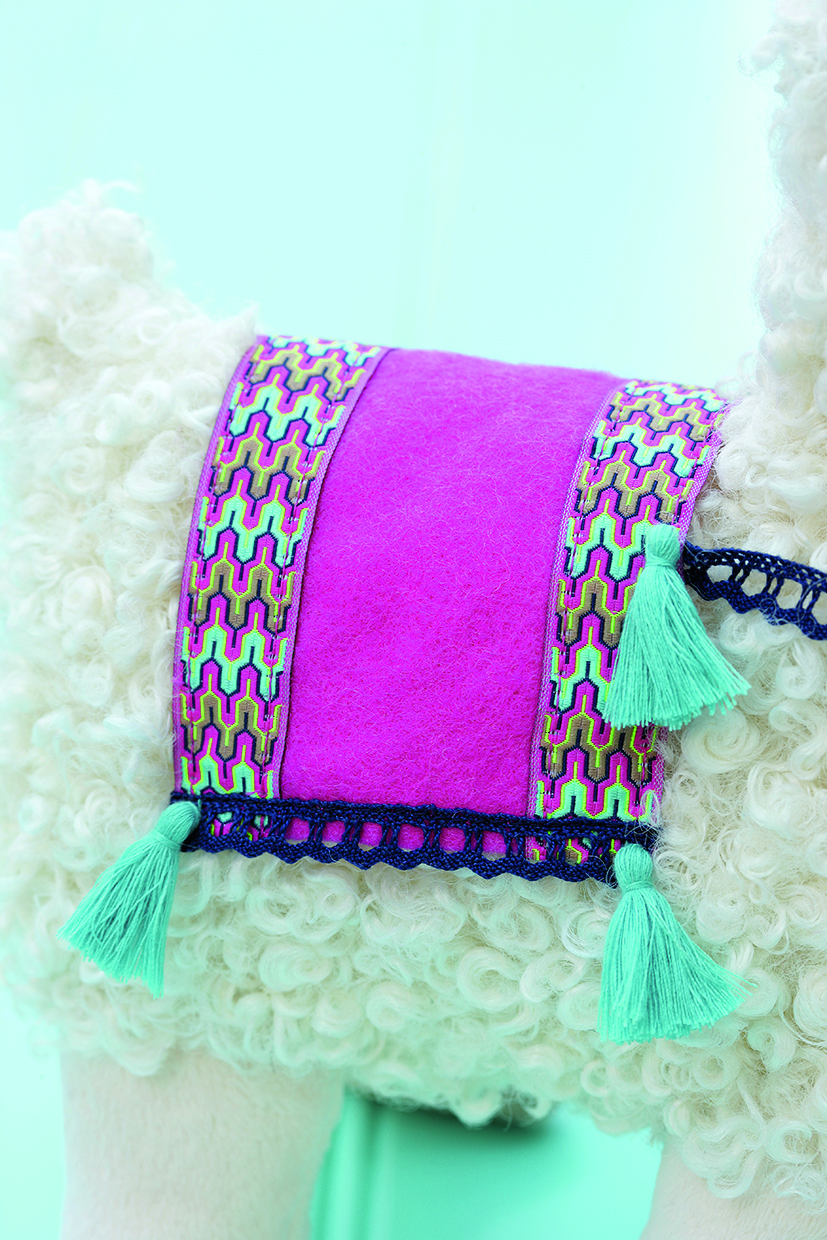
How to make the llama saddle and bridle:
Step 1
With right sides facing up, pin and tack patterned ribbon to the long edges of the saddle with 1cm of ribbon extending beyond the short edges of the saddle. Turn the ends of the ribbon to the underside of the saddle and tack in place. Stitch 3mm inside the long edges of the ribbon.
Step 2
Pin and tack lace trim to the saddle with the scalloped edge level with the short edges of the saddle and 1cm of lace extending beyond the long edges of the saddle. Turn the lace ends to the underside of the saddle and tack in place. Stitch close to the long straight edge of the lace. Sew a tassel to each corner of the saddle.
Step 3
Pin the saddle over the llama’s body. Sew the saddle securely to the body at the corners. To make a chest strap, pin one end of lace trim under the front of the saddle 5cm above the short edge. Take the lace trim around the llama’s chest and pin it under the other side of the saddle 5cm above the short edge. Cut off the excess lace. Sew the lace ends under the saddle, sew a tassel on top. Sew a pair of tassels to the centre of the chest strap.
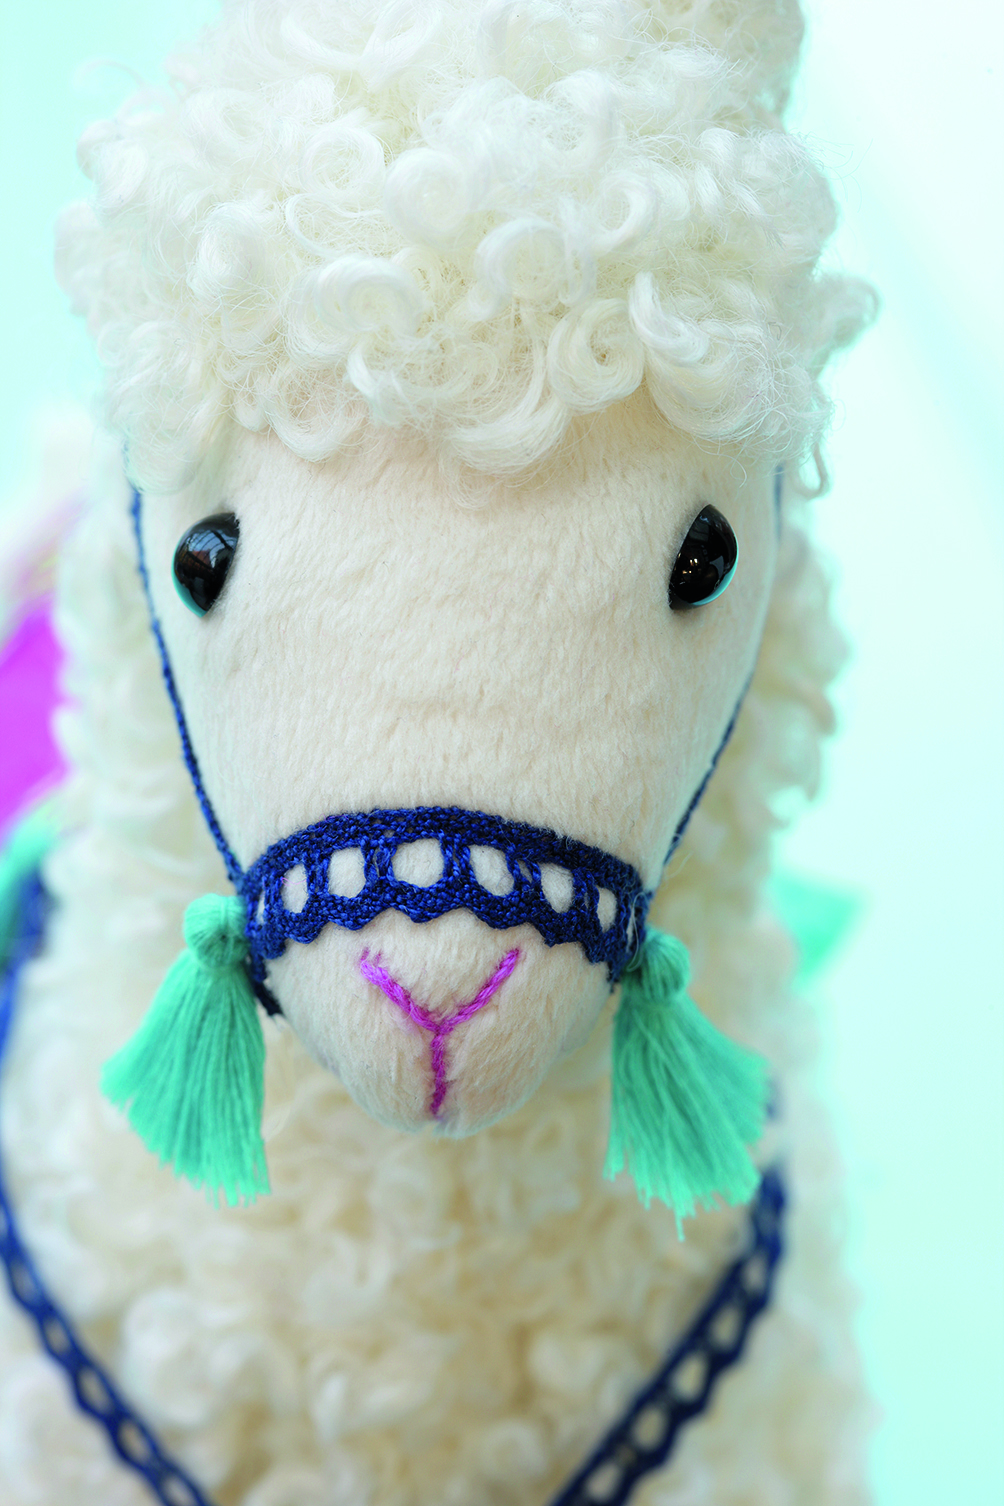
Step 4
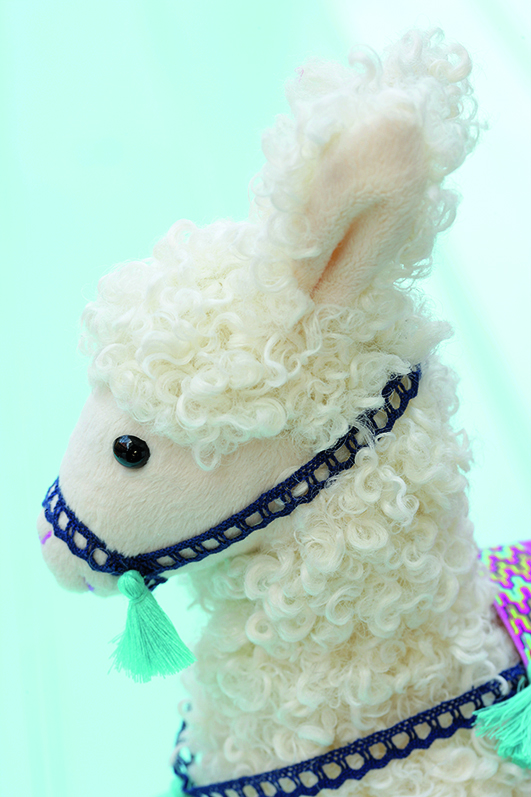
Using the photos as a guide, pin lace trim around the nose, overlapping the ends on one side of the head, cut off the excess. Pin lace trims around the back of the neck as a bridle, pinning the ends to the noseband, cut off the excess. Sew securely to the llama at the intersections. Sew a tassel at the intersections.

Esme is Future's resident craft expert, working across titles such as GoodTo, Woman&Home, Woman’s Weekly, Woman, Woman’s Own, Chat, Now, Pick Me Up and The Craft Network. Successfully turning her sewing hobby into a career, she's adept in a number of crafts, including sewing, papercraft, calligraphy, embroidery and printing.