How to make mosaic planters
Bring your kitchen windowsill to life by lining up fresh herbs in these attractive mosaic planters
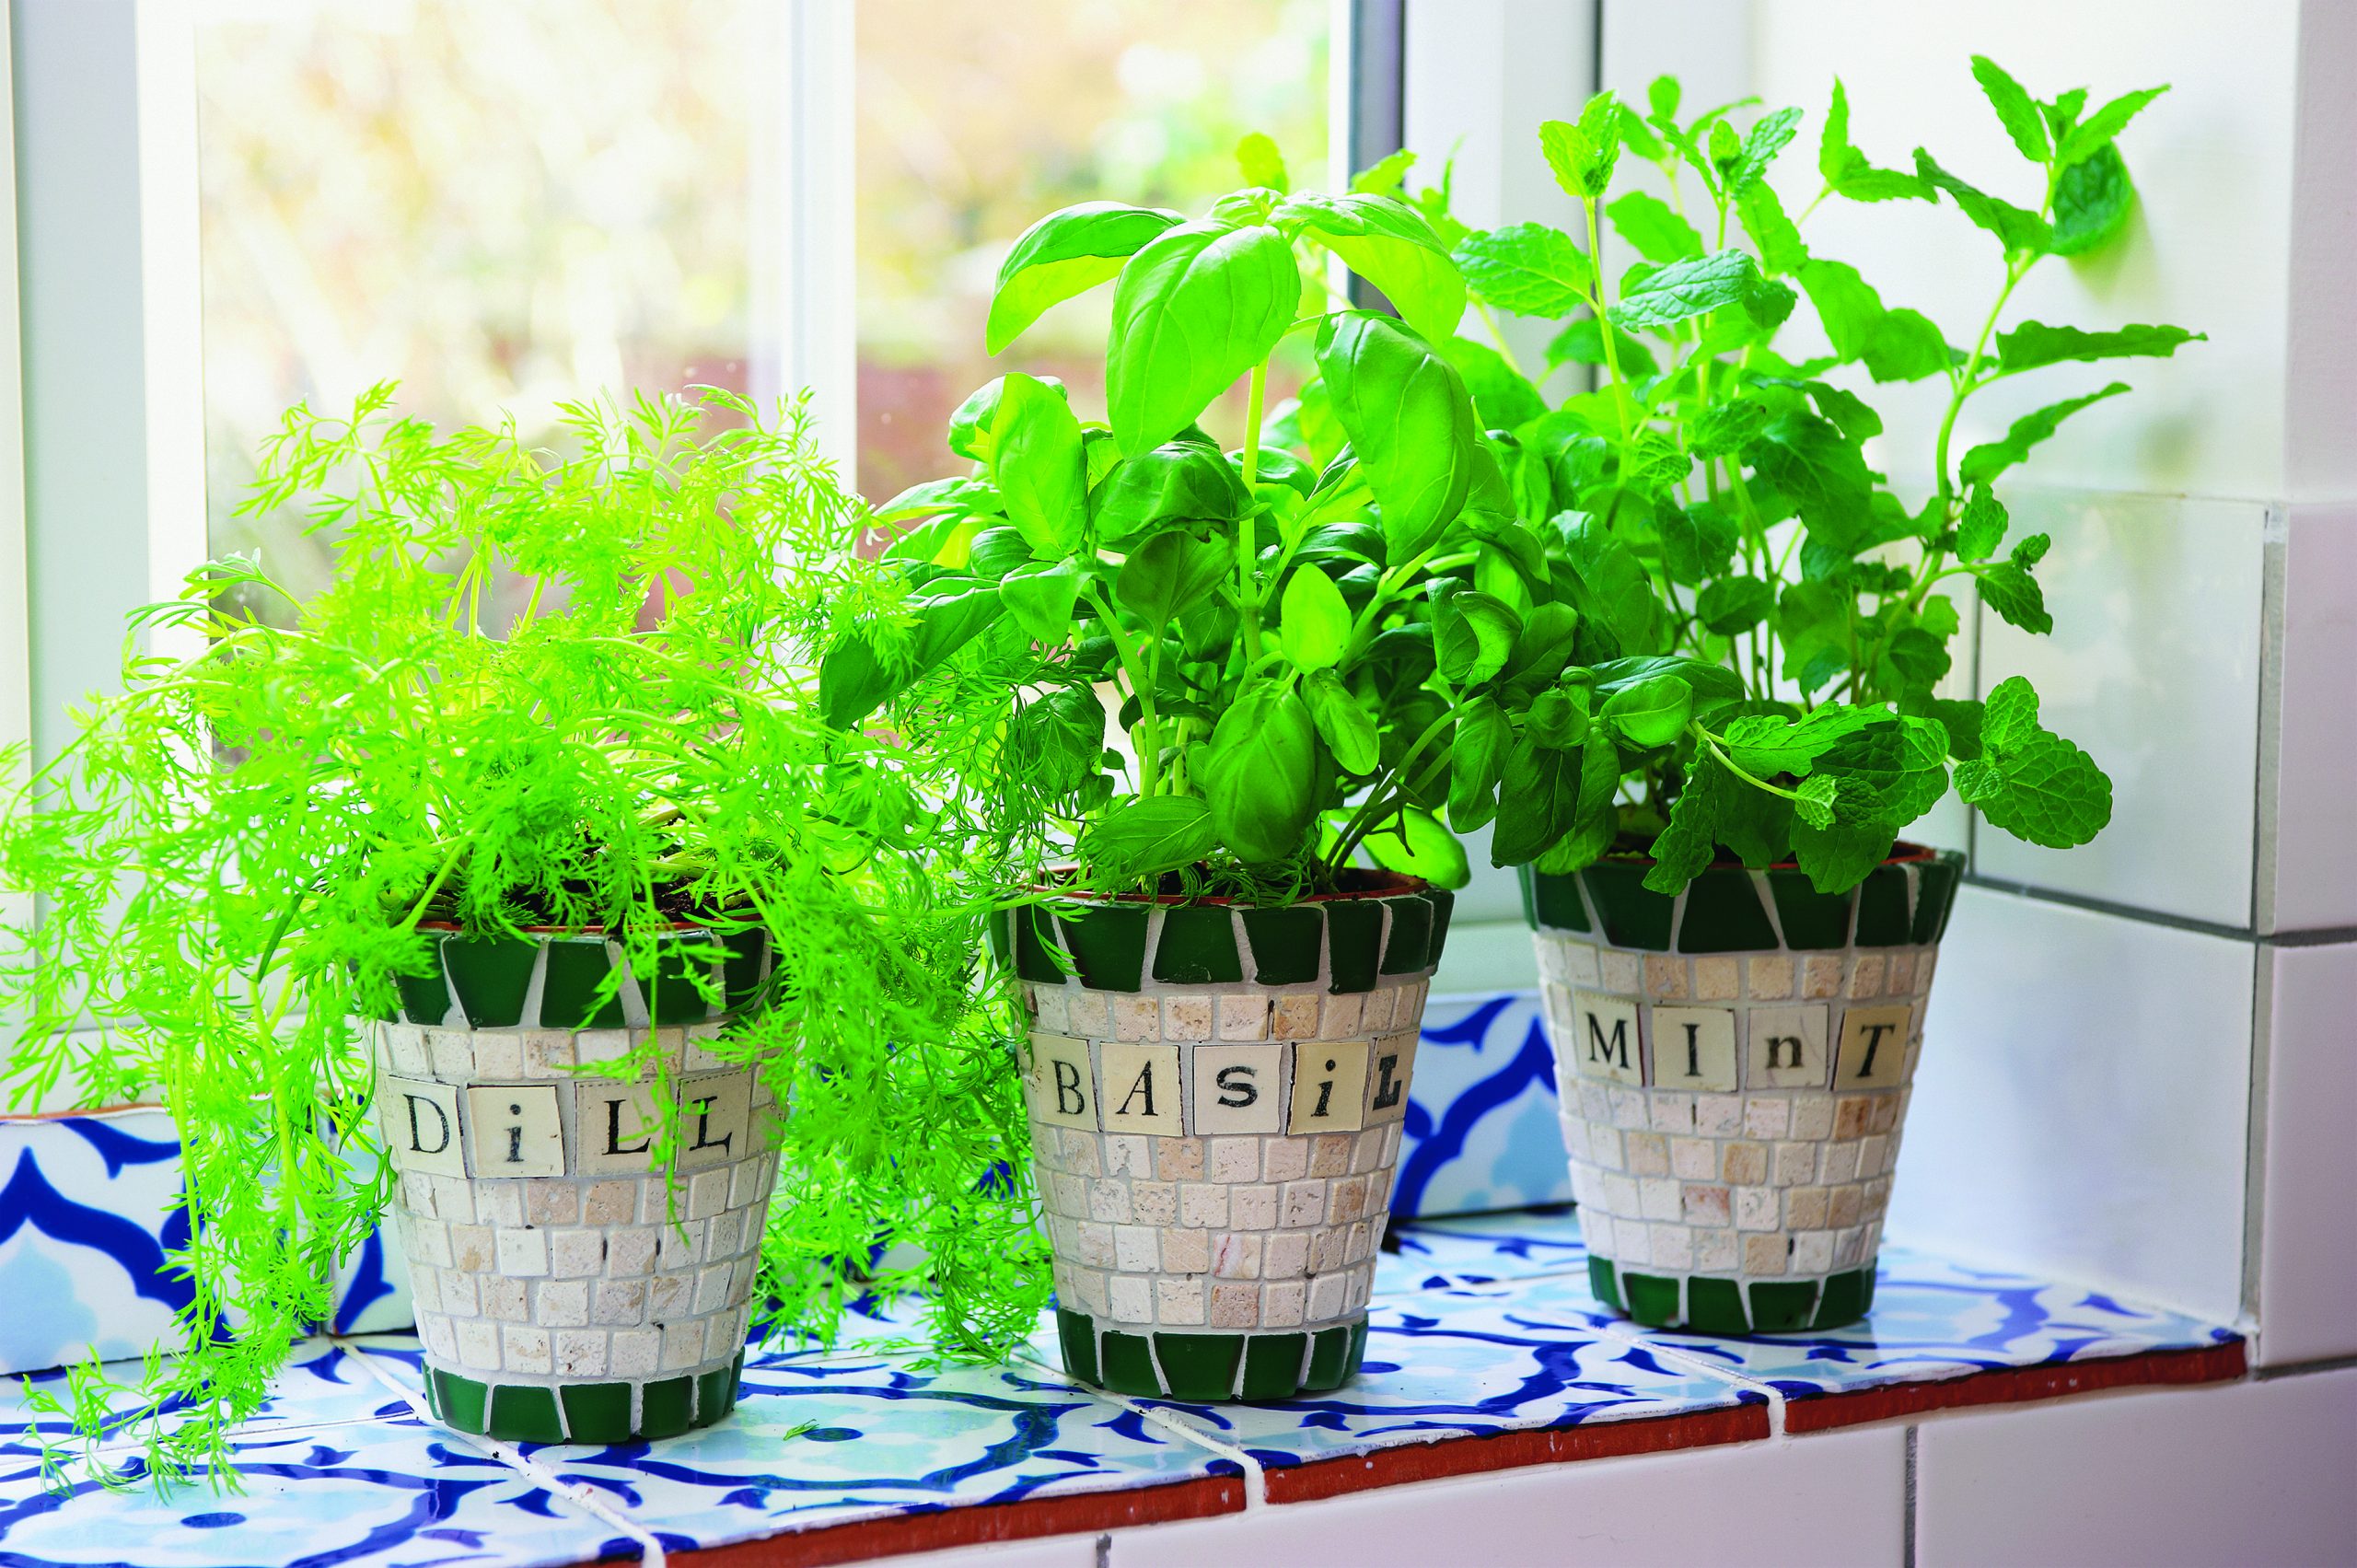

Bring your kitchen windowsill to life by making these attractive mosaic planters filled with fresh herbs
Spruce up a set of plain planters with this mosaic craft project. Plant up a trio of herbs to keep on your kitchen windowsill.
If you love the mosaic look but can't get hold of any tiles, think about upcycling some kitchen tiles leftover from a project or renovation. This trio of tile planters is perfect for sprucing up a display of greenery.
Looking for something a little more child-friendly? While you make your mosaics, give the kids their own plant pot project with these house number planters or plant pot pets to make. They'll look fab on a front door step or balcony.
To make your mosaic planters you will need:
- 30 frosted green beach glass tiles
- One ‘long tom’ terracotta pot
- Approximately 175 10x10x4mm beige honeycomb marble tiles
- Your choice of letter mosaic tiles
- One tube silicone adhesive (will do several pots)
- 1kg silver grey grout
- Disposable gloves
- Protective face mask
- Craft knife or skewer
- Old pot for mixing grout
- Stick to mix grout
- Newspaper
For craft supplies, check out Wilko
How to make mosaic planters:
Step 1
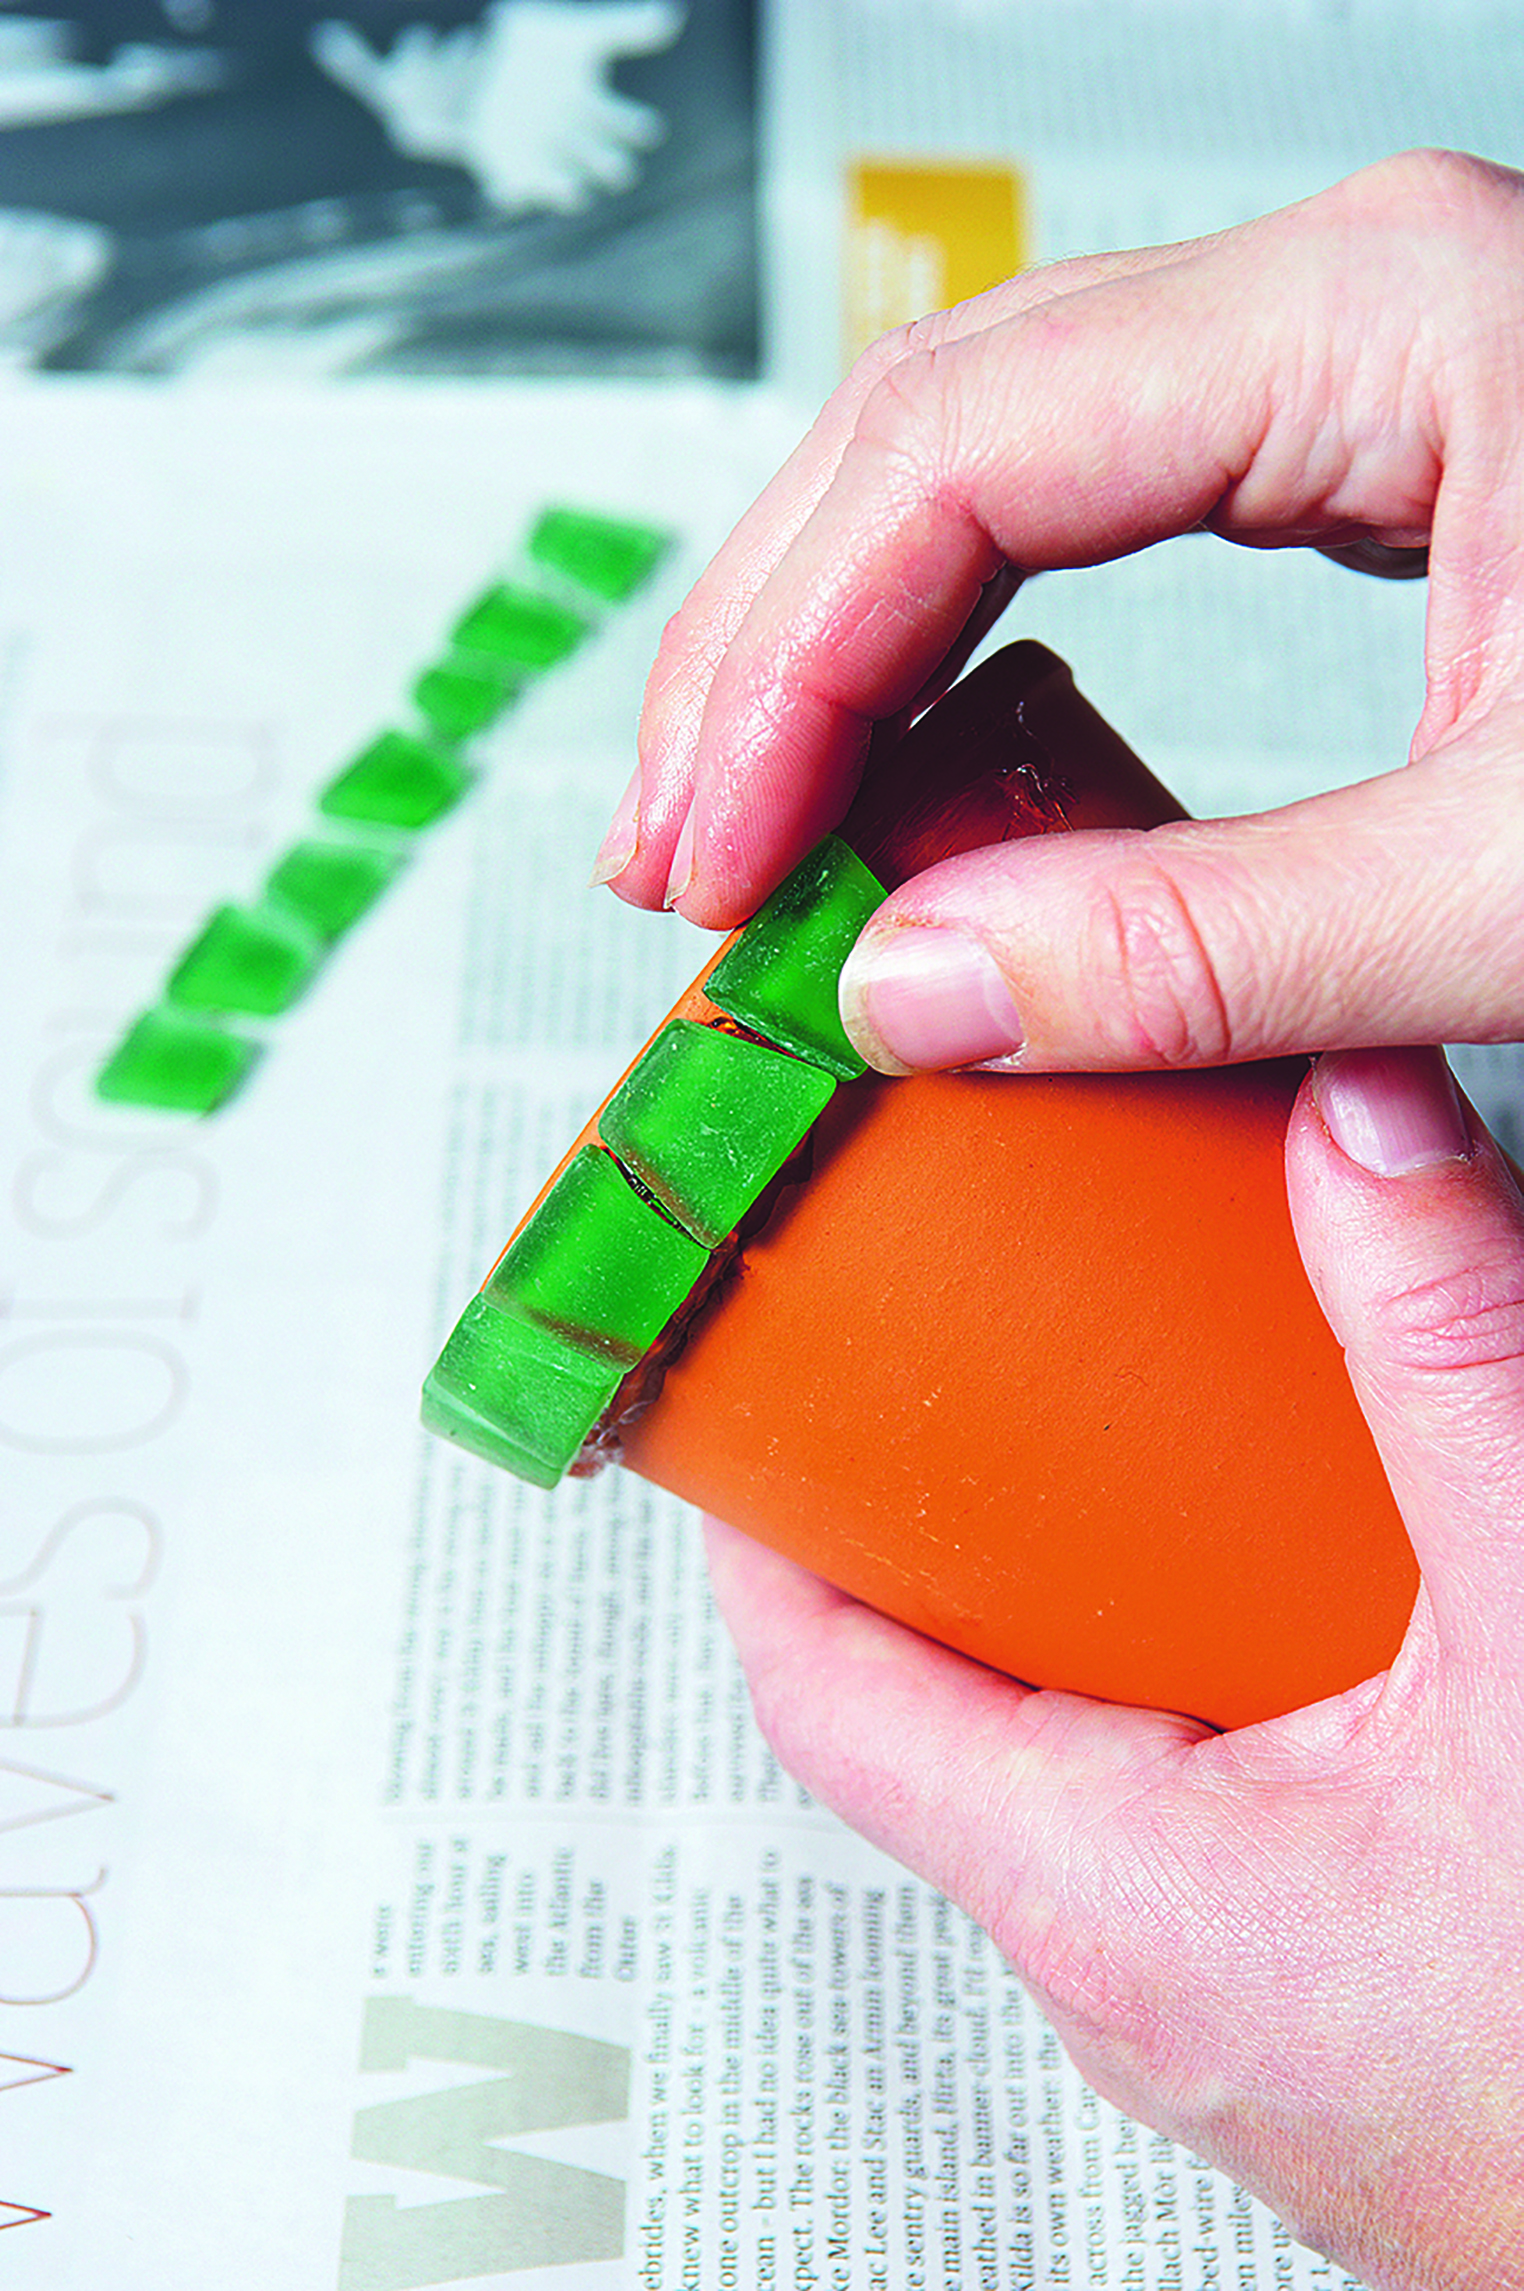
Divide the beach glass into large and small sizes. Lay a line of the larger tiles on your table, selecting tiles that fit with their neighbour and keeping the horizontal lines parallel. Place a line of adhesive just under the rim of the pot, about a third of the circumference at a time.
GoodtoKnow Newsletter
Parenting advice, hot topics, best buys and family finance tips delivered straight to your inbox.
Press the tiles firmly onto the pot, flush with the top, trying to avoid adhesive squeezing out at the edge or up between the tiles where it may later show. Complete the top line and repeat for the bottom of the pot, using the smaller tiles and keeping flush with the base.
Step 2
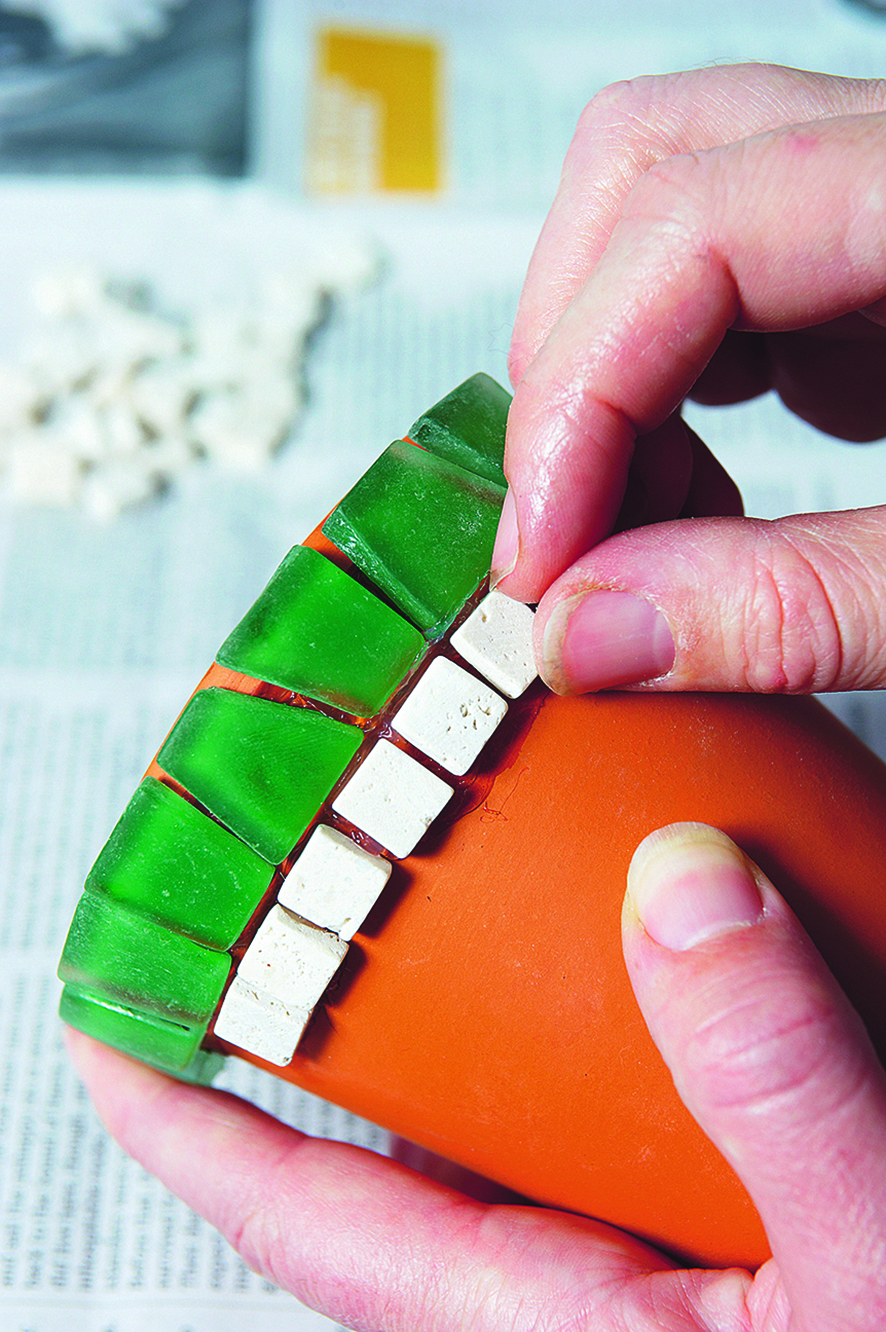
Lay one level line of the honeycomb marble tiles, close together, around the circumference at the top of the pot, just below the beach glass tiles. Expose both the smooth side and pitted side of the tiles, to add texture and interest.
Once again, avoid letting adhesive rise over the tiles, and remove any that does.
Step 3
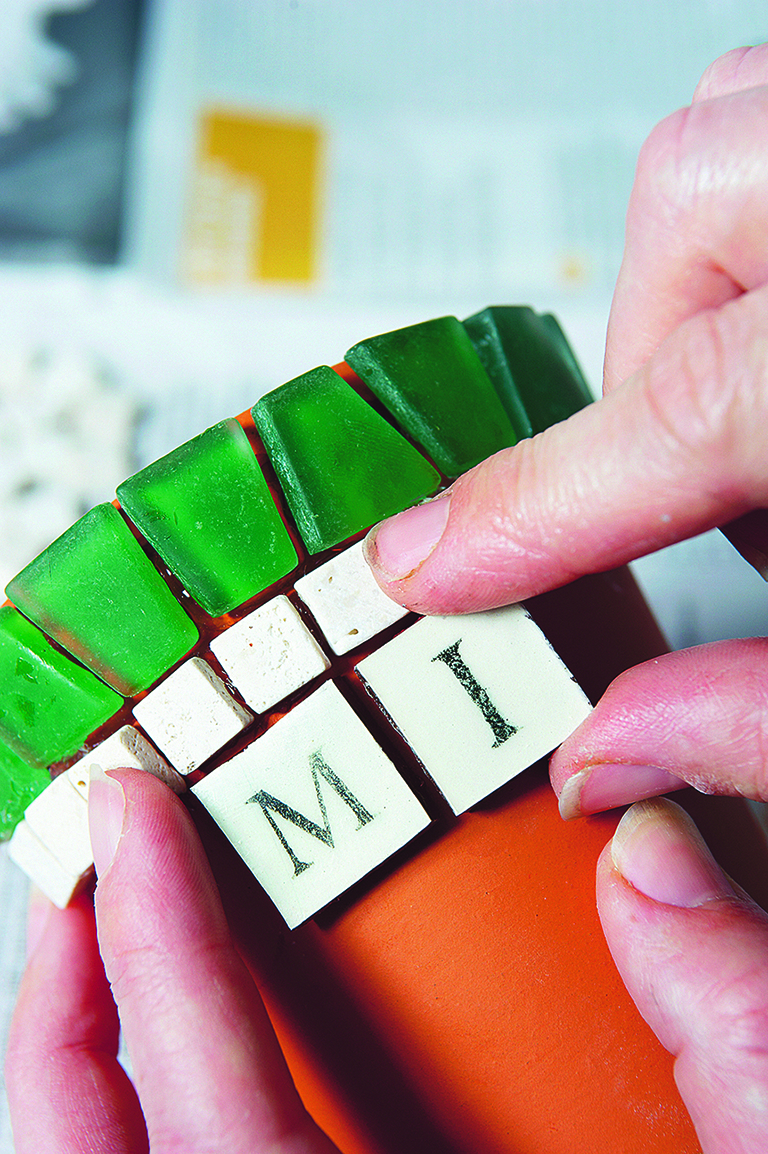
Apply the letter tiles spelling out the name of the herb to the front of the pot. Lay two lines of marble tiles, starting to the left of the first letter and going round to the back of the pot, then lay two lines of tiles, starting to the right of the last letter and going round to the back where the two lines will meet. Adjust tiles neatly where they join.
Step 4
Start to fill the remaining space with a horizontal row of marble tiles. Do not try and align the tiles with the row above, it may be impossible to match them up convincingly and they look more natural if they are offset.
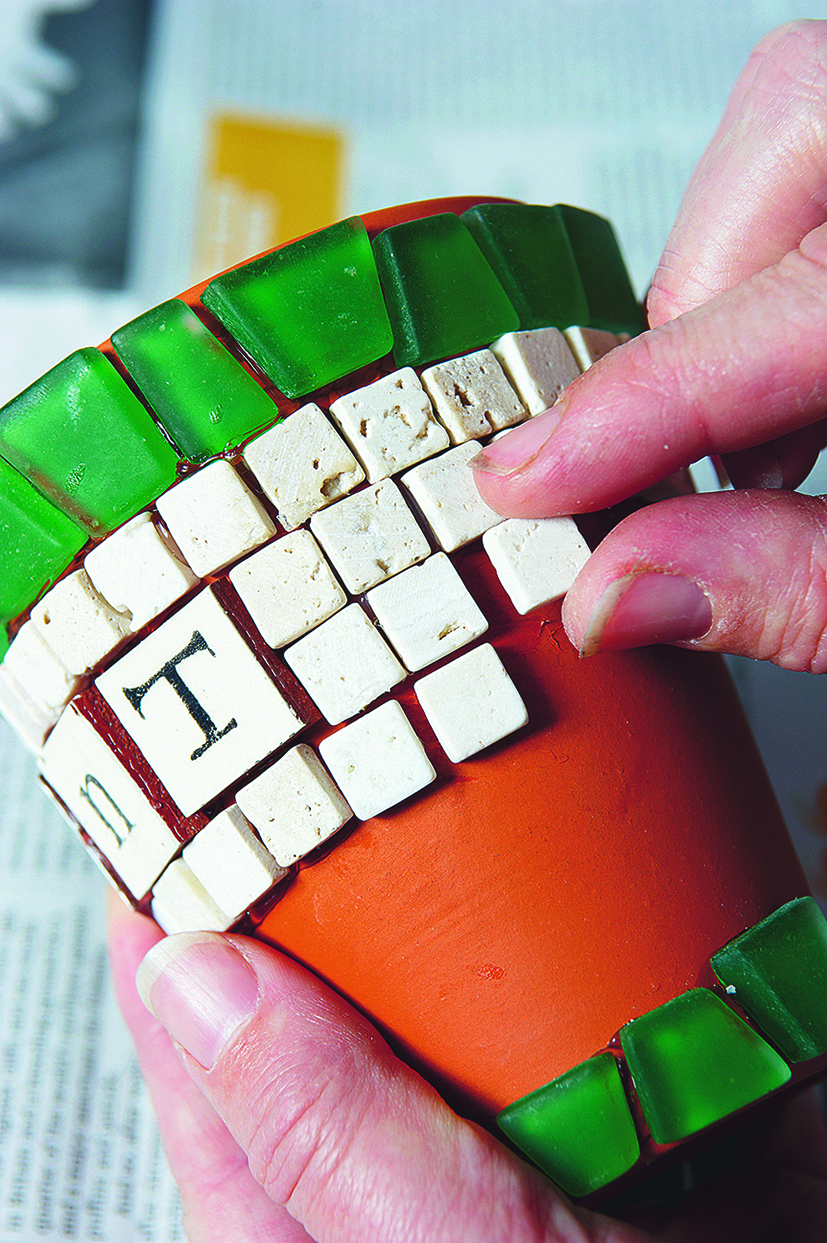
Step 5
Work out how many rows are needed to cover the pot by applying a single vertical line of offset tiles between the bottom row and the lower border. Fill the remaining space with horizontal rows of offset tiles.
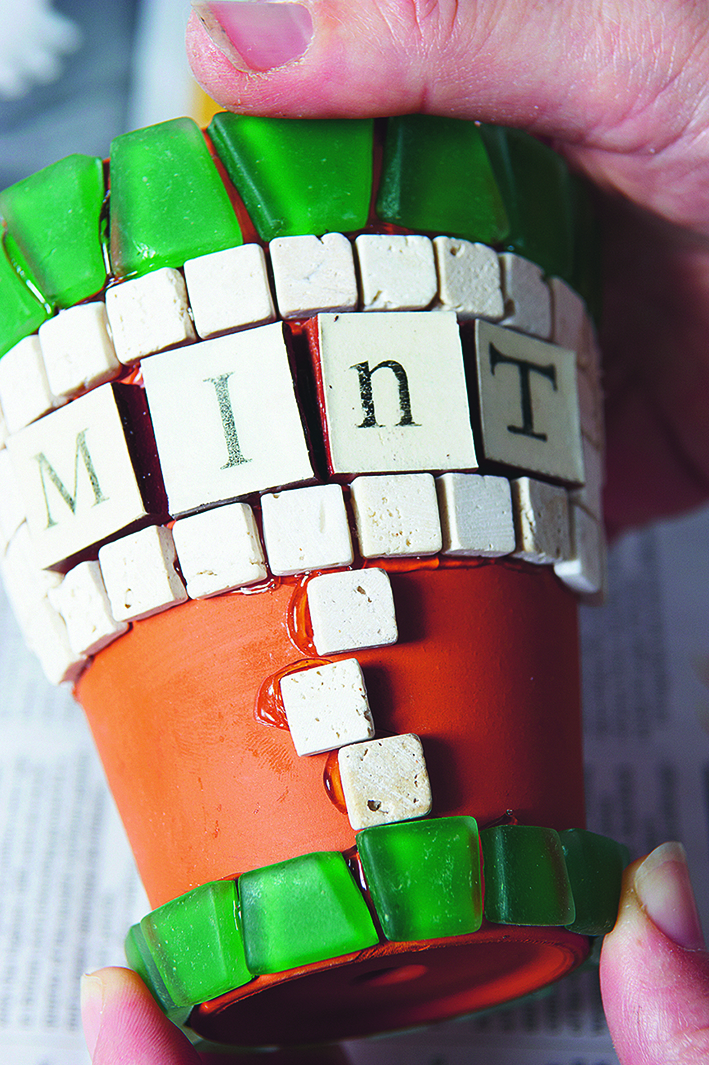
Step 6
Leave your pot for 24 hrs for the adhesive to cure, ready for grouting. Pick out any excess glue with a sharp implement before you start. Mix up about 100-150g of pale grey grout using a little water. The consistency should be like toothpaste, quite firm and not too wet.
Press it into all the crevices, paying special attention to the edges, then wipe off as much as you can using your gloved fingers.
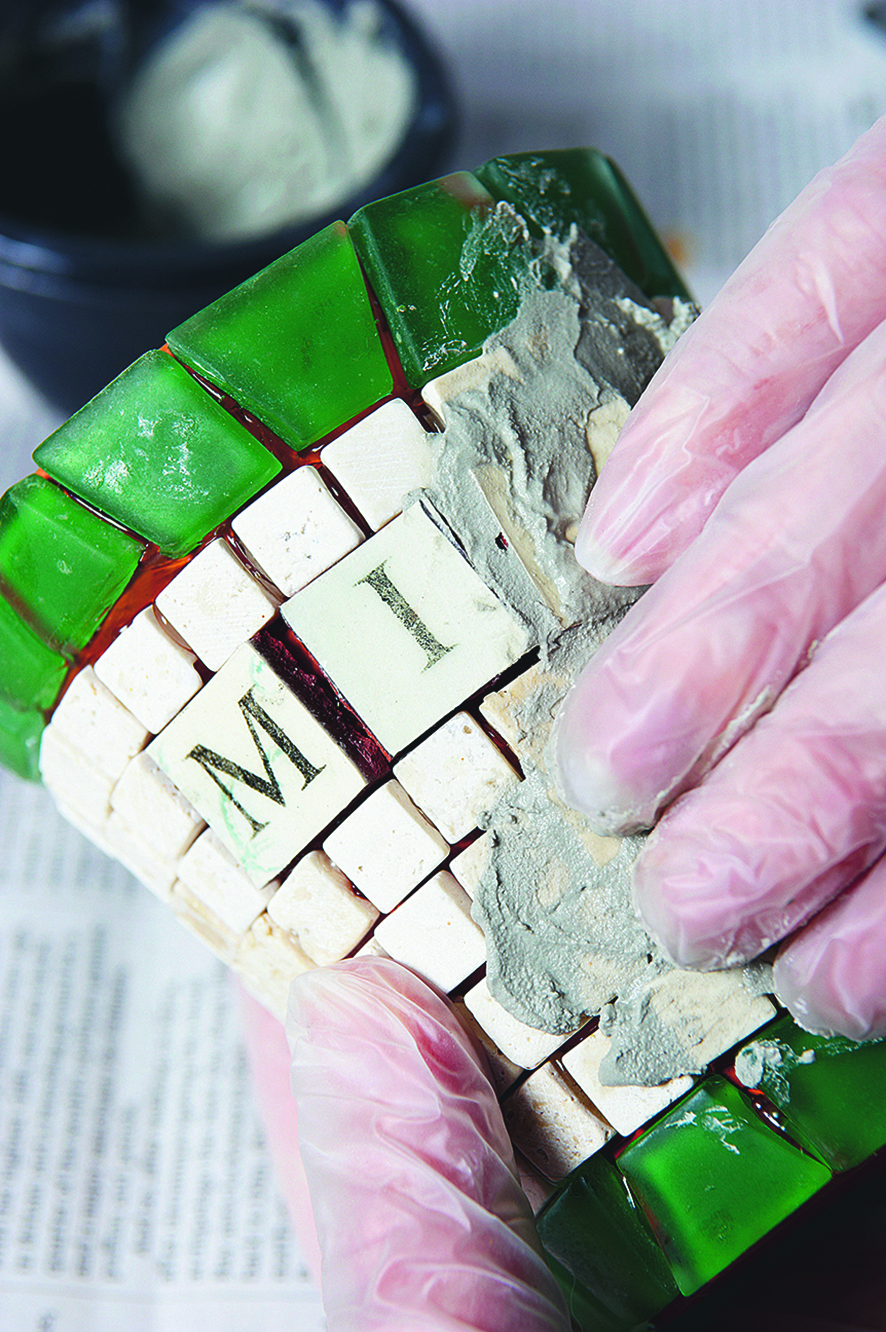
Step 7
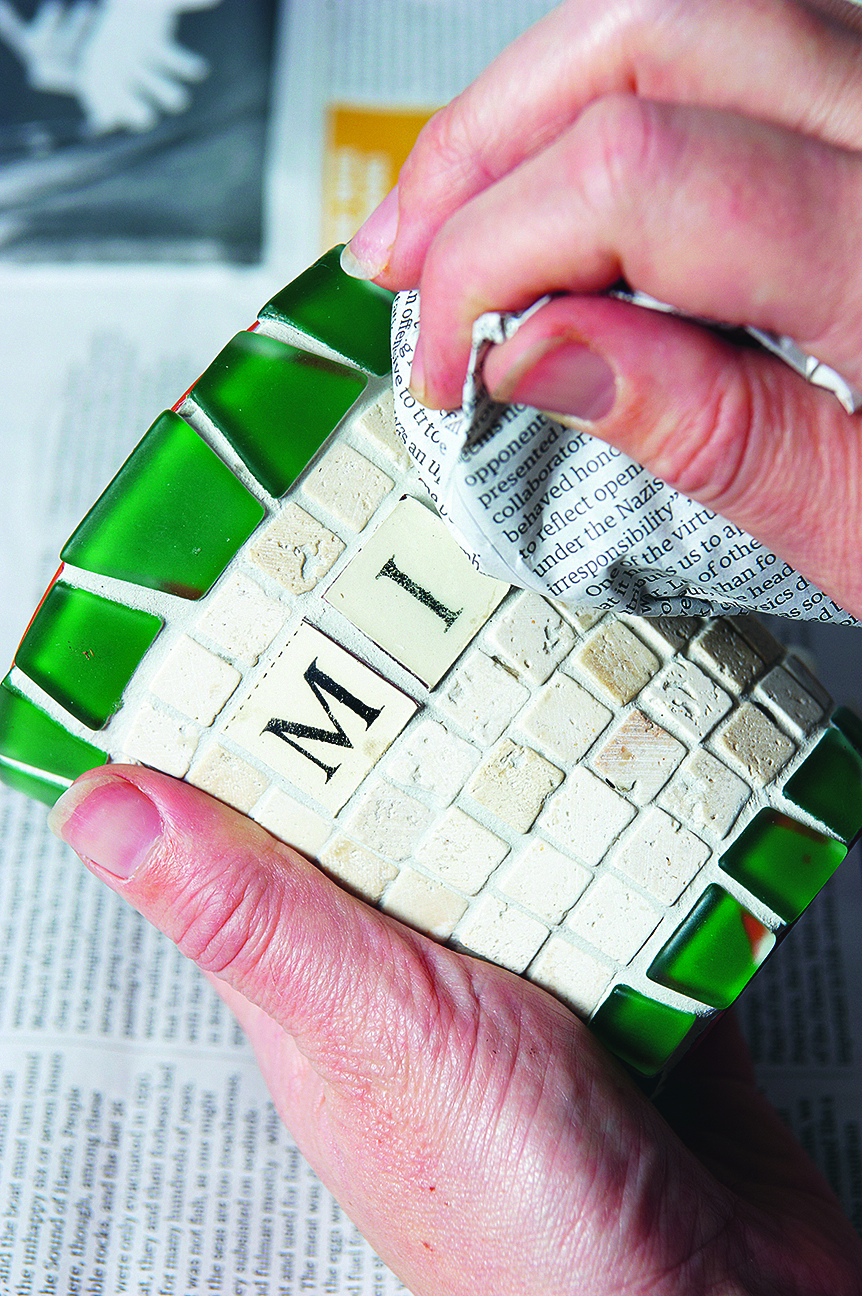
Sprinkle with a little more grout powder to absorb the moisture and leave it for about 10 mins.Wipe away some grout using scrunched-up newspaper.
If it’s not coming away cleanly, leave for a few more minutes and try again. Make sure that the grout looks smooth and the edges are tidy.

Esme is Future's resident craft expert, working across titles such as GoodTo, Woman&Home, Woman’s Weekly, Woman, Woman’s Own, Chat, Now, Pick Me Up and The Craft Network. Successfully turning her sewing hobby into a career, she's adept in a number of crafts, including sewing, papercraft, calligraphy, embroidery and printing.