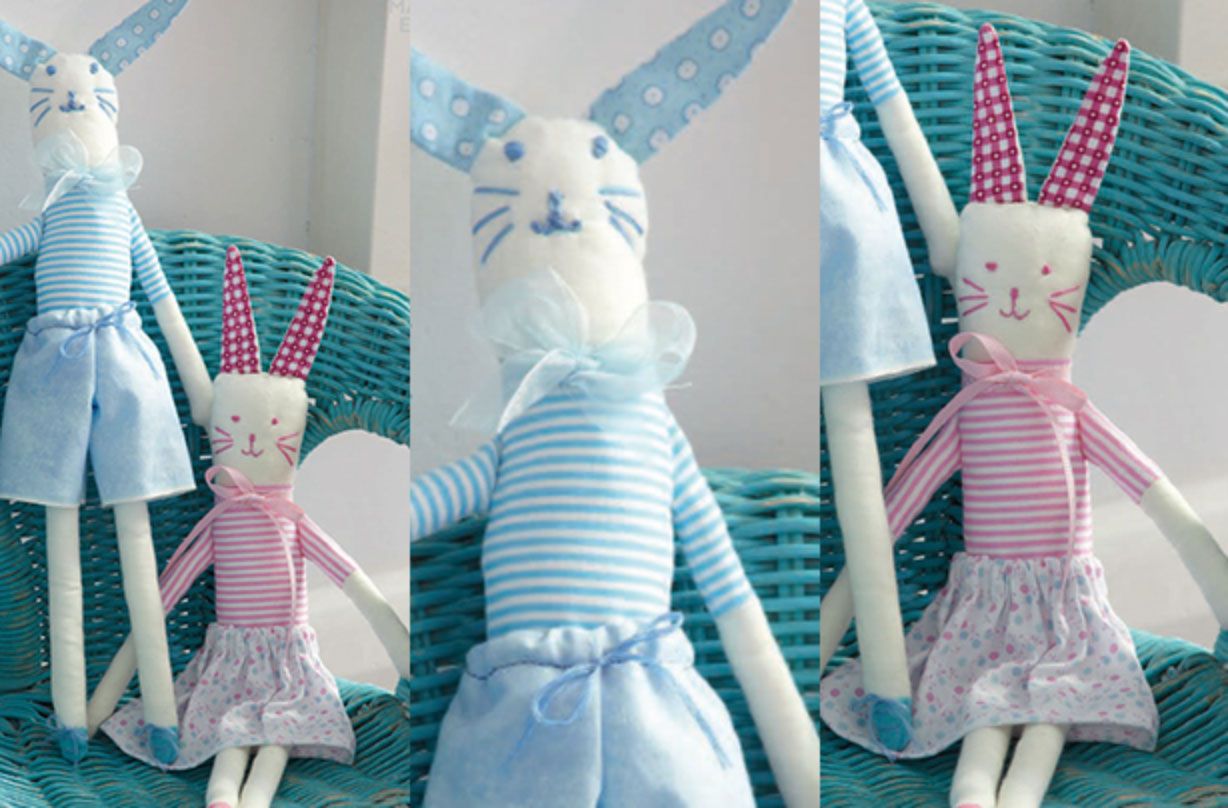
Bunny rabbit teddy craft
Create your very own soft toy with this simple guide on how to make these adorable little bunnies!

If your children are six and over now's the time to teach sewing with this simple first project!
These sweet little rabbit teddies are made in just a few steps and, although they require a sewing machine, they really are simple.
These use basic shapes so require mostly straight line sewing, which is perfect for beginners!
Once you've made the bunny your little ones can have fun dressing it up in different clothes, that you can make using scraps of leftover fabrics.
Top tip: When it comes to stuffing the arms and legs use a very blunt pencil to get the stuffing right to the ends. Then, use a rolling pin to flatten each arm and leg, creating a smooth finish and squashing out any lumps.
You will need
-Scissors
-Calico fabric
GoodtoKnow Newsletter
Parenting advice, hot topics, best buys and family finance tips delivered straight to your inbox.
-Patterned fabrics
-Sewing machine
-Toy stuffing
-Pins
-Needle
-Threads
-Pencil
-Embroidery threads
-Fabric pens
Step 1
For the body. Cut out two rectangle pieces from the calico to include the rounded head. Cut out two body pieces without the head in striped fabric. Sew the striped fabric onto the calico. Iron.See the mini-guide below for shapes.
Step 2
For the arms. For each arm, cut out two calico pieces with rounded hands at the ends and two striped rectangles for the top of the arm. Sew the striped fabric onto the calico. Iron. Place the fabric right sides together and sew around the edges, leaving the top open. Turn through, then stuff.
Step 3
For the ears. Cut out two pointed ear pieces in calico and two in patterned fabric. Place right sides together, then sew around the outside edge. Snip the hem up to the sewn line. So when you turn them through they’re near. Iron.
Step 4
For the legs. For each leg, cut out two rectangles of calico with rounded feet. Place pieces together, Then sew around the outside edge. Snip the foot end to the hem for round toes. Turn through and stuff.
Step 5
To assemble. Take one body piece and pin the ears, arms and legs in place. Put the second body

piece over the top of the first, right side facing inwards.
Pin in place so the raw edges of the arms, ears and legs are sticking out. Sew around the outer edge of the head and body twice to make your bunny strong. Leave the bottom open. Turn the bunny through to the right side and stuff. Hand-sew the bottom closed.
Draw the face details in pencil, then sew over the top with embroidery thread. Use fabric pens to draw on the shoes. Add some laces made from embroidery thread.
Trusted, informative, and empathetic – GoodToKnow is the ultimate online destination for parents. At GoodtoKnow, our mission is 'simple': we're trying to make sense of parenthood. On the site, you'll find everything you need for a happy, healthy family life. Our huge archive of content includes more than 18,000 articles and 1,500 how-to videos. These include expert-backed advice features on parenting, dealing with relationship changes after having a baby, self-care for mums and managing your family finances. We also feature tried-and-tested product reviews and buying recommendations for every stage of family life - from prams and Moses baskets to birthday gifts and top toys.